| Battle for No.3 Post | |||||||
|---|---|---|---|---|---|---|---|
| Part of the Gallipoli Campaign | |||||||
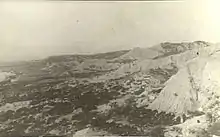
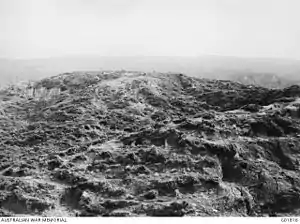 No.3 Post with Chunuk Bair on the skyline | |||||||
| |||||||
| Belligerents | |||||||
|
| |||||||
| Commanders and leaders | |||||||
|
|
| ||||||
| Units involved | |||||||
| New Zealand Mounted Rifles Brigade | 19th Division | ||||||
| Casualties and losses | |||||||
|
42 dead 109 wounded | 200 casualties | ||||||
The battle for No.3 Post (28–30 May 1915) was fought during the Gallipoli Campaign in the First World War, between the forces of the New Zealand Mounted Rifles Brigade and the Turkish 19th Division.[nb 1]
The New Zealand Mounted Rifles Brigade was responsible for the defence of the northern perimeter of the ANZAC beach-head, holding a sector from the position known as Walker's Top down the ridge line to the sea. Part of this defence line was formed by No.1 and No.2 Posts, isolated positions in the far north that could only be approached in safety during the hours of darkness. Near the end of May 1915, the Turks started constructing a new position just inland from No.2 Post, that if left to be completed would cause problems for the New Zealanders. Therefore, it was decided to assault and capture the post. After the position was captured, it was named No.3 Post, and the New Zealanders settled in and attempted to improve its defences. The same night, the Turks counter-attacked. Surrounded and cut off from the rest of the brigade, running short of ammunition and supplies, the defending 9th (Wellington East Coast) Squadron held out for twenty-eight hours until relieved, and beat off several attempts to break through their lines. When the squadron was eventually relieved it was decided the post was untenable, and it was abandoned the same night.
The New Zealand Mounted Brigade's casualties during the battle were forty-two dead and 109 wounded. The exact number of Turkish casualties is not known but was around two hundred men. The New Zealand brigade went on to fight in the Battle of Chunuk Bair and the Battle of Hill 60, and was then evacuated from the peninsula before the campaign ended in December 1915.
Background
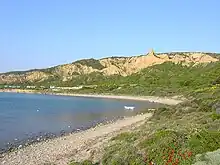
ANZAC landings
On 25 April, at the start of the Gallipoli Campaign, the Australian and New Zealand Army Corps (ANZAC) landed at what later became known as Anzac Cove.[2] Included in the landings was the New Zealand and Australian Division, but the division had been forced to leave part of its strength, including the New Zealand Mounted Rifles Brigade, behind in Egypt. The commanders believed there would be no requirement or opportunities for mounted troops on the peninsula. However, heavy casualties, and the lack of any other reinforcements, forced them to reconsider the decision, and the mounted troops were later dispatched to Gallipoli to serve in a dismounted role.[3]
New Zealand Mounted Rifles Brigade
Under the command of Brigadier-General Andrew Russell,[4] the New Zealand Mounted Rifles Brigade was raised in August 1914 and consisted of three regiments of mounted infantry.[5] While the brigade had an establishment of 1,940 men,[6] when dismounted its rifle strength was only the equivalent of an infantry battalion.[4] Each of the brigade's regiments was formed from three squadrons, each of 158 men organised into a headquarters and four troops.[7]
When the brigade arrived in Egypt, it came under the command of the newly formed New Zealand and Australian Division.[8] In April 1915, the division's infantry units left Egypt for an undisclosed destination, and it was not until 1 May that the New Zealand Mounted Rifles Brigade learned about the Gallipoli landings. Four days later the brigade received news that it would also deploy, as reinforcements, to Gallipoli, but in a dismounted role without their horses.[3] They arrived off the Gallipoli peninsula on 12 May, and disembarked at Anzac Cove.[9] The next day, the brigade moved into the front line on the northern left flank, relieving the Royal Naval Brigade. Their trenches stretched from the Aegean Sea to Walker's Ridge, and included two outposts, No.1 Post and No.2 Post.[10] The latter position was the beach-head's most northern position, situated only two miles (3.2 km) from Chatham's Post, which was the southernmost point.[11] The outlying position of the two posts meant that movement between them and the main lines could only be undertaken safely at night.[12] The brigade deployed with the Canterbury Mounted Rifles on the left, the Auckland Mounted Rifles in the centre, and the Wellington Mounted Rifles on the right.[13][14]
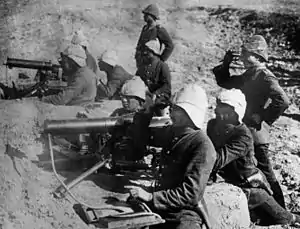
Turkish forces
The First World War Ottoman Turkish Army was badly underestimated by the Allies. During the war it would defeat forces from the British, French and Russian armies.[15] Before the landings Gallipoli was defended by several divisions, based on infantry battalion strong-points overlooking potential landing beaches.[16] By April 1915, the Turks had 82 fixed and 230 mobile artillery pieces on the peninsula.[17]
In May 1915, the Turkish force that would confront the New Zealanders was provided by the 19th Division,[18] comprising the 57th, 72nd and 77th Infantry Regiments,[19] all under the command of Colonel Mustafa Kemal.[20] Kemal was noted as "the most imaginative, most successful officer to fight on either side" during the Gallipoli Campaign.[21] How the Turks viewed the invasion can be judged by Kemal's orders to his troops following the initial landings; "Men, I am not ordering you to attack. I am ordering you to die. In the time that it takes us to die, other forces and commanders can come and take our place."[22]
Virtually all the Turkish Army commanders, down to company commander level, were very experienced, being veterans of the Balkan Wars. But their command structure was weaker at the non-commissioned officer (NCO) level, with only one NCO in each company.[23][nb 2] One advantage that the Turkish Army had over the New Zealanders, at the time, was their hand grenades, which were not used by the British forces.[25][nb 3]
No.3 Post
Capture
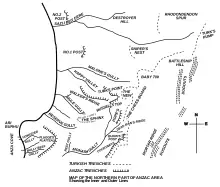
After an abortive Turkish attack in early May, from the middle of the month the New Zealanders observed their opponents improving their defensive positions. One position in particular was started overnight on 26/27 May, at the foot of the ridge that led down to No.2 Post and only 450 yards (410 m) from it. It gave the New Zealanders cause for concern, and therefore it was decided that the position must be captured and denied to the Turks.[25][27]
Plans for the assault were formed, and the task was given to the 1st (Canterbury Yeomanry Cavalry) Squadron of the Canterbury Mounted Rifles, commanded by Major Percy Acton-Adams. On 28 May, the squadron was concentrated at No.2 Post and at 22:00 left the post to capture the Turkish position. By 23:30, after advancing along the ridge, they arrived and with only slight opposition drove off the twenty Turkish defenders at a cost of one dead and five wounded. They were followed up by the 6th (Manawatu) Squadron from the Wellington Mounted Rifles, who carried entrenching tools to improve the defences and would then garrison the position, now named No.3 Post.[27][28][29]
The 6th Squadron, who had orders to "hold the post until relieved", started constructing defences against a Turkish counter-attack, which would not be easy as the post was surrounded on three sides by the Turks.[10] After sunrise on 29 May the squadron was in full view of the Turks and they were engaged by small arms and artillery fire. They were forced to take cover and stop building defences. That night at 21:00 the 6th Squadron was relieved by three troops (nine officers and ninety-three other ranks) of the 9th (Wellington East Coast) Squadron, Wellington Mounted Rifles, commanded by Major Selwyn Chambers.[28][30]
Defence
Chambers and his second in command, Captain Charles Spragg, immediately set about constructing a defensive trench across the post, and strengthening its other defences. But by now the Turks, from the 72nd Infantry Regiment,[31] about 1,000-strong, had managed to use the terrain and darkness to close in on the position. At 22:00 Chambers reported that the position was under attack and surrounded, and at 23:35 the telephone line to headquarters was cut by the Turks. The area in front of No.3 Post was in a gully and out of sight to the defenders, so they had to climb on the trench parapet to engage the Turks. This tactic worked well, and they broke up the Turkish assault, causing the attackers some casualties. The Turks did not withdraw far, and crept up to the edge of the New Zealanders' trench during the night. They then threw hand grenades into the New Zealanders' position. At the same time, small arms fire from the surrounding Turkish positions pinned the New Zealanders down.[32][33]
Just after midnight the New Zealanders sent the 2nd (Wellington West Coast) Squadron, commanded by Major James McGregor Elmslie, forward to reinforce the 9th Squadron. But by itself the 2nd Squadron was not strong enough to break through the Turkish lines and reach the post, and at times they had to engage in close quarter fighting in the thick scrub. Eventually the 2nd Squadron had to form their own defensive position in the ground between No.2 and No.3 Posts.[34]
At 03:00, just before dawn, Spragg took command of the trench in the southern sector of No.3 Post, opposite where the Turks appeared to be gathering their forces to assault the post. He successfully deployed his men so that when the attack began, it was met and broken up by the New Zealanders' small arms fire. But by 03:30 the post was under sustained Turkish rifle and grenade attack and the relieving 2nd Squadron was still held up on a ridge to the south of the post. Between them and No.3 Post was a strong Turkish force which had dug in and were in communication with the Turkish attackers in the gully to the north of the post. However, the 2nd Squadron could now bring their own small arms fire onto the Turks attacking No.3 Post, making them keep their heads down.[34] At daylight Elmslie led a troop in an attack which captured a Turkish trench to the left of the post. At 06:30 communications were re-established with No.3 Post by using signal flags, and Allied artillery were able to bring harassing fire onto the Turkish communications trenches. But by now the defenders were running short of supplies, especially ammunition, and no one could be spared to look after the wounded, who had to see to themselves.[35]
The 6th Squadron, commanded by Major Charles Dick, were also sent forward to support the 2nd Squadron's attempt to break through to the post. Advancing along the ridge from No.2 Post, they reached a position on the open plateau to the north of No.3 Post, but neither of the relieving squadrons could break through the Turkish lines, and were confronted by heavy Turkish fire from the surrounding higher ground. They were blocked by the sheer number of Turkish troops. Around noon the Turks undermined and blew up part of the trench at No.3 Post, which they then occupied. Turkish attacks continued all day, and they brought into action a mountain artillery gun from a nearby position. It was now estimated that around 3,000 Turkish troops were involved in the assault on No.3 Post.[35]
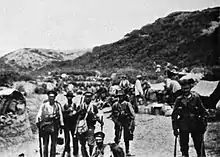
Unable to break through to No.3 Post during the day, the New Zealanders decided to wait for nightfall to make another attempt. At the same time the Canterbury Mounted Rifles were warned they would have to provide two squadrons to take over the defence, once the 9th Squadron had been relieved.[35] During this time the Turks had not given up their attempts to recapture the post. At 19:00 Chambers signalled that the "repeated bombing of the trenches on the northern side of the post had resulted in a portion of the trenches being damaged, to such an extent that he could no longer prevent the enemy from getting in."[36] This was followed ten minutes later with a message that the Turks had occupied the trenches in the north of the post. Around the same time the 6th Squadron, advancing from the south, had managed to get to within one hundred yards (91 m) of the post before being pinned down. Even though they now had fire support from a mountain artillery battery and a British destroyer, HMS Rattlesnake, they were unable to advance any further. As darkness approached the Turkish attacks lessened, and at 22:30, covered by the 2nd and 6th Squadrons, the 10th (Nelson) Squadron and two troops from the 8th (South Canterbury) Squadron from the Canterbury Mounted Rifles managed to break through to No.3 Post.[37][38] By 23:00 the 9th Squadron's survivors had been evacuated and the Canterbury Regiment had taken over the defence of the post. An hour later the 2nd and 6th Squadrons were withdrawn back to the brigade lines.[39] Shortly after the relief, it was decided that the post was untenable and it was abandoned.[40] While the Canterburys were withdrawing south towards No.1 Post they were attacked by the Turks. The New Zealanders turned and opened fire, then counter-attacked in a bayonet charge, forcing the Turks to withdraw before re-occupying No.3 Post. The 9th Squadron had held out for twenty-eight hours, during which the brigade had lost forty-two men killed and 109 wounded, the vast majority from 9th Squadron. Turkish casualties were around two hundred men.[33][38][41][42]
Aftermath
The battle for No.3 Post seemed a major event to those involved, but in General Ian Hamilton's dispatches the fight only received a brief mention: "On 28 May, at 9 p.m., a raid was made on a Turkish post overlooking the beach 1,200 yards north of Kaba Tepe, H.M.S. "Rattlesnake" co-operating. A party of 50 rifles rushed the post, killing or capturing the occupants. A similar raid was made against an enemy trench to the left of our line which cost the Turks 200 casualties, as was afterwards ascertained."[38]
The battle for No.3 Post cost the New Zealanders forty-two dead and 109 wounded.[41] The brigade fought another two battles at Gallipoli: the Battle of Chunuk Bair, and the Battle of Hill 60. Their involvement in these battles proved costly, and in September 1915, with a strength of only 249 men, they left the peninsula for the rest camp on the island of Lemnos.[43] During the campaign, 4,000 men served in the brigade; 727 of those were killed and 1,239 wounded, which equates to a casualty rate of almost fifty per cent.[44] Amongst the dead were Chambers – the commander of the 9th Squadron – and Elmslie of the 6th Squadron. Both survived the battle for No.3 Post, but not the campaign, and were killed in action in August 1915 during the Battle of Chunuk Bair.[45][46] Like many other New Zealanders, neither have a known grave, and they are therefore commemorated on the Chunuk Bair Memorial. The adjacent Commonwealth War Graves Commission Chunuk Bair Cemetery has 632 graves of which only ten men have been identified.[47] During the 260 days of the Gallipoli Campaign, a total of 2,721 New Zealand soldiers were killed and another 4,852 wounded, out of the total 8,556 New Zealanders who took part. The exact number of Turkish casualties at Gallipoli is not known, but has been estimated at 87,000 dead,[48] from a total of around 250,000 casualties.[49]
The war between the British and Ottoman Turkish Empires ended on 31 October 1918, following the signing of the Armistice of Mudros.[50] In November, the Canterbury Mounted Rifles were selected to be part of the Allied force of occupation for the Dardanelles peninsula. During their time there they took the opportunity to look for and bury the brigade's war dead.[51][52] Kemal, the commander of the Turkish 19th Division, survived the war. Following the Turkish War of Independence he became known as Atatürk (Father of the Turks) and became the first president of the new Republic of Turkey, where he is acknowledged as the nation's "founding father".[21][53]
References
- Footnotes
- ↑ At the time of the First World War, the modern Turkish state did not exist, and instead it was part of the Ottoman Turkish Empire. While the terms have distinct historical meanings, within many English-language sources the terms "Turkey" and "Ottoman Empire" are used synonymously, although sources differ in their approaches.[1] The sources used in this article predominantly use the term "Turkey".
- ↑ By comparison a British infantry company had ten sergeants, and several more junior NCOs.[24]
- ↑ The patent for the British Mills bomb hand grenade was not filed until 15 June 1915.[26]
- Citations
- ↑ Fewster, Basarin, Basarin 2003, pp.xi–xii
- ↑ "The landing at Anzac Cove". The Australian War Memorial. Retrieved 1 January 2014.
- 1 2 Powles 1928, p.22
- 1 2 Kinloch 2005, p.32
- ↑ Kinloch 2005, p.29
- ↑ Kinloch 2005, p.30
- ↑ Wilkie 1924, p.3
- ↑ Powles 1928, p.12
- ↑ Waite 1919, p.134
- 1 2 Powles 1928, p.27
- ↑ Waite 1919, p.136
- ↑ Powles 1928, p.29
- ↑ Wilkie 1924, pp.15–18
- ↑ Nicol 1921, p.33
- ↑ Erickson 2007, p.1
- ↑ Erickson 2007, p.16
- ↑ Erickson 2007, p.18
- ↑ Erickson 2007, pp.21–23
- ↑ Carver 2004, p.23
- ↑ Kinloch 2005, p.149
- 1 2 Fewster, Basarin, Basarin 2003, p.2
- ↑ Klees 2002, p.313
- ↑ Erickson 2007, p.26
- ↑ Gudmundsson 2005, p.28
- 1 2 Waite 1919, p.149
- ↑ "Mills Grenade and other like apparatus". US Patents. Retrieved 1 January 2014.
- 1 2 Powles 1928, p.36
- 1 2 Wilkie 1924, p.27
- ↑ Kinloch 2005, p.148
- ↑ Powles 1928, p.28
- ↑ Bean 1941, p.195
- ↑ Wikie 1919, pp.27–29
- 1 2 Powles 1928, p.40
- 1 2 Wilkie 1919, p.29
- 1 2 3 Wilkie 1919, p.30
- ↑ Wilkie 1919, pp.31–32
- ↑ Waite 1919, p.150
- 1 2 3 "Sir Ian Hamilton's Despatch". London Gazette. 20 September 1915. Retrieved 13 January 2014.
- ↑ Wilkie 1919, p.32
- ↑ Powles 1928, p.37
- 1 2 Waite 1924, pp.32–33
- ↑ Wilkie 1919, p.33
- ↑ Waite 1919, p.261
- ↑ Kinloch 2005, p.15
- ↑ "Chambers, Selwyn". Commonwealth War Graves Commission.
- ↑ "Elmslie, James McGregor". Commonwealth War Graves Commission. Retrieved 2 January 2014.
- ↑ "Chunuk Bair (New Zealand) Memorial". Commonwealth War Graves Commission. Retrieved 26 November 2013.
- ↑ "Gallipoli". New Zealand Ministry of Foreign Affair and Trade. Retrieved 1 January 2014.
- ↑ Fewster, Basarin, Basarin 2003, p.6
- ↑ Waite 1919, p.295
- ↑ Waite 1919, p.298
- ↑ Powles 1928, p.245
- ↑ Fewster, Basarin, Basarin 2003, pp.7–8
- Bibliography
- Bean, Charles (1941). The Story of ANZAC from 4 May, 1915, To The Evacuation of the Gallipoli Peninsula. Official History of Australia in the War of 1914–1918. Vol. II (11th ed.). Brisbane: University of Queensland Press. ISBN 0702215864.
- Carver, Michael (2004). The National Army Museum Book of the Turkish Front 1914–1918. Pan Grand Strategy series. London: Pan Macmillan. ISBN 0330491083.
- Erickson, Edward. J (2007). Ottoman Army Effectiveness in World War I: A Comparative Study. Taylor and Francis. ISBN 978-0203964569.
- Fewster, Kevin; Basarin, Vecihi; Basarin, Hatice Hurmuz (2003). Gallipoli: The Turkish Story. Crows Nest, New South Wales: Allen and Unwin. ISBN 1-74114-045-5.
- Gudmundsson, Bruce (2005). The British Expeditionary Force 1914–15. Battle Orders. Vol. 16. Oxford: Osprey Publishing. ISBN 1841769029.
- Kinloch, Terry (2005). Echoes of Gallipoli: In the Words of New Zealand's Mounted Riflemen. Wollombe: Exisle Publishing. ISBN 0908988605.
- Klees, Emerson (2002). The Will to Stay with It: Role Models of Determination. The Role Models of Human Values. Vol. 5. Worksop: Cameo Press. ISBN 1891046012.
- Nicol, C.G. (1921). The Story of Two Campaigns: Official War History of the Auckland Mounted Rifles Regiment, 1914–1919. Auckland: Wilson and Horton. ISBN 1847343414.
- Powles, Charles Guy (1928). The History of the Canterbury Mounted Rifles 1914–1919. Auckland: Whitcombe and Tombs. ISBN 9781847343932.
- Waite, Fred (1919). The New Zealanders at Gallipoli. Christchurch: Whitcombe and Tombs. ISBN 1407795910.
- Wilkie, A. H. (1924). Official War History of the Wellington Mounted Rifles Regiment, 1914–1919. Auckland: Whitcombe and Tombs. ISBN 9781843427964.