| Battle of Zama | |||||||
|---|---|---|---|---|---|---|---|
| Part of the Second Punic War | |||||||
| |||||||
| Belligerents | |||||||
| Rome | Carthage | ||||||
| Commanders and leaders | |||||||
| Publius Cornelius Scipio | Hannibal | ||||||
| Strength | |||||||
|
| ||||||
| Casualties and losses | |||||||
|
| ||||||
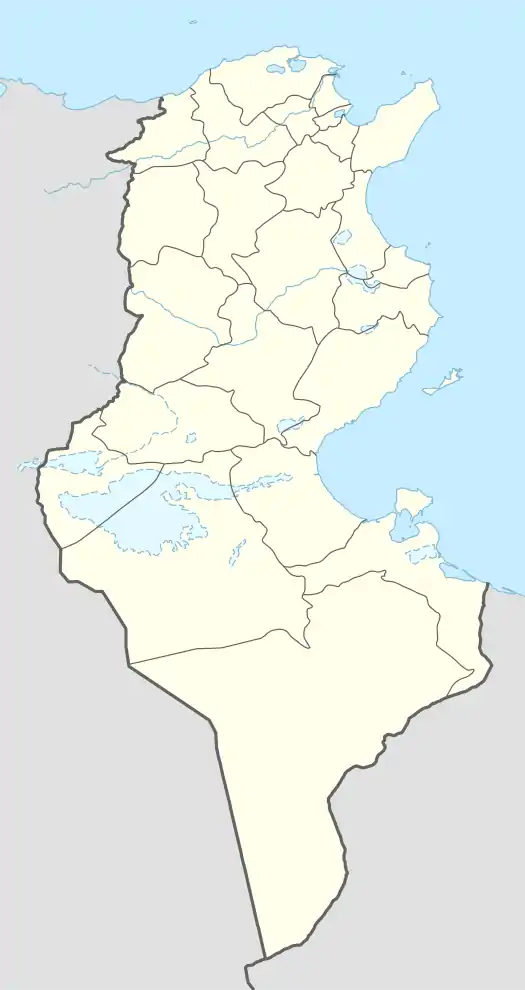 Location within Tunisia 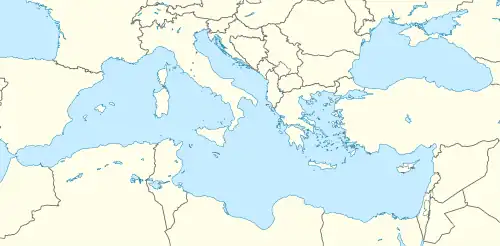 Battle of Zama (Mediterranean) | |||||||
The Battle of Zama was fought in 202 BC in what is now Tunisia between a Roman army commanded by Scipio Africanus and a Carthaginian army commanded by Hannibal. The battle was part of the Second Punic War and resulted in such a severe defeat for the Carthaginians that they capitulated, while Hannibal was forced into exile. Roman army of approximately 30,000 men was outnumbered by the Carthaginians who fielded either 40,000 or 50,000; the Romans were stronger in cavalry, but the Carthaginians had 80 war elephants.
At the outset of the Second Punic War, in 218 BC, a Carthaginian army led by Hannibal invaded mainland Italy, where it campaigned for the next 16 years. In 210 BC Scipio took command of the faltering Roman war effort in Iberia (modern Spain and Portugal) and cleared the peninsula of Carthaginians in five years. He returned to Rome and was appointed consul in 205 BC. The following year his army landed near the Carthaginian port of Utica. The Carthaginians and their Numidian allies were repeatedly beaten in battle and the Roman ally Masinissa became the leading Numidian ruler. Scipio and Carthage entered into peace negotiations, while Carthage recalled armies from Italy commanded by Hannibal and Mago Barca. The Roman Senate ratified a draft treaty, but when Hannibal arrived from Italy, Carthage repudiated it. Hannibal marched inland to confront the Romans and a battle quickly ensued.
The fighting opened with a charge by the Carthaginian elephants. These were repulsed, some retreating through the Carthaginian cavalry on each wing and disorganising them. The Roman cavalry units on each wing took advantage to charge their counterparts, rout them and pursue them off the battlefield. The two armies' close-order infantry were each deployed in three lines. The first two lines engaged each other and after a hard-fought combat the Carthaginians were routed. The second Carthaginian line then fanatically assaulted the Roman first line, inflicting heavy losses and pushing it back. After the Romans committed their second line the Carthaginians were forced to withdraw. There was a pause, during which the Romans formed a single extended line, to match that of the Carthaginians. These two lines charged each other, according to the near-contemporary historian Polybius "with the greatest fire and fury". The fight continued for some time, neither side gaining the advantage. The Roman cavalry then returned to the battlefield and charged the Carthaginian line in the rear, routing and destroying it. Carthage was left with no army with which to continue the war. The peace treaty dictated by Rome stripped Carthage of its overseas territories and some of its African ones. Thereafter, it was clear that Carthage was politically subordinate to Rome.
Primary sources
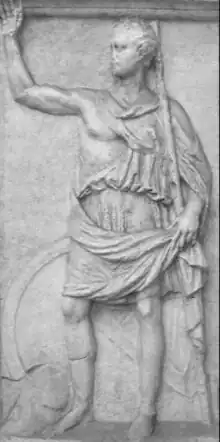
The main source for almost every aspect of the Punic Wars[note 1] is the historian Polybius (c. 200 – c. 118 BC), a Greek sent to Rome in 167 BC as a hostage.[2] His works include a now largely lost manual on military tactics,[3] but he is best known for The Histories, written sometime after 146 BC.[2][4] Polybius's work is considered broadly objective and largely neutral as between Carthaginian and Roman points of view.[5][6] Polybius was an analytical historian and wherever possible interviewed participants, from both sides, in the events he wrote about.[7][2][8]
The accuracy of Polybius's account has been much debated over the past 150 years. Modern historians consider Polybius to have treated the relatives of Scipio Aemilianus, his patron and friend, unduly favourably but the consensus is to accept his account largely at face value and the details of the wars in modern sources are largely based on interpretations of Polybius's account.[2][9] The modern historian Andrew Curry sees Polybius as being "fairly reliable";[10] Craige Champion describes him as "a remarkably well-informed, industrious, and insightful historian".[11] Much of Polybius's account of the Second Punic War is missing, or only exists in fragmentary form.[12]
The account of the Roman historian Livy, who relied heavily on Polybius, is used by modern historians where Polybius's account is not extant.[12][13] The classicist Adrian Goldsworthy says Livy's "reliability is often suspect",[14] and the historian Philip Sabin refers to Livy's "military ignorance".[15] Dexter Hoyos describes Livy's account of Zama as "bizarrely at odds with Polybius’ which he seems not to understand fully".[16]
Other, later, ancient histories of the war exist, although often in fragmentary or summary form.[17][note 2] Modern historians usually take into account the writings of Appian and Cassius Dio, two Greek authors writing during the Roman era; they are described by John Lazenby as "clearly far inferior" to Livy. Hoyos accuses Appian of bizarre invention in his account of Zama; Michael Taylor states that it is "idiosyncratic". But some fragments of Polybius can be recovered from their texts.[12][2][19] The Greek moralist Plutarch wrote several biographies of Roman commanders in his Parallel Lives.[18][16] Other sources include coins, inscriptions, archaeological evidence and empirical evidence from reconstructions such as the trireme Olympias.[20]
Background
The First Punic War was fought between the two main powers of the western Mediterranean in the 3rd century BC: Carthage and Rome.[21] The war lasted for 23 years, from 264 to 241 BC, before the Carthaginians were defeated.[22][23] It took place primarily on the Mediterranean island of Sicily, its surrounding waters and in North Africa.[21]

Carthage expanded its territory in Iberia (modern Spain and Portugal) from 236 BC,[24] in 226 BC agreeing the Ebro Treaty with Rome which established the Ebro River as the northern boundary of the Carthaginian sphere of influence. A little later Rome made a separate treaty of association with the city of Saguntum, well south of the Ebro. Hannibal, the de facto ruler of Carthaginian Iberia, led an army to Saguntum in 219 BC and besieged, captured and sacked it. Early the following year Rome declared war on Carthage, starting the Second Punic War.[25][26][27]
Hannibal led a large Carthaginian army from Iberia, through Gaul, over the Alps and invaded mainland Italy in 218 BC. During the next three years Hannibal inflicted heavy defeats on the Romans at the battles of the Trebia, Lake Trasimene and Cannae.[28] At the last of these alone, at least 67,500 Romans were killed or captured.[29] The historian Toni Ñaco del Hoyo describes these as "great military calamities",[28] and Brian Carey writes that they brought Rome to the brink of collapse.[30] Hannibal's army campaigned in Italy for 14 years.[31]
There was also extensive fighting in Iberia from 218 BC. In 210 BC Publius Cornelius Scipio arrived to take command of Roman forces in Iberia.[32] During the following four years Scipio repeatedly defeated the Carthaginians, driving them out of Iberia in 206 BC.[33] One of Carthage's allies in Iberia was the Numidian prince Masinissa, who led a force of light cavalry in several battles.[34][35]
Roman preparations
In 206 BC Scipio left Iberia and returned to Italy.[36] There he was elected to the senior position of consul in early 205 BC, despite being aged 31 when the minimum age for the office was 42.[37] Scipio was already anticipating an invasion of North Africa and while still in Iberia had been negotiating with the Numidian leaders Masinissa and Syphax. He failed to win over the latter, but made an ally of the former.[38]
Opinion was divided in Roman political circles as to whether an invasion of North Africa was an excessive risk. Hannibal was still on Italian soil; there was the possibility of further Carthaginian invasions,[39] shortly to be realised when Hannibal's youngest brother Mago Barca landed in Liguria with an army from Iberia;[40] the practical difficulties of an amphibious invasion and its logistical follow up were considerable; and when the Romans had invaded North Africa in 256 BC during the First Punic War they had been driven out with heavy losses, which had re-energised the Carthaginians.[41] Eventually a compromise was agreed: Scipio was given Sicily as his consular province,[42] which was the best location for the Romans to launch an invasion of the Carthaginian homeland from and then logistically support it, and permission to cross to Africa on his own judgement.[39] But Roman commitment was less than wholehearted, Scipio could not conscript troops for his consular army, as was usual, but only call for volunteers.[40][43]
In 216 BC the survivors of the Roman defeat at Cannae had been formed into two legions and sent to Sicily.[44] They formed the core of the Roman expeditionary force.[45][46] Modern historians estimate a combat strength of 25,000–30,000, of whom more than 90 per cent were infantry.[45][47] With up to half of the complement of his legions being fresh volunteers, and with no fighting having taken place on Sicily for the past five years, Scipio instigated a rigorous training regime. This extended from drills by individual centuries – the basic Roman army manoeuvre unit of 80 men – to exercises by the full army. This lasted for approximately a year. At the same time Scipio assembled a vast quantity of food and materiel, merchant ships to transport it and his troops, and warships to escort the transports.[48]
Also during 205 BC, 30 Roman ships under Scipio's second-in-command, the legate Gaius Laelius, raided North Africa around Hippo Regius, gathering large quantities of loot and many captives.[47][49] The Carthaginians initially believed this was the anticipated invasion by Scipio and his full invasion force; they hastily strengthened fortifications and raised troops. Reinforcements were sent to Mago in an attempt to distract the Romans in Italy.[50] Meanwhile a succession war had broken out in Numidia between the Roman-supporting Masinissa and the Carthaginian-inclined Syphax. Laelius re-established contact with Masinissa during his raid. Masinissa expressed dismay regarding how long it was taking the Romans to complete their preparations and land in Africa.[51]
Opposing forces
Roman
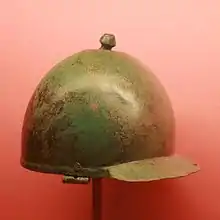
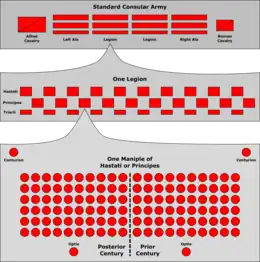
Most male Roman citizens were liable for military service and would serve as infantry; a better-off minority provided a cavalry component. Historically, when at war the Romans would raise two legions, each of 4,200 infantry – this could be increased to 5,000 in some circumstances,[52] or, rarely, even more[45] – and 300 cavalry. Approximately 1,200 of the infantry – poorer or younger men unable to afford the armour and equipment of a standard legionary – served as javelin-armed skirmishers known as velites; they each carried several javelins, which would be thrown from a distance, a short sword and a 90-centimetre (3 ft) shield.[53] The balance were equipped as heavy infantry, with body armour, large shields and short thrusting swords. They were divided into three ranks, of which the hastati in the front rank also carried two javelins each; the principes and triarii, in the second and third ranks, respectively, had thrusting spears instead. A standard-size legion at full strength would have 1,200 hastati, 1,200 principes and 600 triarii.[54][55]
Both legionary sub-units and individual legionaries fought in relatively open order. It was the long-standing Roman procedure to elect two men each year as senior magistrates, known as consuls, who in time of war would each lead an army. An army was usually formed by combining a Roman legion with a similarly sized and equipped legion provided by their Latin allies; allied legions usually had a larger attached complement of cavalry than Roman ones.[54][55] By this stage of the war, Roman armies were generally larger, typically consisting of four legions, two Roman and two provided by its allies, for a total of approximately 20,000 men. The Roman army which invaded Africa consisted of four legions, each of the Roman pair reinforced to an unprecedented 6,200 infantry and with a more usual 300 cavalry each. Modern historians estimate the invading army to have totalled 25,000–30,000 men, including perhaps 2,500 cavalry.[56][47][57] Goldsworthy describes the army as being "superbly trained" when it left Sicily.[58]
Carthaginian
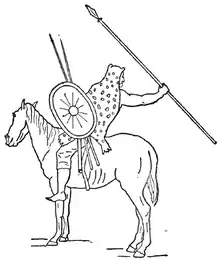
Carthaginian citizens served in their army only if there was a direct threat to the city of Carthage.[59][60] When they did they fought as well-armoured heavy infantry armed with long thrusting spears, although they were notoriously ill-trained and ill-disciplined. In most circumstances Carthage recruited foreigners to make up its army.[note 3] Many were from North Africa and these were frequently referred to as "Libyans". The region provided several types of fighters, including: close-order infantry equipped with large shields, helmets, short swords and long thrusting spears; javelin-armed light infantry skirmishers; close-order shock cavalry[note 4] (also known as "heavy cavalry") carrying spears; and light cavalry skirmishers who threw javelins from a distance and avoided close combat – the latter were usually Numidians.)[63][64]
The close-order African infantry and the citizen-militia both fought in a tightly packed formation known as a phalanx.[65] On occasion some of the infantry would wear captured Roman armour, especially those who served with Hannibal.[66] As well both Iberia and Gaul provided experienced but unarmoured infantry who would charge ferociously, but had a reputation for breaking off if combat was protracted. Slingers were frequently recruited from the Balearic Islands.[63][67] The Carthaginians also employed war elephants; North Africa had indigenous African forest elephants at the time.[note 5][69][70] The sources are not clear as to whether they carried towers containing fighting men.[71]
Invasion
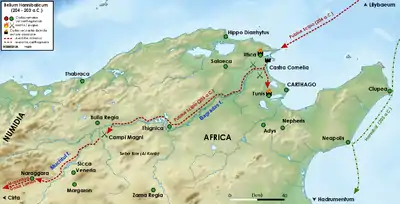
In 204 BC, probably in June or July, the Roman army left Sicily[72] and disembarked three days later at Cape Farina 20 kilometres (12 mi) north of the large Carthaginian port of Utica.[72][73] Carthaginian scouting parties were repulsed and the area was pillaged. Masinissa joined the Romans with either 200 or 2,000 men, the sources differ. Masinissa had been recently defeated by his Numidian rival Syphax, who had decided to act in support of Carthage.[74] Wanting a more permanent base and a port more resilient to the bad weather to be expected when winter came, Scipio besieged Utica. Although the Romans were well supplied with siege engines the siege dragged on.[73][75] A Carthaginian army under the experienced commander Hasdrubal Gisco and a Numidian one under Syphax set up separate fortified camps nearby. The size of both of these armies is uncertain, but it is accepted that the Romans were considerably outnumbered, especially in terms of cavalry.[76][77] The Romans pulled back from Utica.[78] Both sides were reluctant to commit to a pitched battle.[79]
Fighting in 203 BC
Scipio sent emissaries to Syphax to attempt to persuade him to defect. Syphax in turn offered to broker peace terms.[76] A series of exchanges of negotiating parties followed, during which Scipio obtained information on the layout and construction of the Numidian camp, as well as the size and composition of the Numidian army and the most frequented routes in and out of the camp.[76][79][82] As the weather improved Scipio made conspicuous preparations to assault Utica.[83] Instead, he marched his army out late one evening and divided it in two.[84][85] One part launched a night attack on the Numidian camp, setting fire to their reed barracks. In the ensuing panic and confusion the Numidians were dispersed with heavy casualties.[86] Not realising what was happening, the Carthaginians were also taken by surprise when Scipio attacked them with the remaining Romans. Again the Romans inflicted heavy casualties in the dark.[87][86] Hasdrubal fled 40 kilometres (25 mi) to Carthage with 2,500 survivors, pursued by Scipio. Syphax escaped with a few cavalry and regrouped 11 kilometres (7 mi) away.[85][88]
When word of the defeat reached Carthage there was panic, and some wanted to renew the peace negotiations. The Carthaginian Senate also heard demands for Hannibal's army to be recalled. A decision was reached to fight on with locally available resources.[78] A force of 4,000 Iberian warriors arrived in Carthage, and Hasdrubal raised further local troops with whom to reinforce the survivors of Utica;[89] Syphax remained loyal and joined Hasdrubal with what was left of his army.[90] The combined force is estimated at 30,000 and they established a strong camp in an area by the Bagradas River known as the Great Plains within 30–50 days of the defeat at Utica.[91][89]
Scipio immediately marched most of his army to the scene. The size of his army is not known, but it was outnumbered by the Carthaginians.[88] After several days of skirmishing both armies committed to a pitched battle.[91] Upon being charged by the Romans and Masinissa's Numidians, those Carthaginians who had been involved in the debacle at Utica turned and fled; morale had not recovered.[92][91][93] Only the Iberians stood and fought. They were enveloped by the well-drilled Roman legions and wiped out.[94][95] Hasdrubal fled to Carthage, where he was demoted and exiled.[96]
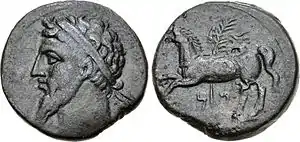
Syphax withdrew as far as his capital, Cirta, where he recruited more troops to supplement those survivors who had stayed with him.[97] Masinissa's Numidians pursued their fleeing countrymen accompanied by part of the Roman force, under Laelius.[97] The armies met in the battle of Cirta, where Syphax's army initially gained the upper hand.[97] Laelius fed groups of Roman infantry into the battle line and Syphax's troops broke and fled.[98][97] Syphax was captured[96][99] and paraded beneath the city walls in chains, which caused Cirta to surrender to Masinissa, who then took over much of Syphax's kingdom and joined it to his own.[note 6][100][102]
Hannibal's return
Scipio and Carthage entered into peace negotiations.[103] Carthage built up its naval strength and prepared the city of Carthage for a siege.[97] The Carthaginian Senate recalled both Hannibal and Mago from Italy.[103][104] After Scipio overran all of Carthaginian Iberia in 205 BC, Mago had left with those forces still loyal and sailed to Liguria in northern Italy[105][103] where he recruited Gallic and Ligurian reinforcements. In 203 BC Mago marched into Cisalpine Gaul in an attempt to draw Roman attention away from North Africa, but was defeated at the battle of Insubria.[106] His army retreated and sailed for Carthage from Genua. Mago died of wounds on the voyage and some of his ships were intercepted by the Romans,[107] but 12,000 of his troops reached Carthage.[108]
By 207 BC, after 12 years of campaigning in Italy, Hannibal's forces had been compelled to withdraw to Bruttium, the "toe" of Italy, where they remained undefeated but were ineffective.[103][109][110] When recalled the limited number of ships available meant that few horses could be taken and that many newer recruits were left in Italy.[111][112] Hannibal's army sailed from Croton and landed at Leptis Minor, some 140 kilometres (87 mi) south of Carthage, with 15,000–20,000 experienced veterans. Hannibal was appointed to command the new army and consolidated his forces at Hadrumetum.[111][107][113]
Prelude to battle
The Roman Senate ratified a draft treaty, but because of mistrust and a surge in confidence when Hannibal arrived from Italy, Carthage repudiated it.[114] The Romans retaliated by methodically capturing Carthaginian-controlled towns in Carthage's hinterland and selling their inhabitants into slavery, regardless of whether they had surrendered before being attacked or not. Scipio probably anticipated that these attacks would create pressure on the Carthaginians to dispatch an army to face him as soon as possible, rather than wait until it had recruited to maximum strength and was fully trained. Scipio was himself under time pressure, as he was concerned that his political opponents in the Roman Senate might appoint a new consul to replace him. The Carthaginian Senate repeatedly ordered Hannibal to advance from his base at Hadrumetum and deal with Scipio's army, but Hannibal delayed until he had been reinforced by 2,000 Numidian cavalry led by a relative of Syphax – they were reputed to be elite troops.[115]
Hannibal believed, correctly, that the Roman army had not yet been joined by its Numidian auxiliaries under Masinissa and so had the Carthaginian army march inland for five days and camp not far from the town of Zama, just 3 kilometres (1.9 mi) from the Roman army. This proximity all but guaranteed that a battle would result. While the Carthaginians were en route Masinissa arrived at the Roman camp with 10,000 Numidians.[116] The site of the battle is generally, but not universally, believed to be a flat area to the south of Sicca (modern El Kef), the Draa el Metnan.[117]
Battle
Numbers involved
.png.webp)
Little is known of the number of men Scipio commanded at Zama.[118] An estimated 25,000–30,000 men had landed in Africa the year before and there is no record of any reinforcements arriving from Italy. However, the strength of the force left to guard their camp and continue the siege of Utica is not known, nor is the level of attrition suffered in the three major battles and several skirmishes the legions had so far been involved in.[119][57] The ancient sources agree that the Romans were supported by 6,000 Numidian infantry and 4,000 cavalry under Masinissa. The ancient historian Appian, writing 350 years after the event, states that the Numidians brought the total to 34,500 troops, but modern historians do not accept this.[120][118] They usually give a total of 29,000[121][46] or 30,000,[116][46] although Nigel Bagnall gives 40,000.[122] Of these, slightly more than 6,000 were cavalry.[119]
Appian states that the Carthaginian army at the battle of Zama consisted of 50,000 men; this is discounted by many modern historians,[123] although some accept it with provisos.[124] Most give 40,000, based on Polybius. Of these, all but 4,000 were infantry. Hannibal's army had abandoned its horses in Italy because of a lack of shipping space and Masinissa's defeat of Syphax had dried up the supply of Numidian cavalry; thus, even with the recent addition of 2,000 Numidians the Carthaginians fielded only 4,000 cavalry.[125][126][127] Hannibal also deployed 80 war elephants, the first time these are recorded as being used since Scipio invaded. Hannibal delayed seeking battle to give his army time to train up a force of elephants. Such forces had been fielded earlier in the war in both Italy and Iberia. Hannibal had famously taken elephants over the Alps in 218 BC. It is unclear why Carthage was not able to field a force of fully trained war elephants at Zama, or at any time since Scipio invaded.[128][129][130]
Initial dispositions
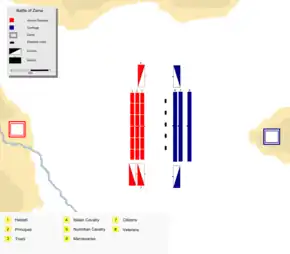
The Roman army formed up with the heavy infantry of its two Roman legions in the centre and with allied legions on each side of them.[123][126] As usual, the hastati formed the front rank with the principes and then the triarii behind them. Instead of organising each legion's maniples – the basic Roman infantry manoeuvre unit of 120 men each – in the usual "checkerboard" or quincunx formation, Scipio arranged a principes maniple directly behind each maniple of hastati. This left broad avenues through the Roman lines, which were occupied by the Roman light infantry, the velites. Masinissa's 4,000 Numidian cavalry were on the right of the infantry. Laelius led 1,500 Roman and allied cavalry positioned on the left. There were a further 600 Numidian cavalry under Dacamas, but it is not known whether they were attached to Masinissa's or Laelius's force.[131] It is not stated in the ancient sources what role or roles the 6,000 Numidian infantry took up. Modern suggestions include operating in close support of their cavalry, guarding the Roman camp, supplementing the velites as skirmishers or forming up as close-order infantry to one side of the legions.[132]
The Carthaginian deployment reflected the fact that Hannibal's command was made up of the survivors of three different armies. Hannibal had not had time to integrate the forces he had been allocated into a unified command and so felt it wisest to deploy them separately.[133] The Carthaginian infantry, like the Romans', went in the centre. Its first line was made up largely of veterans of Mago's failed expedition to northern Italy. The close-order troops were Iberians, Gauls and Ligurians. In front of these heavy infantry were light-infantry skirmishers consisting of Balearic slingers, Moor archers and Moor and Ligurian javelin-men. The total strength of this component was 12,000 men. In front of these infantry were the 80 war elephants, evenly spaced along the line, approximately 30 metres (98 ft) apart.[134][122][135] The modern historian José Lago states that the Carthaginian light infantry were sent out in front of the whole Carthaginian army, as was usual, including in front of the elephants,[136][137] for the several hours it took the army to form up.[138]
Carthaginians and other Africans made up the second line. They were either survivors of the earlier campaigns whose morale was poor or freshly raised recruits who had received little training. They probably fought as close-order infantry; Polybius describes them as adopting phalanx formations, but there is modern debate as to just what this describes. The strength of the second line is not known, but it is sometimes assumed by modern historians to have consisted of a further 12,000 men.[134][139][140] About 200 metres (700 ft) behind the Carthaginian second line were the infantry Hannibal had brought back from Italy. Most of them were Bruttians, but they included some Africans and Iberians who had left Iberia with Hannibal more than 17 years before, and Gauls recruited in northern Italy in 218 and 217 BC. All were battle-hardened veterans.[134][141] This third line is variously estimated at 12,000,[142] 15,000–20,000[133] or 20,000[143][144] men by modern historians. The Carthaginians are believed to have fielded approximately 4,000 cavalry. Hannibal placed the Numidians among them on his left flank, facing Masinissa's Numidians; and the other African cavalry on the right. How many of the total of 4,000 cavalry were in each of these contingents is not known, although Lazenby suggests that the Numidians on the left would have been the stronger.[134]
Initial charges
The armies advanced towards each other, the first clashes occurring on the Carthaginian left flank, the Roman right, between the 2,000 or more Carthaginian-supporting Numidian cavalry and the 4,000 – or possibly 4,600 – siding with the Romans. Each force sent detachments to hurl javelins at the other and then withdraw. Lazenby describes these skirmishes as "desultory". Hannibal then ordered a charge against the Roman infantry by his 80 elephants, with the whole of his first two lines moving forward in support.[146][147] The modern historian Jacob Edwards, in a study of Hannibal's use of elephants during the war, describes their deployment at Zama as "an ill-advised practice which departed from the successful tactics used previously". He suggests that they would have been better employed against the superior Roman cavalry on the flanks, rather than directly charging the Roman infantry.[128] It is possible that Hannibal believed the elephants would have brought an element of surprise, as their previous use in the war had been limited.[148] Most modern accounts have the elephants in front of the Carthaginian infantry,[134][122][135] but Lago has the Carthaginian light infantry in front of the whole Carthaginian army,[136] skirmishing with their opposite numbers, as was usual before armies were formed up and ready to commence the battle proper.[137] Lago states that they stayed in front of and between the elephants, protecting them from the javelins of the Roman velites, until the elephants charged.[136]
As the elephants advanced, the velites moved forward into the gap between the armies, hurled javelins at the elephants and fell back.[138] The Roman heavy infantry then sounded their bugles, and possibly rhythmically banged their weapons against their shields – swashbuckling.[note 7][150] This startled some of the elephants and several of those on the left turned and fled, past the end of the line of infantry behind them. Edwards expresses amazement that war elephants should be so easily panicked and again suggests that at least some of the animals were "young and inexperienced at battle" making them "a liability rather than an asset". These out-of-control elephants trampled their way through the Carthaginian-backing Numidian cavalry, thoroughly disordering them.[127][128] Masinissa took advantage of the situation by ordering a charge. This routed the disordered cavalry and they fled, pursued by Masinissa's force.[150]
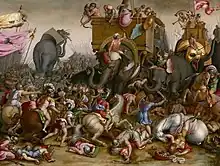
Most of the rest of the elephants charged into the Roman infantry, amid showers of javelins. Terrified by the swashbuckling infantry and their bugles the majority stampeded into the broad gaps the Romans had left between their maniples. Many of the velites were killed as they ran back in front of the elephants and into the gaps between the ranks of the heavy infantry. From there they hurled javelins into the elephants' flanks. Those elephants which emerged into the rear of the Roman army were all wounded and now cut off. They were subsequently hunted down and killed. Some elephants did charge into the hastati as planned, where they caused heavy casualties before being driven off. This causes Mir Bahmanyar to suggest that the elephants accomplished what Hannibal expected of them. Some elephants baulked at charging the hastati on the Roman left and attacked the cavalry alongside them, who also showered the elephants with javelins. Most of these elephants were badly wounded and had lost their crews by this point; those which could fled, avoiding the line of Carthaginian infantry, but not the Carthaginian cavalry on the right flank. This cavalry force became disorganised by the out-of-control elephants and like Masinissa, Laelius ordered his cavalry to take advantage of this and charge. The Carthaginian cavalry were swept from the field and the Roman cavalry closely pursued them.[151][138][150][152][153]
Infantry engagement
With the battlefield cleared of both elephants and cavalry all three ranks of the Roman heavy infantry and the first two of Carthaginian advanced towards each other. The Carthaginian third rank, Hannibal's Italian veterans, remained in place. The two front ranks charged enthusiastically and violently into each other and commenced a hard-fought, close-quarter, hand-to-hand combat. The Romans' superior weaponry and organisation eventually told and despite the hastati taking further heavy losses, the Carthaginian front rank broke and fled. They attempted to make their way through the Carthaginian second rank, but these men refused to let them pass; according to Polybius to the point of fighting them off. The survivors of the front rank were forced to make their escape around the flanks of the second rank. Many of these then rallied and rejoined the fight by extending the flanks of the Carthaginian second rank.[154][155]
The hastati, despite having taken casualties from the elephants and the Carthaginian first rank, now attacked the Carthaginian second rank. Polybius reports that the Carthaginian and other African spearmen who made up this force fought "fanatically and in an extraordinary manner".[156] The Romans were pushed back in disorder. Bahmanyar opines that the Roman front rank came close to being broken at this stage.[157] The Romans were forced to commit their second line, the principes, to the fight.[158][159] Liddell Hart writes that even the principes struggled to hold the line,[160] but eventually this reinforcement was sufficient to break the Carthaginian second line; they fled, pursued impetuously by the hastati.[161]
Both Bahmanyar and Goldsworthy suggest this was an opportunity for the Carthaginian third line to counter-attack the disorganised hastati, but that Hannibal decided against it because his third line was some distance back, the fleeing Carthaginians from the first two lines were inadvertently blocking a clean charge and because the ground over which the third line would have attacked was strewn with corpses.[161][162] According to Polybius the gap between the fighting lines "was now covered with blood, slaughter, and dead bodies ... slippery corpses which were still soaked in blood and had fallen in heaps".[163] Bagnall suggests the withdrawal of the Carthaginian second line was more deliberate and orderly than the ancient sources portray.[164] Taylor believes that Hannibal had hoped that the Romans would rush forward in pursuit at this stage and that he had prepared an infantry envelopment in anticipation of this; in the event Scipio saw the potential trap and his troops were disciplined enough to break off their pursuit when recalled.[165]
Decision
The Romans recalled the pursuing hastati by sounding bugles and reformed their line. The Carthaginian third line – Hannibal's veterans supplemented by some of the survivors of the first and second lines – was longer than the Roman formation and outflanked it on both sides. The hastati formed up in the centre and the principes and triarii moved to each side to make a single, longer line. There was a prolonged pause while this was taking place. The Carthaginians took advantage of the hiatus to rally some of their first and second line troops, using them to extend the length of their own fighting line. This enabled Roman close-order infantry to match the length of the Carthaginian's third line, but correspondingly thinned their line, preventing them from using their habitual tactic of feeding new, less-fatigued men into the fighting line as a combat wore on.[161][166] The surviving heavy infantry of each side were roughly equal in numbers. Most of the original Carthaginian were equipped in the same manner as the Romans they faced. They were veterans of many years' experience and they were fresh, having not yet fought. Many of the Romans were veterans, some having fought at Cannae and almost all having taken part in the two, or for some three, major victories the previous year. Many of the Romans were tired from the two immediately preceding fierce combats, but their victories in both would have boosted their morale.[167]
Having satisfactorily reorganised, the two lines charged each other, according to Polybius "with the greatest fire and fury".[164] The fight continued for some time, neither side gaining the advantage.[168] Lazenby describes this fighting as "a grim business".[169] The cavalry commanded by Masinissa and Laelius then returned to the battlefield, apparently at more or less the same time.[170] Philip Sabin states that they arrived "in the nick of time".[171] Being fiercely engaged to their front, the Carthaginian infantry were helpless to prevent the Roman cavalry from charging into their rear. Their line collapsed and there was a great massacre.[170] Hannibal was one of the few Carthaginians to escape.[172]
Casualties
Polybius states that 20,000 Carthaginians were killed and as many again taken prisoner, which accounts for the entire Carthaginian army. He gives Roman losses as 1,500 killed. This is five per cent or more of their total force; Goldsworthy considers this fatality rate "a substantial loss for a victorious army, testimony to the hard fighting" and that the battle as a whole was "a slogging match". The number of wounded is not known, although the ancient sources refer to many Roman wounded being carried to the rear during the pause before the final engagement.[167][58] At least 11 Carthaginian elephants survived the battle to be captured by the Romans.[168]
Hannibal and his companions reached the main Carthaginian base at Hadrumetum, where they mustered 6,000 infantry and 500 cavalry. Hannibal considered this too few with which to continue the war and advised the Carthaginian Senate to make peace on whatever terms they could.[173]
Aftermath
The Romans looted the Carthaginian camp and then Scipio marched his legions back to Tunis. The Carthaginians again sued for peace. Given the difficulty of ending the war by storming or starving the city of Carthage, and his continuing fear that he might be superseded in command, Scipio entered into negotiations. During these Scipio received word that a Numidian army under Syphax's son Vermina was marching to Carthage's assistance. This was intercepted and surrounded by a Roman force largely made up of cavalry and defeated. The number of Numidians involved is not known, but Livy records that more than 16,000 were killed or captured. This was the last battle of the Second Punic War.[174][175]
The peace treaty the Romans subsequently imposed on the Carthaginians stripped them of their overseas territories and some of their African ones. An indemnity of 10,000 silver talents[note 8] was to be paid over 50 years, hostages were taken, Carthage was forbidden to possess war elephants and its fleet was restricted to 10 warships. It was prohibited from waging war outside Africa and in Africa only with Rome's express permission. Many senior Carthaginians wanted to reject it, but Hannibal spoke strongly in its favour and it was accepted in spring 201 BC. Henceforth it was clear Carthage was politically subordinate to Rome.[177][178] Scipio was awarded a triumph and received the agnomen "Africanus".[179]
Third Punic War
Masinissa exploited the prohibition on Carthage waging war to repeatedly raid and seize Carthaginian territory with impunity. Carthage appealed to Rome, which always backed its Numidian ally.[180] In 149 BC, fifty years after the end of the Second Punic War, Carthage sent an army, under Hasdrubal the Boetharch, against Masinissa,[note 9] the treaty notwithstanding. The campaign ended in disaster at the battle of Oroscopa and anti-Carthaginian factions in Rome used the illicit military action as a pretext to prepare a punitive expedition.[183] The Third Punic War began later in 149 BC when a large Roman army landed in North Africa[184] and besieged Carthage.[185] In the spring of 146 BC the Romans launched their final assault,[note 10] systematically destroying the city and killing its inhabitants;[187] 50,000 survivors were sold into slavery.[188] The formerly Carthaginian territories were annexed by Rome and reconstituted to become the Roman province of Africa, with Utica as its capital.[189][190]
Notes, citations and sources
Notes
- ↑ The term Punic comes from the Latin word Punicus (or Poenicus), meaning "Carthaginian" and is a reference to the Carthaginians' Phoenician ancestry.[1]
- ↑ Sources other than Polybius are discussed by Bernard Mineo in "Principal Literary Sources for the Punic Wars (apart from Polybius)".[18]
- ↑ Roman and Greek sources refer to these foreign fighters derogatively as "mercenaries", but the modern historian Adrian Goldsworthy describes this as "a gross oversimplification". They served under a variety of arrangements; for example, some were the regular troops of allied cities or kingdoms seconded to Carthage as part of formal treaties, some were from allied states fighting under their own leaders, many were volunteers from areas under Carthaginian control who were not Carthaginian citizens. (Carthaginian citizenship was largely reserved for inhabitants of the city of Carthage.)[61]
- ↑ "Shock" troops are those trained and used to close rapidly with an opponent, with the intention of breaking them before, or immediately upon, contact.[62]
- ↑ These elephants were typically about 2.5-metre-high (8 ft) at the shoulder, and were distinct from the larger African bush elephant.[68]
- ↑ Masinissa also married Syphax's wife, Sophonisba, Hasdrubal's daughter.[100] Syphax was taken as a prisoner to Italy, where he died.[101]
- ↑ Swashbuckling is to noisily strike – "swash" – a sword or spear against one's shield or "buckler".[149]
- ↑ 10,000 talents was approximately 269,000 kilograms (265 long tons) of silver.[176]
- ↑ Masinissa, now aged 88, was still able to lead his army into battle and father children. He died in 148 BC.[181][182]
- ↑ Led by Scipio Aemilianus, the adopted grandson of Publius Scipio.[186]
Citations
- ↑ Sidwell & Jones 1998, p. 16.
- 1 2 3 4 5 Goldsworthy 2006, pp. 20–21.
- ↑ Shutt 1938, p. 53.
- ↑ Walbank 1990, pp. 11–12.
- ↑ Lazenby 1996, pp. x–xi.
- ↑ Hau 2016, pp. 23–24.
- ↑ Shutt 1938, p. 55.
- ↑ Champion 2015, pp. 98, 101.
- ↑ Lazenby 1996, pp. x–xi, 82–84.
- ↑ Curry 2012, p. 34.
- ↑ Champion 2015, p. 102.
- 1 2 3 Lazenby 1998, p. 87.
- ↑ Champion 2015, p. 95.
- ↑ Goldsworthy 2006, p. 222.
- ↑ Sabin 1996, p. 62.
- 1 2 Hoyos 2015, p. 3.
- ↑ Goldsworthy 2006, pp. 21–23.
- 1 2 Mineo 2015, pp. 111–127.
- ↑ Taylor 2019, p. 312.
- ↑ Goldsworthy 2006, pp. 23, 98.
- 1 2 Goldsworthy 2006, p. 82.
- ↑ Lazenby 1996, p. 157.
- ↑ Bagnall 1999, p. 97.
- ↑ Miles 2011, p. 220.
- ↑ Goldsworthy 2006, pp. 143–145.
- ↑ Collins 1998, p. 13.
- ↑ Zimmermann 2015, p. 281.
- 1 2 Ñaco del Hoyo 2015, p. 377.
- ↑ Bagnall 1999, pp. 192–194.
- ↑ Carey 2007, p. 2.
- ↑ Edwell 2015, p. 322.
- ↑ Edwell 2015, p. 323.
- ↑ Goldsworthy 2006, pp. 277–285.
- ↑ Edwell 2015, p. 330.
- ↑ Bagnall 1999, p. 233.
- ↑ Goldsworthy 2006, p. 285.
- ↑ Carey 2007, p. 99.
- ↑ Goldsworthy 2006, pp. 285–286.
- 1 2 Goldsworthy 2006, p. 286.
- 1 2 Miles 2011, p. 306.
- ↑ Goldsworthy 2006, pp. 286–287.
- ↑ Lazenby 1998, p. 194.
- ↑ Lazenby 1998, p. 195.
- ↑ Goldsworthy 2006, p. 218.
- 1 2 3 Goldsworthy 2006, p. 287.
- 1 2 3 Taylor 2019, p. 316.
- 1 2 3 Carey 2007, p. 100.
- ↑ Goldsworthy 2006, pp. 287–288.
- ↑ Goldsworthy 2006, p. 288.
- ↑ Lazenby 1998, pp. 194–195.
- ↑ Lazenby 1998, pp. 198–199.
- ↑ Bagnall 1999, p. 23.
- ↑ Goldsworthy 2006, p. 48.
- 1 2 Bagnall 1999, pp. 22–25.
- 1 2 Goldsworthy 2006, p. 50.
- ↑ Goldsworthy 2006, pp. 227, 287.
- 1 2 Miles 2011, p. 309.
- 1 2 Goldsworthy 2004, p. 76.
- ↑ Lazenby 1998, p. 9.
- ↑ Scullard 2006, p. 494.
- ↑ Goldsworthy 2006, p. 33.
- ↑ Jones 1987, p. 1.
- 1 2 Goldsworthy 2006, pp. 32–34.
- ↑ Koon 2015, pp. 79–87.
- ↑ Koon 2015, p. 93.
- ↑ Rawlings 2015, p. 305.
- ↑ Bagnall 1999, pp. 8–9.
- ↑ Miles 2011, p. 240.
- ↑ Bagnall 1999, p. 9.
- ↑ Lazenby 1996, p. 27.
- ↑ Sabin 1996, p. 70, n. 76.
- 1 2 Carey 2007, p. 103.
- 1 2 Goldsworthy 2006, p. 291.
- ↑ Goldsworthy 2006, pp. 290–292.
- ↑ Lazenby 1998, p. 206.
- 1 2 3 Goldsworthy 2006, pp. 292–293.
- ↑ Lazenby 1996, p. 207.
- 1 2 Goldsworthy 2006, p. 294.
- 1 2 Bagnall 1999, p. 277.
- ↑ Coarelli 2002, pp. 73–74.
- ↑ Etcheto 2012, pp. 274–278.
- ↑ Bagnall 1999, p. 278.
- ↑ Bagnall 1999, pp. 278–279.
- ↑ Goldsworthy 2006, p. 293.
- 1 2 Lazenby 1998, p. 208.
- 1 2 Carey 2007, pp. 105–106.
- ↑ Goldsworthy 2006, pp. 293–294.
- 1 2 Carey 2007, p. 106.
- 1 2 Hoyos 2003, p. 162.
- ↑ Goldsworthy 2006, pp. 294–295.
- 1 2 3 Goldsworthy 2006, p. 295.
- ↑ Edwell 2015, p. 333.
- ↑ Carey 2007, p. 108.
- ↑ Rawlings 1996, p. 90.
- ↑ Goldsworthy 2006, pp. 295–296.
- 1 2 Hoyos 2015b, p. 205.
- 1 2 3 4 5 Edwell 2015, p. 334.
- ↑ Goldsworthy 2006, pp. 48, 50.
- ↑ Bagnall 1999, p. 282.
- 1 2 Lazenby 1998, p. 212.
- ↑ Kunze 2015, p. 397.
- ↑ Carey 2007, p. 110.
- 1 2 3 4 Carey 2007, p. 111.
- ↑ Goldsworthy 2006, pp. 296–297.
- ↑ Barceló 2015, p. 362.
- ↑ Bagnall 1999, pp. 286–287.
- 1 2 Miles 2011, p. 312.
- ↑ Bagnall 1999, p. 289.
- ↑ Zimmermann 2015, pp. 289–290.
- ↑ Miles 2011, pp. 304–305.
- 1 2 Carey 2007, pp. 111–112.
- ↑ Roberts 2017, pp. 228–229.
- ↑ Goldsworthy 2006, p. 244.
- ↑ Bagnall 1999, pp. 287–291.
- ↑ Lazenby 1998, pp. 216–218.
- 1 2 Lazenby 1998, p. 219.
- ↑ Taylor 2019, pp. 313–314.
- 1 2 Edwell 2015, p. 336.
- 1 2 Lazenby 1998, p. 221.
- ↑ Goldsworthy 2006, pp. 301–302.
- ↑ Miles 2011, p. 316.
- 1 2 3 Bagnall 1999, p. 291.
- 1 2 Goldsworthy 2006, p. 302.
- ↑ Taylor 2019, p. 317, 317 n. 24.
- ↑ Lazenby 1998, pp. 220–221.
- 1 2 Bahmanyar 2016, p. 41.
- 1 2 Carey 2007, p. 115.
- 1 2 3 Edwards 2001, p. 903.
- ↑ Goldsworthy 2006, pp. 163–166, 250, 279.
- ↑ Bahmanyar 2016, p. 53.
- ↑ Lazenby 1998, pp. 221–222.
- ↑ Taylor 2019, p. 322.
- 1 2 Goldsworthy 2006, p. 303.
- 1 2 3 4 5 Lazenby 1998, p. 222.
- 1 2 Bahmanyar 2016, p. 55.
- 1 2 3 Lago 2013, p. 60.
- 1 2 Goldsworthy 2006, p. 57.
- 1 2 3 Goldsworthy 2006, p. 304.
- ↑ Bahmanyar 2016, p. 56.
- ↑ Daly 2002, p. 87.
- ↑ Carey 2007, p. 117.
- ↑ Carey 2007, p. 116.
- ↑ Miles 2011, p. 317.
- ↑ Taylor 2019, p. 318.
- ↑ Bagnall 1999, p. 292.
- ↑ Carey 2007, pp. 117–118.
- ↑ Lazenby 1998, p. 223.
- ↑ Dorey & Dudley 1971, p. 144.
- ↑ SOED 1962, p. 1098.
- 1 2 3 Bagnall 1999, p. 293.
- ↑ Carey 2007, pp. 118, 122.
- ↑ Koon 2015, p. 84.
- ↑ Bahmanyar 2016, p. 67.
- ↑ Bahmanyar 2016, p. 70.
- ↑ Goldsworthy 2006, pp. 305–306.
- ↑ Lazenby 1998, p. 224.
- ↑ Bahmanyar 2016, p. 71.
- ↑ Bagnall 1999, pp. 293–294.
- ↑ Carey 2007, p. 124.
- ↑ Liddell Hart 1976, p. 182.
- 1 2 3 Goldsworthy 2006, p. 306.
- ↑ Bahmanyar 2016, p. 76.
- ↑ Koon 2015, pp. 91–92.
- 1 2 Bagnall 1999, p. 294.
- ↑ Taylor 2019, pp. 324–327.
- ↑ Taylor 2019, pp. 324–326.
- 1 2 Goldsworthy 2006, pp. 306–307.
- 1 2 Carey 2007, p. 125.
- ↑ Lazenby 1998, p. 225.
- 1 2 Goldsworthy 2006, p. 307.
- ↑ Sabin 1996, p. 67 n. 52.
- ↑ Bagnall 1999, p. 295.
- ↑ Taylor 2019, pp. 326–327.
- ↑ Carey 2007, p. 131.
- ↑ Bagnall 1999, pp. 296–297.
- ↑ Lazenby 1996, p. 158.
- ↑ Carey 2007, p. 132.
- ↑ Zimmermann 2015, p. 295.
- ↑ Miles 2011, p. 318.
- ↑ Kunze 2015, pp. 398, 407.
- ↑ Goldsworthy 2006, pp. 335, 345.
- ↑ Bagnall 1999, p. 15.
- ↑ Kunze 2015, pp. 399, 407.
- ↑ Purcell 1995, p. 134.
- ↑ Goldsworthy 2006, p. 341.
- ↑ Goldsworthy 2006, pp. 343, 346–347, 351–352.
- ↑ Le Bohec 2015, p. 441.
- ↑ Scullard 2002, p. 316.
- ↑ Le Bohec 2015, p. 443.
- ↑ Scullard 2002, pp. 310, 316.
Sources
- Bagnall, Nigel (1999). The Punic Wars: Rome, Carthage and the Struggle for the Mediterranean. London: Pimlico. ISBN 978-0-7126-6608-4.
- Bahmanyar, Mir (2016). Zama 202 BC: Scipio Crushes Hannibal in North Africa. Oxford; New York: Osprey. ISBN 978-1-4728-1422-7.
- Barceló, Pedro (2015) [2011]. "Punic Politics, Economy, and Alliances, 218–201". In Hoyos, Dexter (ed.). A Companion to the Punic Wars. Chichester, West Sussex: John Wiley & Sons. pp. 357–375. ISBN 978-1-119-02550-4.
- Le Bohec, Yann (2015) [2011]. "The "Third Punic War": The Siege of Carthage (148–146 BC)". In Hoyos, Dexter (ed.). A Companion to the Punic Wars. Chichester, West Sussex: John Wiley & Sons. pp. 430–446. ISBN 978-1-1190-2550-4.
- Carey, Brian Todd (2007). Hannibal's Last Battle: Zama & the Fall of Carthage. Barnsley, South Yorkshire: Pen & Sword. ISBN 978-1-84415-635-1.
- Champion, Craige B. (2015) [2011]. "Polybius and the Punic Wars". In Hoyos, Dexter (ed.). A Companion to the Punic Wars. Chichester, West Sussex: John Wiley & Sons. pp. 95–110. ISBN 978-1-1190-2550-4.
- Coarelli, Filippo (2002). "I ritratti di 'Mario' e 'Silla' a Monaco e il sepolcro degli Scipioni" [The Portraits of 'Mario' and 'Sulla' in Monaco and the Tomb of the Scipios]. Eutopia Nuova Serie (in Italian). II (1): 47–75.
- Collins, Roger (1998). Spain: An Oxford Archaeological Guide. Oxford: Oxford University Press. ISBN 978-0-19-285300-4.
- Curry, Andrew (2012). "The Weapon that Changed History". Archaeology. 65 (January/February): 32–37. JSTOR 41780760.
- Daly, Gregory (2002). Cannae: The Experience of Battle in the Second Punic War (PDF). London: Routledge. ISBN 978-0-415-26147-0. Archived from the original (PDF) on 18 December 2020. Retrieved 15 April 2020.
- Dorey, T. A.; Dudley, D. R. (1971). Rome Against Carthage. London: Seeker & Warburg. OCLC 567405690.
- Edwards, Jacob (2001). "The Irony of Hannibal's Elephants". Latomus. 60 (October–December): 900–905. JSTOR 41542312.
- Edwell, Peter (2015) [2011]. "War Abroad: Spain, Sicily, Macedon, Africa". In Hoyos, Dexter (ed.). A Companion to the Punic Wars. Chichester, West Sussex: John Wiley & Sons. pp. 320–338. ISBN 978-1-1190-2550-4.
- Etcheto, Henri (2012). Les Scipions. Famille et pouvoir à Rome à l'époque républicaine [The Scipios: Family and Power in Rome During the Republican Era] (in French). Bordeaux: Ausonius Éditions. ISBN 978-2-35613-073-0.
- Goldsworthy, Adrian (2004). In the Name of Rome: The Men Who Won the Roman Empire. London: Phoenix. ISBN 978-0-7538-1789-6.
- Goldsworthy, Adrian (2006) [2000]. The Fall of Carthage: The Punic Wars 265–146 BC. London: Phoenix. ISBN 978-0-304-36642-2.
- Hau, Lisa (2016). Moral History from Herodotus to Diodorus Siculus. Edinburgh: Edinburgh University Press. ISBN 978-1-4744-1107-3.
- Hoyos, Dexter (2003). Hannibal's Dynasty: Power and Politics in the Western Mediterranean, 247–183 BC. London; New York: Routledge. ISBN 978-0-203-41782-9.
- Hoyos, Dexter (2015) [2011]. A Companion to the Punic Wars. Chichester, West Sussex: John Wiley & Sons. ISBN 978-1-1190-2550-4.
- Hoyos, Dexter (2015b). Mastering the West: Rome and Carthage at War. Oxford: Oxford University Press. ISBN 978-0-19-986010-4.
- Jones, Archer (1987). The Art of War in the Western World. Urbana: University of Illinois Press. ISBN 978-0-252-01380-5.
- Koon, Sam (2015) [2011]. "Phalanx and Legion: the 'Face' of Punic War Battle". In Hoyos, Dexter (ed.). A Companion to the Punic Wars. Chichester, West Sussex: John Wiley & Sons. pp. 77–94. ISBN 978-1-1190-2550-4.
- Kunze, Claudia (2015) [2011]. "Carthage and Numidia, 201–149". In Hoyos, Dexter (ed.). A Companion to the Punic Wars. Chichester, West Sussex: John Wiley & Sons. pp. 395–411. ISBN 978-1-1190-2550-4.
- Lago, José Ignacio (2013). La batalla de Zama 202 a.C.: derrota de Aníbal por Escipión y final de la 2 Guerra Púnica [The Battle of Zama 202 B.C.: The Defeat of Hannibal by Scipio and End of the Second Punic War] (in Spanish). Madrid: Almena. ISBN 978-84-92714-63-6.
- Lazenby, John (1996). The First Punic War: A Military History. Stanford, California: Stanford University Press. ISBN 978-0-8047-2673-3.
- Lazenby, John (1998). Hannibal's War: A Military History of the Second Punic War. Warminster, Wiltshire: Aris & Phillips. ISBN 978-0-85668-080-9.
- Liddell Hart, B. H. (1976). A Greater Than Napoleon: Scipio Africanus. New York: Biblo and Tannen. ISBN 978-0-8196-0269-5.
- Little, William; Onions, C. T., eds. (1962). The Shorter Oxford English Dictionary on Historical Principles. Vol. 2. Oxford: Clarendon. OCLC 123700679.
- Miles, Richard (2011). Carthage Must be Destroyed: The Rise and Fall of an Ancient Civilization. London: Penguin. ISBN 978-0-14-101809-6.
- Mineo, Bernard (2015) [2011]. "Principal Literary Sources for the Punic Wars (Apart from Polybius)". In Hoyos, Dexter (ed.). A Companion to the Punic Wars. Chichester, West Sussex: John Wiley & Sons. pp. 111–128. ISBN 978-1-1190-2550-4.
- Ñaco del Hoyo, Toni (2015) [2011]. "Roman Economy, Finance, and Politics in the Second Punic War". In Hoyos, Dexter (ed.). A Companion to the Punic Wars. Chichester, West Sussex: John Wiley & Sons. pp. 376–392. ISBN 978-1-1190-2550-4.
- Purcell, Nicholas (1995). "On the Sacking of Carthage and Corinth". In Innes, Doreen; Hine, Harry & Pelling, Christopher (eds.). Ethics and Rhetoric: Classical Essays for Donald Russell on his Seventy Fifth Birthday. Oxford: Clarendon. pp. 133–148. ISBN 978-0-19-814962-0.
- Rawlings, Louis (1996). "Celts, Spaniards, and Samnites: Warriors in a Soldier's War". Bulletin of the Institute of Classical Studies. Supplement. The Second Punic War: A Reappraisal. London: Institute of Classical Studies/Oxford University Press. 2 (67): 81–95. JSTOR 43767904.
- Rawlings, Louis (2015) [2011]. "The War in Italy, 218–203". In Hoyos, Dexter (ed.). A Companion to the Punic Wars. Chichester, West Sussex: John Wiley & Sons. pp. 299–319. ISBN 978-1-1190-2550-4.
- Roberts, Mike (2017). Hannibal's Road: The Second Punic War in Italy 213–203 BC. Pen & Sword: Barnsley, South Yorkshire. ISBN 978-1-47385-595-3.
- Sabin, Philip (1996). "The Mechanics of Battle in the Second Punic War". Bulletin of the Institute of Classical Studies. Supplement (67): 59–79. JSTOR 43767903.
- Scullard, Howard H. (2006) [1989]. "Carthage and Rome". In Walbank, F. W.; Astin, A. E.; Frederiksen, M. W. & Ogilvie, R. M. (eds.). Cambridge Ancient History. Vol. VII, part 2 (2 ed.). Cambridge: Cambridge University Press. pp. 486–569. ISBN 978-0-521-23446-7.
- Scullard, Howard H. (2002). A History of the Roman World, 753 to 146 BC. London: Routledge. ISBN 978-0-415-30504-4.
- Shutt, Rowland (1938). "Polybius: A Sketch". Greece & Rome. 8 (22): 50–57. doi:10.1017/S001738350000588X. JSTOR 642112. S2CID 162905667.
- Sidwell, Keith C.; Jones, Peter V. (1998). The World of Rome: An Introduction to Roman Culture. Cambridge: Cambridge University Press. ISBN 978-0-521-38600-5.
- Taylor, Michael J. (2019). "Reconstructing the Battle of Zama". Classical Journal. 114 (3): 310–329. doi:10.5184/classicalj.114.3.0310. S2CID 165792330.
- Walbank, F. W. (1990). Polybius. Berkeley, California: University of California Press. ISBN 978-0-520-06981-7.
- Zimmermann, Klaus (2015) [2011]. "Roman Strategy and Aims in the Second Punic War". In Hoyos, Dexter (ed.). A Companion to the Punic Wars. Chichester, West Sussex: John Wiley & Sons. pp. 280–298. ISBN 978-1-405-17600-2.
_-_Glyptothek_-_Munich_-_Germany_2017.jpg.webp)
