Introduction

This repair guide was authored by the iFixit staff and hasn’t been endorsed by Google. Learn more about our repair guides here.

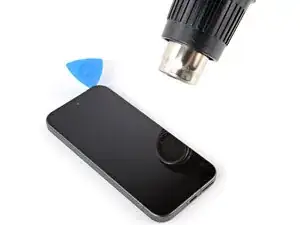
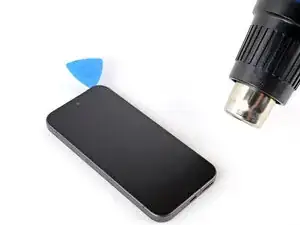
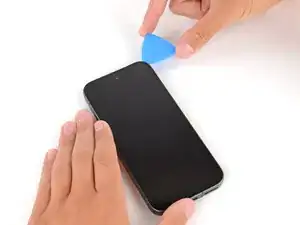
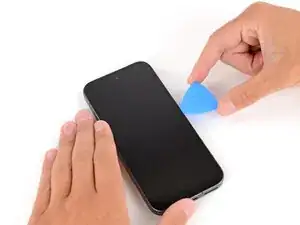
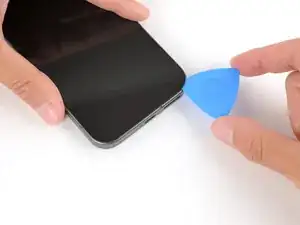
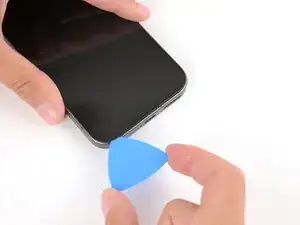
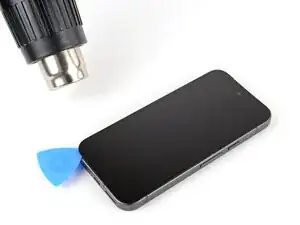
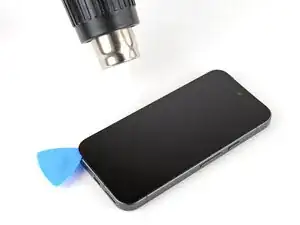
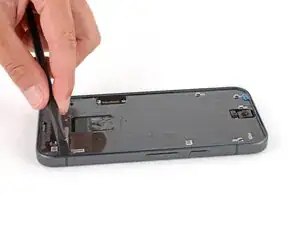
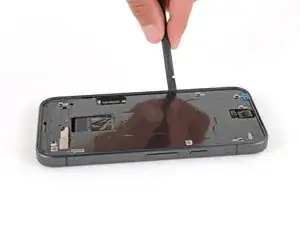
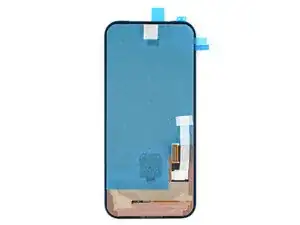
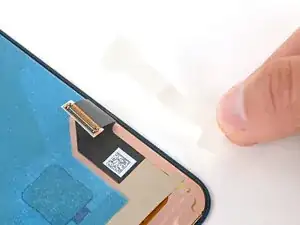
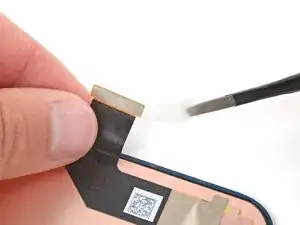
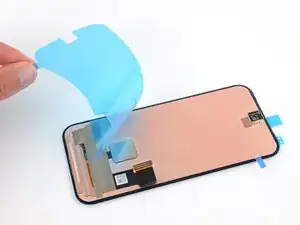
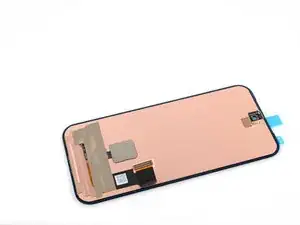
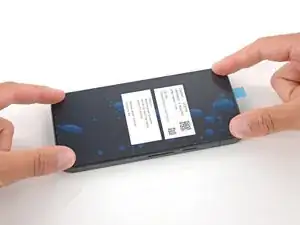
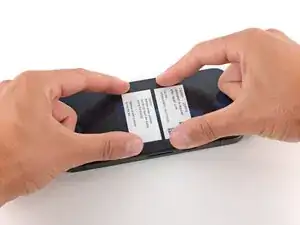
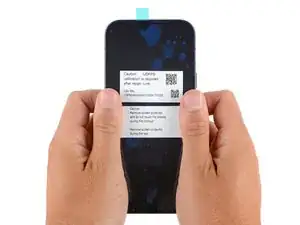
Follow this guide to replace a cracked, broken or non‑responsive screen on your Google Pixel 9a smartphone.

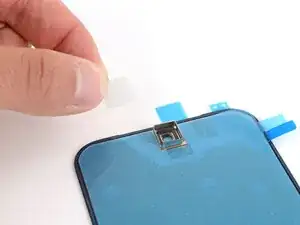
If your screen doesn't come with adhesive pre‑installed, you'll need replacement screen adhesive to complete this repair.

Note: Any repair can compromise the water resistance of your phone. Retaining water resistance after the repair depends on how accurately the new adhesives are applied and how clean the mating surfaces are.

  1. LTilkVoaHyOYJQoP
    LTilkVoaHyOYJQoP
    DDba2IYvihnIWjP6
    • Let your Pixel's battery drain below 25% before starting this repair. A charged lithium‑ion battery may catch fire if damaged.

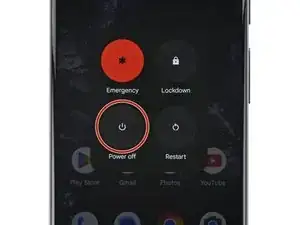
    • Unplug all cables and completely power down your phone.

  2. KAKlhgQSkR3XBOgk
    KAKlhgQSkR3XBOgk
    GjCFTFql1mV2Bwpg
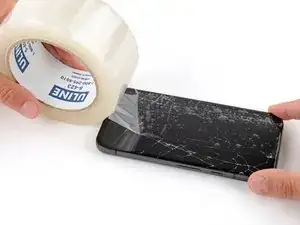
    • Glass shards can complicate disassembly—or worse, cause injury. If your phone has a cracked screen, follow these steps:

    • Apply overlapping strips of packing tape to the cracked glass until the whole screen is covered—this will allow the suction cup to stick to the screen.

    • Only cover the glass itself—don't stick any tape to the frame.

    • Consider wearing safety glasses to protect your eyes from any glass shaken free during the repair.

  3. EnVxBQNEVFSTuODS
    • The screen adhesive is very strong, requiring significant heat to soften it. If you have difficulty separating the adhesive, reheat the screen and try again.

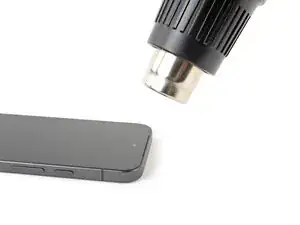
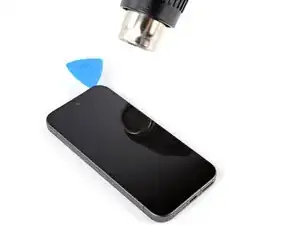
    • Use a hair dryer, heat gun, or hot mat to heat the top edge of the screen until it's almost too hot to touch.

    • Be careful not to overheat the phone—the battery and plastic components are susceptible to heat damage. Stop heating if the frame becomes too hot to touch.

    • If you're using a hot mat, set it to 80° C (176° F) and place your phone screen side down for 10 minutes.

  4. kS6Y2k31RZ5BZbvS
    kS6Y2k31RZ5BZbvS
    WlDSWkaUrNvbrJrJ
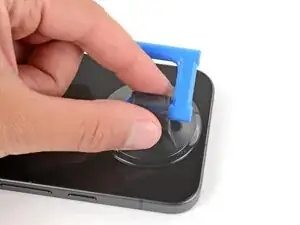
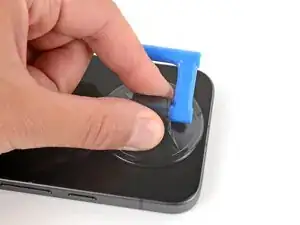
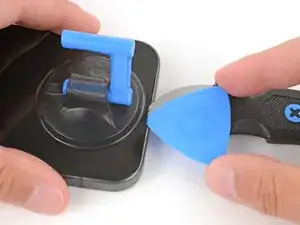
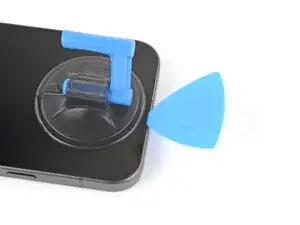
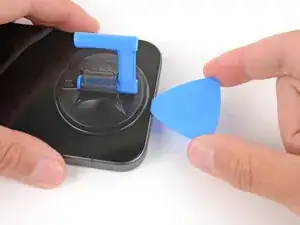
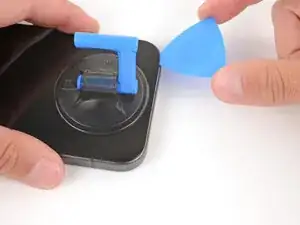
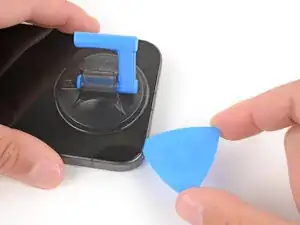
    • Apply a suction handle to the center of the screen's top edge.

  5. YnygNrHYiGMa6Prx
    YnygNrHYiGMa6Prx
    mdSVsAIlUPDWfU5O
    g2WLZ6cYRgGSt4UZ
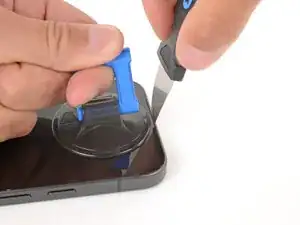
    • Don't insert any tools deeper than 2 mm, or you may damage the front camera.

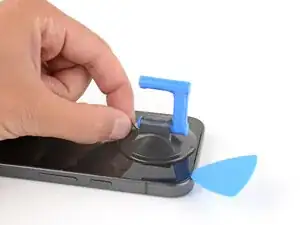
    • Insert the tip of a Jimmy downward into the speaker cutout on the top edge of your phone.

    • If you don't have a Jimmy, you can use another small metal tool. Make sure it's thin and rigid.

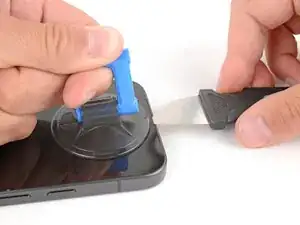
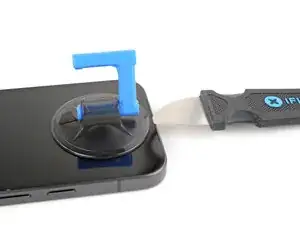
    • Pull up on the suction handle with strong, steady force while lowering the Jimmy until it slides under the screen.

    • Inserting your tool is very difficult. Reheat the screen at any point and try again if it feels stuck.

  6. tkE1gbHLIPGtb1WO
    tkE1gbHLIPGtb1WO
    RNaIibT11nMAvycO
    5rj6pXVQbLSCfJES
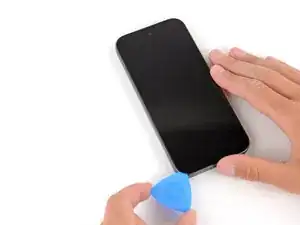
    • Slide the tip of an opening pick under the screen into the gap created by the Jimmy.

    • Remove the Jimmy.

  7. OGtKNjMhCDbSqXAm
    OGtKNjMhCDbSqXAm
    TUVrFPSAEgDw5KBJ
    ihkesV4dV3rXdwnX
    • Remember: Don't insert your pick deeper than 2 mm, or you may damage the front camera.

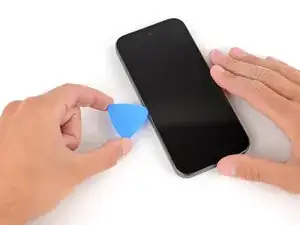
    • Slide your opening pick along the top edge of the screen to separate the adhesive securing it.

    • Leave the pick inserted under the top right corner of the screen to prevent the adhesive from re‑sealing.

  8. SJAMdEk2SKHVfPyA
    SJAMdEk2SKHVfPyA
    FKsDiTyBs3eQlFAY
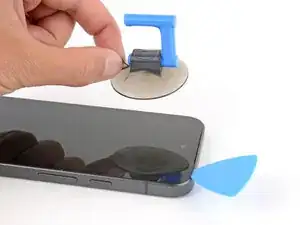
    • Use the small tab to remove the suction handle from the screen.

  9. FrfmWMWDghwJTCZn
    FrfmWMWDghwJTCZn
    TIIsy1Q6BZbsJgSi
    DogAV5mgY15tkhYN
  10. RV3jxaQj5ZkGtvqH
    RV3jxaQj5ZkGtvqH
    TLkwuefxJ33uprms
    1YMYgfhMXZlQ4leq
    • Slide your opening pick down the right edge to separate the adhesive securing it.

    • Leave the pick inserted under the bottom right corner of the screen to prevent the adhesive from re‑sealing.

  11. dHBY4FsxnVLeCHME
  12. E4tPaFHRSCmRlFiX
    E4tPaFHRSCmRlFiX
    LVWa2bGUGiJwpoDH
    • Slide your opening pick along the bottom edge of the screen to separate the adhesive securing it.

    • Leave the pick inserted under the bottom left corner of the screen to prevent the adhesive from re‑sealing.

  13. GuNbwaAtsydoeyZ5
    GuNbwaAtsydoeyZ5
    NkKB5KlM26VjHhd5
    mSdJMkZLv1Rc6CHK
  14. 6go4srXCGLvQFCJd
    6go4srXCGLvQFCJd
    Z2VxH3qXv6vPlHb2
    nMNtXPls6mMfLmK2
    • Be careful not to insert your pick too far near the center of the left edge, or you may damage the screen cable.

    • Slide your opening pick up the left edge to separate the adhesive securing it.

  15. XN4nZC2Prd6YxZ2J
    XN4nZC2Prd6YxZ2J
    cq5pe1FqtFufRKIE
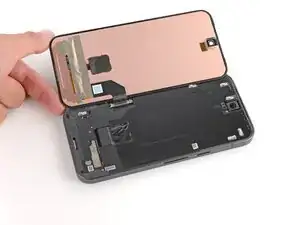
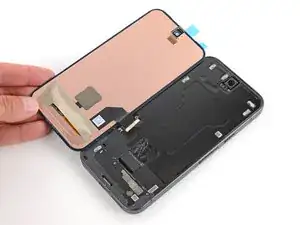
    • Swing the screen over the left edge of your phone (like opening the cover of a book) and lay it down flat.

    • If you feel resistance when lifting the screen, use an opening pick to separate any leftover adhesive.

  16. P6ELNcgDqtjfaTke
    P6ELNcgDqtjfaTke
    UPuYkgaIRYeReIvv
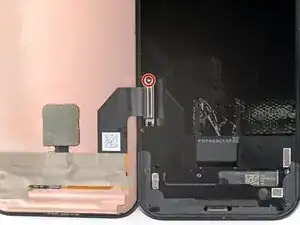
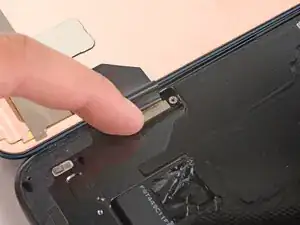
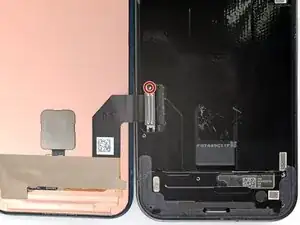
    • The battery is exposed through a small cutout near the screen cable. Be very careful not to damage it with your tools.

    • Use a Torx Plus 3IP screwdriver to remove the 1.7 mm‑long screw securing the cable cover screw.

  17. vgpSXn13CdKChHN6
    vgpSXn13CdKChHN6
    ioRiDSQt4sfCq4Sg
    maIfqGht2rAXrf1W
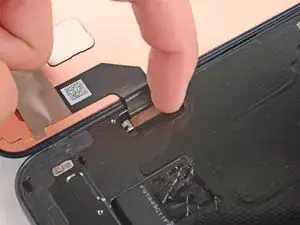
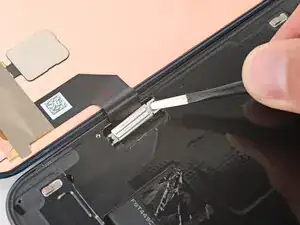
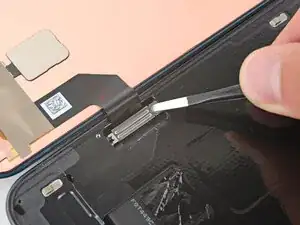
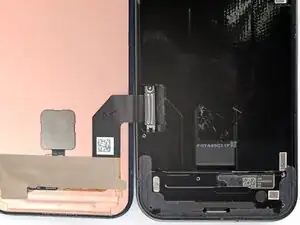
    • Use tweezers or your fingers to lift and remove the cable cover.

  18. BUb1QZWe3go3Eh61
    BUb1QZWe3go3Eh61
    I2C1aovSkoM2PtRm
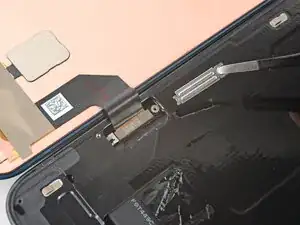
    • Remember: The battery is exposed through a small cutout near the screen cable. Be very careful not to damage it with your tool.

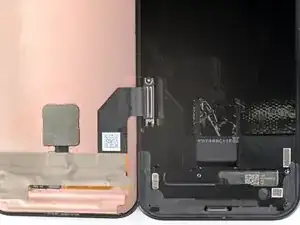
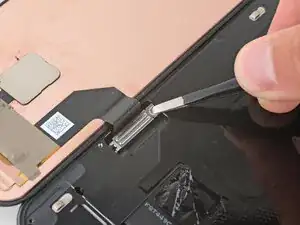
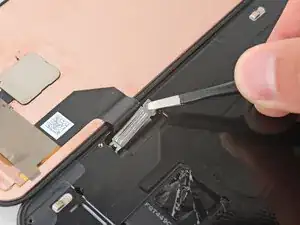
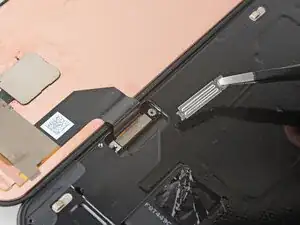
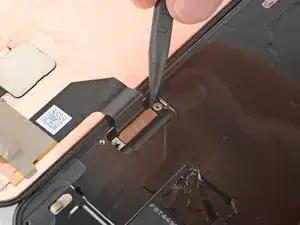
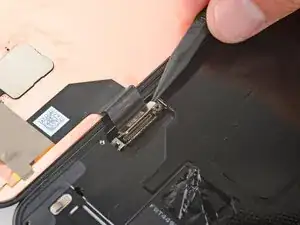
    • Use the point of a spudger to pry up and disconnect the screen press connector from its top left corner.

  19. FeT6w6n2oFP4SWt3
    • Remove the screen.

  20. rytVFuxjQHm2Ikgs
    • Congratulations on completing disassembly! The remaining steps will show how to reassemble your phone.

  21. U2SBRUSRZhMMDkXF
    U2SBRUSRZhMMDkXF
    rSZC1NaLS4tPCf1B
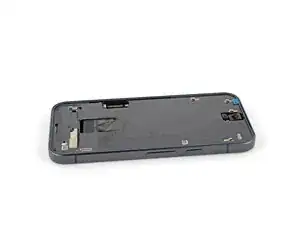
    • Take your time during this step. A clean frame allows replacement adhesive to lay totally flat, ensuring a better bond.

    • Use a spudger and tweezers to scrape up and remove any screen adhesive from the perimeter of the frame.

    • Most of the adhesive should have stayed on the screen during removal, so there may not be any adhesive to remove.

    • Using some high‑concentration (>90%) isopropyl alcohol and a lint‑free cloth (or coffee filter), clean the areas of the frame where the adhesive was.

    • Be careful not to damage the silver foam pads around the perimeter of the phone.

    • Wait for any alcohol to dry completely before continuing.

  22. ge1MHrJdVENsjcj4
    ge1MHrJdVENsjcj4
    GxGhTtJm1TJrtFvd
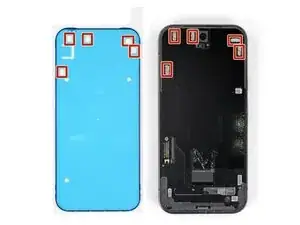
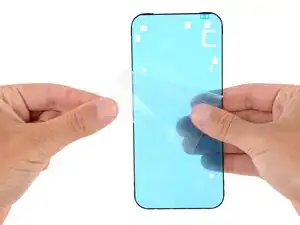
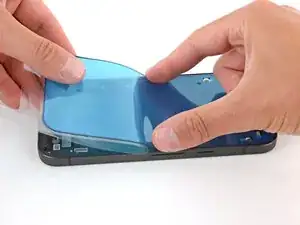
    • Check if your replacement screen comes with adhesive pre‑installed around its perimeter. If it does, skip down six steps. If it doesn't, follow the next six steps to install new screen adhesive on the frame.

    • Before applying the screen adhesive, make sure you know how it will sit on the frame. If you apply the adhesive incorrectly, you'll need to restart with new adhesive.

    • Hold the adhesive above the frame to find its orientation. Use cutouts in the liner to help visualize how it will lay in the frame.

    Where to find such an adhesive film as none was delivered with my replacement screen?

    Julien Chevalier -

  23. OgPMFT3YSrLpVFWm
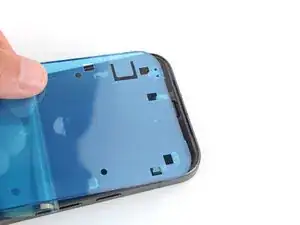
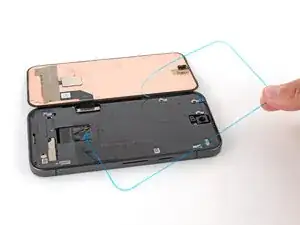
    • Peel down the top half of the large, clear liner to expose the adhesive—don't fully remove the liner yet.

  24. rPp21HDWTHXSqa5J
    rPp21HDWTHXSqa5J
    IK1cSKwfHC1PPP45
    PLXQvuDwnxdmSSK4
    • Take your time aligning the adhesive with the frame—it's very sticky and can't be moved after you apply it.

    • With the larger, clear liner folded towards the bottom of the phone, lay the exposed top edge of the adhesive onto the frame.

    • Use the lip of the frame to help align the adhesive.

    • Once the top edge is properly aligned, gently press down on the top corners with your fingers to secure the adhesive.

  25. urHcQyqIjZvf1K1H
    urHcQyqIjZvf1K1H
    bYbZwEKFICEoOGDy
    pI4CC4GKOdbvV2TO
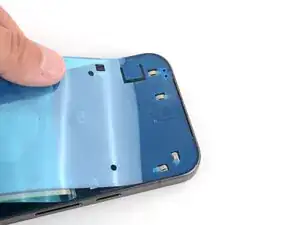
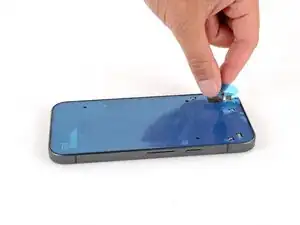
    • Slowly lay the rest of the adhesive onto the frame, pressing it into place and peeling away the larger liner as you go.

  26. iIxAMWqYlENutgas
    iIxAMWqYlENutgas
    DhGIpqZqoMVhLwDN
    KaYhrU2T45PTArAx
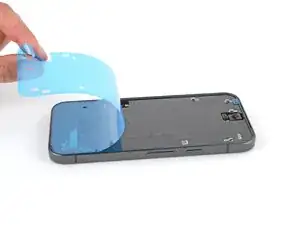
    • Use the pull tab to remove the large, colored liner.

  27. mAdOpxKRVoQfsRTN
    mAdOpxKRVoQfsRTN
    DKZTcruOyKIYUsac
    3DfEyXYRFh5BbxQK
    • Use a spudger to press down firmly on the screen adhesive around the perimeter of your phone to secure it to the frame.

  28. a5hOeHZx6HU1K6i4
    a5hOeHZx6HU1K6i4
    mbNjluLjlAaxDh3p
    ImSDxDcYjhn2YmTv
    • Your replacement screen has various protective liners and pieces of tape on the underside that must be removed before installing the screen. Your screen may have different pieces in different locations, so make sure to check carefully!

    • Tape may be covering the front camera and holding the screen cable in place.

    • There may be multiple protective liners covering the bottom of the screen.

    • Do not remove any of the liners from the screen adhesive around the perimeter yet.

  29. PnJkApaZhwYmUkaA
    PnJkApaZhwYmUkaA
    OjygfkqIweqbSScV
    dheH2QdjDTR6FGlQ
    • Use your fingers to carefully remove any tape from the front camera cutout and screen cable.

    • If there's tape covering the top of the connector, use tweezers to remove it. Be careful not to pull on or tear the screen cable.

  30. KhdAKKxKgi1QkuDG
    KhdAKKxKgi1QkuDG
    2eK4dvWMHME25RIO
    CvpbQNMfRqqKkOKJ
    • Carefully remove any liners covering the bottom of the screen.

    • The exposed copper underside of your Pixel's screen is very fragile. Even a small scratch or dent can damage the screen underneath. Be very careful not to touch it with your tools during the remainder of your repair.

  31. WcgLhnaBySujVpXb
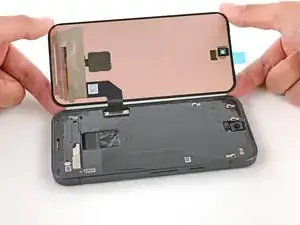
    • Carefully lay your replacement screen display‑side‑down just to the left of your phone so you can reconnect the cable.

  32. ZgYYyytM6AbM3wj6
    ZgYYyytM6AbM3wj6
    kWSVqvynyDc1VGfq
    • Align the screen press connector over its socket and gently press down with your finger—first on one of the short sides, then on the other—until the connector clicks into place.

    • Now is a good time to test your phone before sealing it up. Power it on and check that it works. Power it back down before you continue reassembly.

  33. 2VlhUNpRX6xCFmOq
    2VlhUNpRX6xCFmOq
    L14nKub2EEgH2VOH
    2fPfm1xsprfUIuLX
    • Hook the bottom edge of the screen cable cover into its cutout and lay the cover into place.

  34. 6omOprwKPBPKhYn3
    6omOprwKPBPKhYn3
    Qy4ITOIdMFXOPnCM
    • Remember: The battery is exposed through a small cutout near the screen cable. Be very careful not to damage it with your tools.

    • Use a Torx Plus 3IP screwdriver to install the 1.7 mm‑long screw securing the cover.

  35. ZBxWMDHldkVljlOA
    ZBxWMDHldkVljlOA
    Eva4OH2aylhPNWFy
    K6icGuY1xHDoLKnO
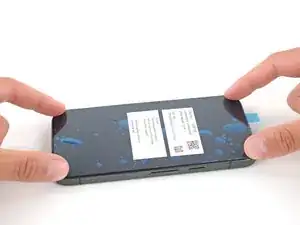
    • Use tweezers or your fingers to remove the final adhesive liner from the perimeter of the screen.

    • If you applied adhesive directly to the frame, remove that remaining liner, holding the screen up out of the way as necessary, without straining the cable.

    • If the adhesive starts to peel up with the liner, check that you’ve pushed all of it into place with your spudger. If it continues to peel up, hold it down with the point of your spudger as you go.

  36. LYNqBUYsyPJ1LqQh
    LYNqBUYsyPJ1LqQh
    skwrHLNHsOm1yyNZ
    RuvIBt16uRQtYbJK
    • Carefully flip the screen over and align it over the frame.

    • Double check that the screen is aligned properly before pressing it into place, otherwise you may damage the screen through the copper backing.

    • Once aligned, press the screen into the frame.

  37. bDHuCbnTPYgLaXUB
    bDHuCbnTPYgLaXUB
    PEm4UAoJS21KBJKw
    KNATWJqJBVEdJTNB
    • Firmly press around the perimeter of the screen to secure the adhesive.

    • You can also hold your phone up and squeeze firmly around the perimeter to strengthen the adhesive bond. For an even more secure bond, lay your phone screen-down on a clean and flat surface underneath a few books overnight.

    • When powering on your phone for the first time:

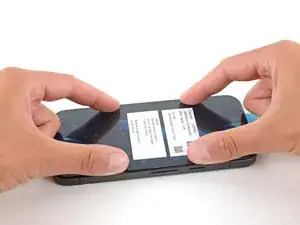
    • Lay the phone camera-side down on a clean, flat surface. Remove the plastic liner from the screen, making sure nothing touches the phone while you do so (fingers, screen protectors, or cases).

    • To calibrate the display’s fingerprint reader, use Google’s Pixel Update and Software Repair tool.

    What does "camera-side down" mean? Both sides of the phone have a camera. I assume this is supposed to mean "screen-side up", but that's not clear to me from the context.

    Evan O -

Conclusion

Congratulations on completing your repair!

To calibrate your display’s fingerprint reader, use Google’s Pixel Update and Software Repair tool.

Take your e-waste to an R2 or e-Stewards certified recycler.

To run a diagnostics test with the built-in Pixel Diagnostic tool, click here.

Repair didn’t go as planned? Try some basic troubleshooting, or ask our Answers community for help.

Spencer Day

Member since: 14/09/22

117606 Reputation

0 comments