Introduction

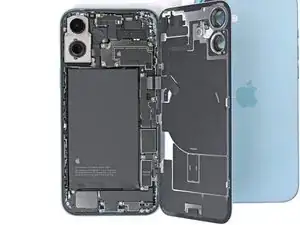
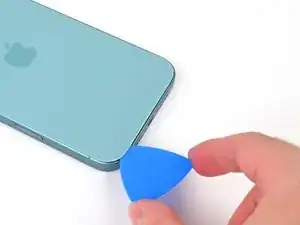
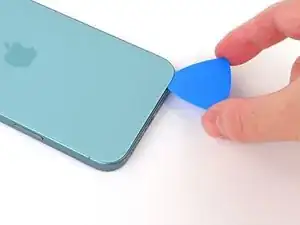
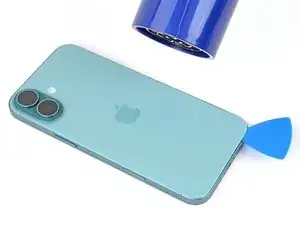
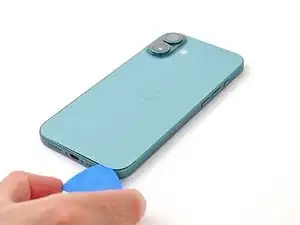
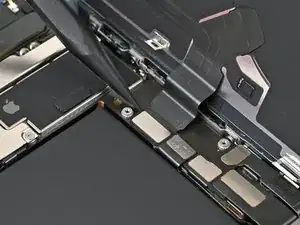
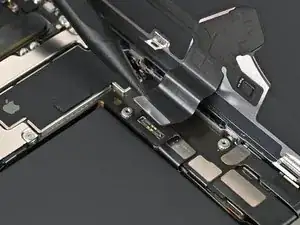
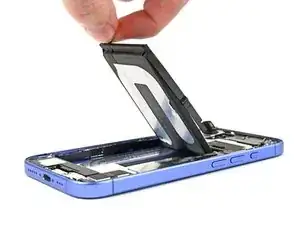
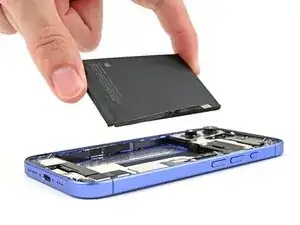
Use this guide to replace the battery in your iPhone 16 Plus.

You'll need replacement back glass and battery adhesive to complete this repair. If your replacement battery does not include adhesive, use stretch release battery adhesive instead.

iPhone batteries are rated to hold 80% of their capacity for up to 500 charge cycles, or roughly 18–24 months. If your iPhone needs to be charged more often or runs slower, it might be time to replace the battery.

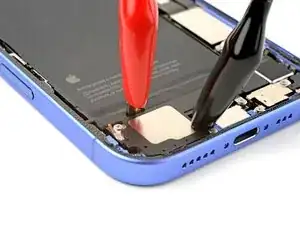
This iPhone uses a battery adhesive that requires an electrical charge to loosen it. Apple's repair manual recommends connecting a 9V battery for 90 seconds, but you can use a power supply or a power bank at a 5–20V output instead—the time required to loosen the adhesive will vary.

The guide below uses our VoltClip with a USB-C Power Delivery (PD) power source. This can either be the FixHub Portable Power Station, a USB-C PD power brick, or some laptops/smartphones. Not all USB-C PD power sources support 12 V (the FixHub Portable Power Station does). If the source doesn't support 12 V, the VoltClip will operate at the next lowest voltage—usually 9 V. This voltage is still sufficient to debond the adhesive. If you're using a different method, follow the guide normally and supplement your power source's operating procedures during the necessary steps.

After completing this repair, you may receive warnings about your replacement part and lose access to battery health data, but your new battery will otherwise work normally. As of iOS 18.1, battery health works with both genuine and aftermarket replacement batteries.

After your repair, run Repair Assistant to reset the battery metrics.

Some photos in this guide are of the non-Plus iPhone 16 and may contain slight visual discrepancies, but they won't affect the procedure.

  1. hbPBaXVZPtwvERPE
    hbPBaXVZPtwvERPE
    Bgrow53isTuoxQB4
    • Allow your phone's battery to drain below 25%, as a charged lithium-ion battery is a potential safety hazard.

    • Unplug any cables from your phone.

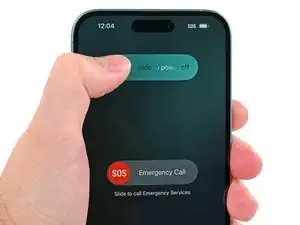
    • Hold the power and either volume buttons and slide to power off your phone.

  2. R2rEXSbbyyNJaQcF
    R2rEXSbbyyNJaQcF
    EtRYJkAafVclWPaG
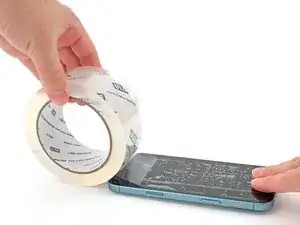
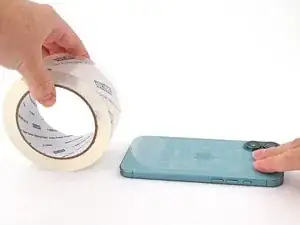
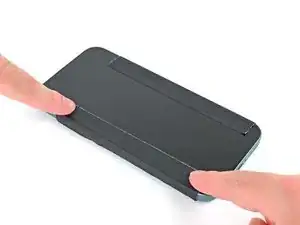
    • If your screen or back glass is badly cracked, lay overlapping strips of packing tape over the glass to protect yourself and make disassembly easier.

    • Make sure there's a smooth area near the bottom edge that's big enough for a suction cup to stick to.

  3. 2L1xyPNHbxcHDGo2
    2L1xyPNHbxcHDGo2
    pHlXkMHcKaCfppXs
    UyUfMfOFG1QtVZl1
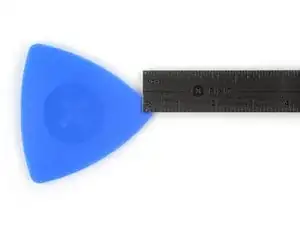
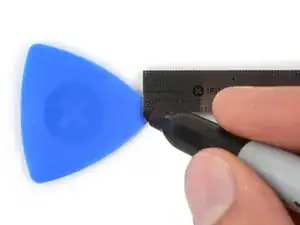
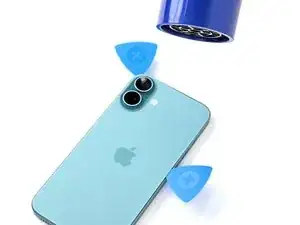
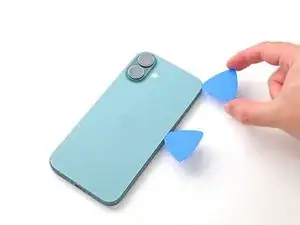
    • If inserted too far, an opening pick can damage your device. Follow this step to mark your pick and prevent damage.

    • Measure 3 mm from the tip and mark the opening pick with a permanent marker.

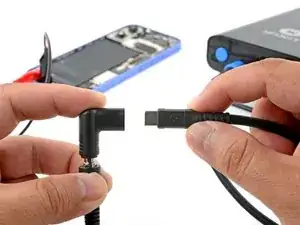
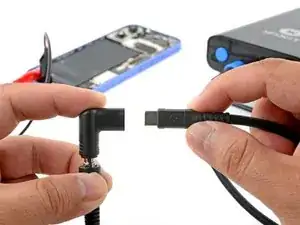
    • You can also mark the other corners of the pick with different measurements.

    • Alternatively, tape a coin to a pick 3 mm from the tip.

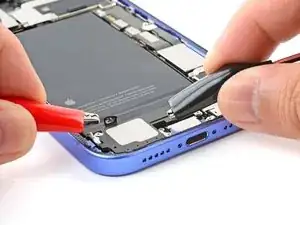
  4. aWWeNTKf1NMVXj2C
    aWWeNTKf1NMVXj2C
    NQGCaiKXR42NUZuR
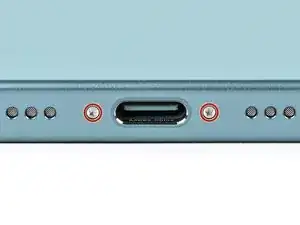
    • Use a P2 pentalobe driver to remove the two 7.7 mm-long screws on either side of the USB-C port.

  5. V6JnHhMjamY4JxNv
    V6JnHhMjamY4JxNv
    piRkAcaAd1BGMtB3
    6oAJFy6AoYU6lNwq
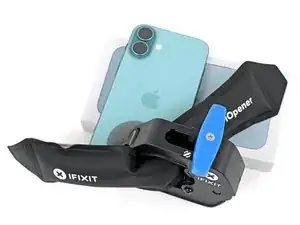
    • The next five steps demonstrate the Anti-Clamp, a tool we designed to make the opening procedure easier. If you aren't using the Anti-Clamp, skip down four steps for an alternate method.

    • For complete instructions on how to use the Anti-Clamp, check out this guide.

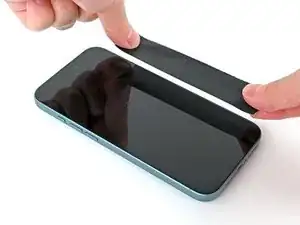
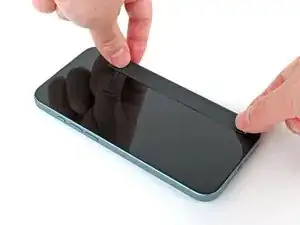
    • The Anti-Clamp applies suction to both the screen and the back glass. To open only the back glass, you need to secure the screen with tape.

    • Cut two strips of tape, apply them along the long edges of the phone, and fold them over the screen to secure it.

    • Make sure the tape is only securing the screen, and not the back glass.

  6. UJLQBZVhyak45qJ6
    UJLQBZVhyak45qJ6
    tqFbtCscGUuKGVVI
    kU3AdZFUjAMcZa5Q
    • Pull the Anti-Clamp's blue handle backward to unlock the arms.

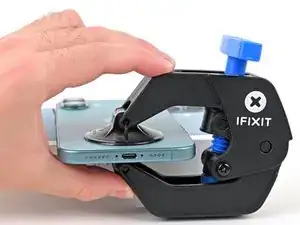
    • With the back glass facing up, slide the arms over the right edge of your phone, with one suction cup on the back glass and the other on the screen. Center the suction cups near the bottom edge.

    • Support your phone so it rests level while between the Anti-Clamp's arms—a small box works well.

    • Squeeze the cups together to create suction.

    • If you find that the surface of your phone is too slippery for the Anti-Clamp to hold onto, use tape to create a grippier surface.

  7. 4F2cda4JM65fAECv
    4F2cda4JM65fAECv
    UaKomqO2J4WXBLYA
    4dhD5vvRK5Tkf3rM
    • Pull the blue handle forward to lock the arms.

    • Turn the handle one full turn (360 degrees) or until the cups start to stretch.

    • As the cups stretch, make sure they stay vertically aligned with each other. If they keep slipping, remove the Anti-Clamp and apply tape for the cups to stick to.

    • If you don't have tape, you may warm up the suction cups to help them stick.

  8. ZCA6MvHT1kIJjxXT
    ZCA6MvHT1kIJjxXT
    rhNCXQYuk2LYfxQm
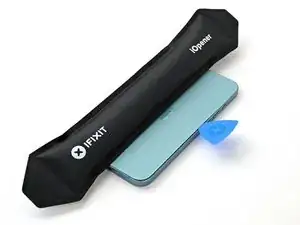
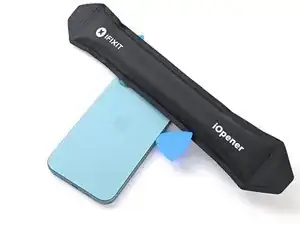
    • Heat your iOpener and apply it to the bottom edge of the back glass for two minutes.

    • Alternatively, you can use a hair dryer or heat gun to heat the bottom edge of the back glass until it's hot to the touch.

    • Be careful not to heat the phone hotter than this—the battery is susceptible to heat damage.

    • Wait up to a minute for the adhesive to separate and a gap to form between the back glass and the frame.

    • If a gap doesn't appear after one minute, apply more heat and rotate the handle a quarter turn. Let the Anti-Clamp do the work for you, repeating this process as necessary.

  9. lOIMjDAUkao4VCmB
    lOIMjDAUkao4VCmB
    IUi4EPBShqHmwxUQ
    LPXZLPBVIFHBtFa6
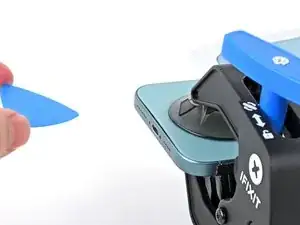
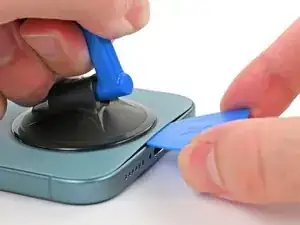
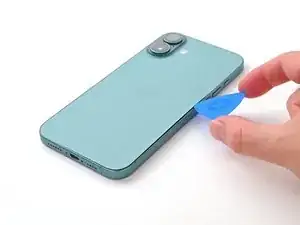
    • Insert the tip of an opening pick into the gap.

    • Remove the Anti-Clamp using the pull tabs on the suction cups.

    • Skip the next two steps.

  10. jUvFgtit6HG5coHE
    jUvFgtit6HG5coHE
    I1ISNbhOYAW64LNb
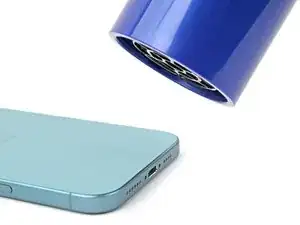
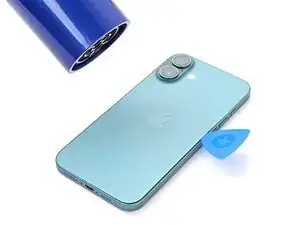
    • Apply a heated iOpener to the bottom edge of the back glass for two minutes.

    • Alternatively, you can use a hair dryer or heat gun to heat the bottom edge of the back glass until it's hot to the touch.

    • Be careful not to heat the phone hotter than this—the battery is susceptible to heat damage.

  11. 1ToETaMTFJHWEQjK
    1ToETaMTFJHWEQjK
    TOxhnHSJC1rB2MKg
    IYcM24kLP5CWQGKw
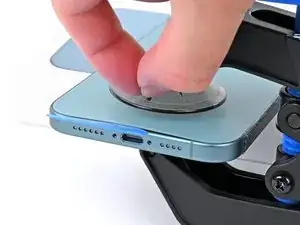
    • Apply a suction handle to the bottom edge of the back glass, above the USB-C port.

    • Pull up on the handle with a strong, steady force to create a gap between the back glass and the frame.

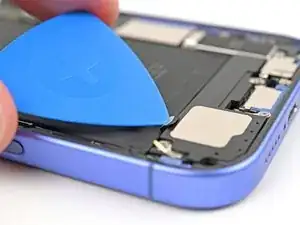
    • Insert the tip of an opening pick into the gap.

  12. xZIU2JMJvpJTnlRO
    xZIU2JMJvpJTnlRO
    N2Yd2oAjLNhWqQ6x
    • As you slice the adhesive securing the back glass in the next steps, be careful of the following areas:

    • There's a delicate cable connecting the back glass to the phone, right next to the volume up button. Don't insert your pick here to avoid slicing the cable.

    • There are multiple spring contacts around the perimeter of the phone. Be extra careful not to insert your pick deeper than suggested in each step to avoid bending these contacts.

  13. AZfeCeeOcwrPKirV
    AZfeCeeOcwrPKirV
    Dee5BQLC4JktOpKB
    GumdFJhHAKNXxM1f
    • Don't insert your pick deeper than 5 mm on the bottom edge to avoid damaging the spring contacts.

    • Slide your pick back and forth along the bottom edge to separate the adhesive.

    • Leave your pick inserted in the bottom right corner to prevent the adhesive from resealing.

  14. M1PPTKqeXxk2uPTd
    M1PPTKqeXxk2uPTd
    Rhd2vrRkjYvNRKRR
    • Apply a heated iOpener to the right edge of the back glass for two minutes.

    • When using a hair dryer or heat gun, heat the back glass until it's hot to the touch.

  15. DacIIpEVt3AxRxTt
    DacIIpEVt3AxRxTt
    GMD1NM1dXrKqAysJ
    wCD5lwggIRQeeFbf
    • Don't insert your pick deeper than 5 mm along the right edge to avoid damaging the spring contacts and ribbon cable.

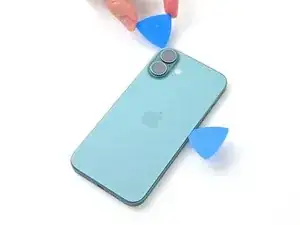
    • Slide your pick around the bottom right corner and slide it halfway up the right edge, or until you feel a hard stop at a clip securing the back glass.

    • Don't slice near the volume buttons to avoid damaging the wireless charging/flash cable.

    • Leave this pick inserted to prevent the adhesive from resealing.

  16. 4k4HlnW4MoMTWIdW
    4k4HlnW4MoMTWIdW
    TE2nGBTnhDakt2Za
  17. MiCeNpanRf2EwNCE
    MiCeNpanRf2EwNCE
    2Cvf3VOCsAZM2C1W
    wRCBkONDC1JJurc1
    • Don't insert your pick deeper than 5 mm along the left edge to avoid damaging the spring contact.

    • Insert a second opening pick at the bottom edge.

    • Slide the second pick around the bottom left corner and along the left edge of the screen to separate the adhesive and release the metal clips.

    • You'll hear and feel the metal clips release as you pass them.

    • Leave this pick inserted at the top left corner to prevent the adhesive from resealing.

  18. 5jhjPP6TwG2HiASm
    5jhjPP6TwG2HiASm
    VvOTqyFWqprkfcTB
    • Apply a heated iOpener to the top edge of the back glass, angled to include the volume buttons, for two minutes.

    • When using a hair dryer or heat gun, heat until it's hot to the touch.

  19. DiX5ie45VLqVIXgp
    DiX5ie45VLqVIXgp
    FySOAAPNQUZEHjWx
    1FSCXREqFlra3qkM
    • Don't insert your pick deeper than 3 mm along the top edge to avoid damaging the spring contacts.

    • Slide your opening pick across the top edge and around the top right corner to the volume up button to separate the adhesive.

    • You should hear and feel clicks as the top two clips release.

  20. qbEVBrt42bN2ZYVp
    qbEVBrt42bN2ZYVp
    a4TEI5HF3vU5JpIx
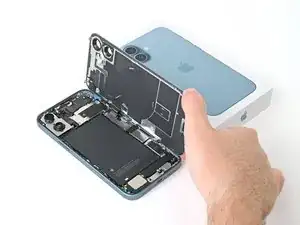
    • Don't try to fully remove the back glass just yet—it's still attached with a delicate ribbon cable. Follow the next few steps to remove it safely.

    • If the back glass doesn't swing open easily, don't force it—go back around the perimeter with your pick to check for missed sections of adhesive or stuck clips.

    • You may need to lift the back glass up slightly before swinging it open to fully disengage the clips.

    • Gently swing open the back glass towards the volume buttons.

    • Support the back glass with a clean, sturdy object like a small box to avoid straining the cable.

    • Remove the opening picks.

  21. 4HCLCbHUX4IiDSOq
    4HCLCbHUX4IiDSOq
    TVogu4cVOxKJoOtU
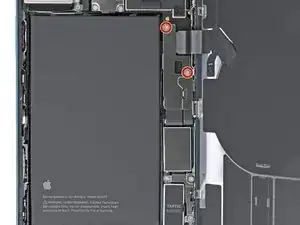
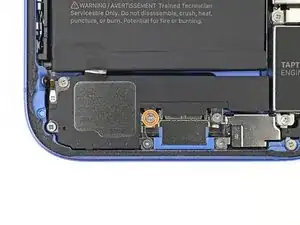
    • Use a tri-point Y000 driver to remove the two 1.3 mm-long screws securing the middle connector cover.

  22. cWoXMMXdxFBBKKa5
    cWoXMMXdxFBBKKa5
    KJ4KVbFKRZAoBO4G
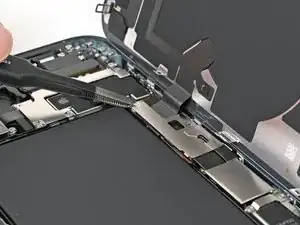
    • Be careful not to dent or puncture the battery during this step.

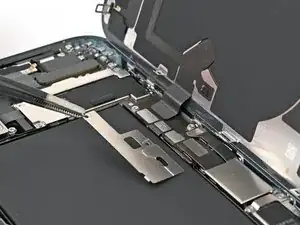
    • Use blunt-nose tweezers or your fingers to slide the cover towards the left edge of the phone and release its hook from its slot on the logic board.

    • Remove the cover.

    • During reassembly, align the hooks over their slots on the logic board. Then, press the cover down and slide it towards the right edge to re-engage the hooks.

  23. cB5SK6xW2npGwtZQ
    cB5SK6xW2npGwtZQ
    iF1BSEsNlEiDrNNo
    UXVDoU6fT4XfOOR6
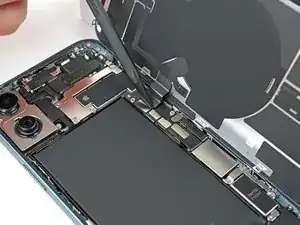
    • Use the point of a spudger to pry up and disconnect the battery press connector.

    • During reassembly, align the connector carefully over its socket and press down with your fingertip or the flat end of a spudger—first on one side, then the other—until it clicks into place. Don't try to force the connector into place. If you're having trouble, reposition it and try again.

  24. BKkFJPBmbj1gPrrJ
    BKkFJPBmbj1gPrrJ
    uiTPT4QfOv2UHuIy
    • Use the point of a spudger to pry up and disconnect the wireless charging coil press connector.

  25. HoygjRdUwIYRINAi
    HoygjRdUwIYRINAi
    1bQCFx5xhHrhGlGs
    • Lift the back glass off the frame and remove it.

    • During reassembly:

    • This is a good point to test your repair before sealing up your phone. Temporarily reconnect the battery and back glass (before replacing the adhesive), power on your phone, and make sure it works as expected. Power it back down, disconnect the battery, and continue reassembly.

    • Use this guide to reapply adhesive and install your back glass.

  26. LaU6s32cFXEi2WPc
    LaU6s32cFXEi2WPc
    nIZEOCSCfiilNoCP
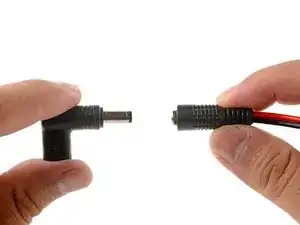
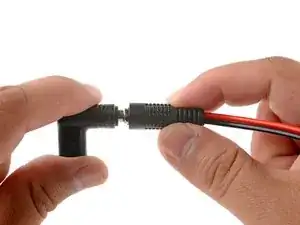
    • Plug the VoltClip's barrel connector into the USB-C elbow.

    • Don't connect the VoltClip to a power source just yet. The loose alligator clips may accidentally touch each other and cause an electrical short.

  27. 2QwDP1nNyyYBhu5J
    2QwDP1nNyyYBhu5J
    LI5DAWfaKQJ4TJMZ
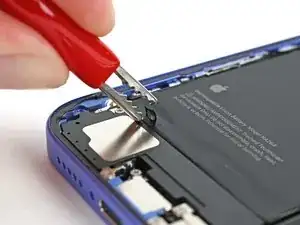
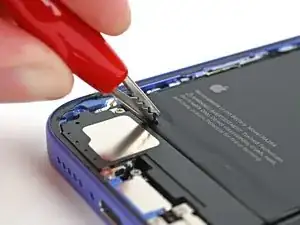
    • Use a clean fingernail or an opening pick to peel up the silver tab at the bottom edge of the battery.

  28. ULWCDSmo1HCgtW6g
    ULWCDSmo1HCgtW6g
    wNLkhVMFRF5Z6YRg
    • Attach the red alligator clip to the silver tab on the battery.

  29. lmON1u1uWuECHOFM
    lmON1u1uWuECHOFM
    SCC2BG3kGvMEEGwL
    JpNiDgeOFRPaAxNI
    • Attach the black alligator clip to the grounding screw.

  30. j3kXQbEWmpIUbt4q
    j3kXQbEWmpIUbt4q
    Oe36Gs6WSHEoXOLS
    6BvI6IcZTHJuIATG
    • Make sure the red alligator clip isn't touching any stray metallic surfaces.

    • Connect a powered USB-C cable to the USB-C elbow and wait 90 seconds for the adhesive to loosen.

  31. UFNByBWQFTBQx2HL
    UFNByBWQFTBQx2HL
    jlGeFdZLQVQJw6ZP
    nxSPRZtT5wRxpRAY
    • Disconnect the USB-C cable from the elbow, then disconnect the alligator clips.

  32. fKtX3iRYDahUHjTv
    fKtX3iRYDahUHjTv
    FdJUxmo2jdbjEIiT
    1UgNEeUqB4r3UFIm
    • Your adhesive should be fully loosened at this point. If your battery doesn't budge during the step, reconnect the VoltClip for an additional minute and try again.

    • Grip the silver tab and lift the battery out of the frame.

    • Alternatively, you can use a suction handle to pull the battery out. If the battery doesn't come out easily, don't force it—reconnect the VoltClip for one minute.

Conclusion

To reassemble your phone, follow these instructions in reverse order.

After your repair, run Apple's Repair Assistant. Navigate to Settings  General  About  Parts & Service History, tap Restart & Finish Repair, and follow the onscreen prompts.

Calibrate your newly installed battery after completing this guide.

Take your e-waste to an R2 or e-Stewards certified recycler.

Repair didn’t go as planned? Try some basic troubleshooting, or ask our iPhone 16 Plus Answers Community for help.

Nick Schultz

Member since: 24/03/24

13497 Reputation

0 comments