Introduction

Follow this guide to replace a dead or worn‑out battery in your FixHub Portable Power Station.

  1. BpRu2oW2lUEt2upe
    BpRu2oW2lUEt2upe
    fjYIBOB3VJ43jtTM
    l4sG4aTAeZC2fdtM
    • Let your Portable Power Station's battery drain below 25% before starting this repair. A charged lithium‑ion battery may catch fire if damaged.

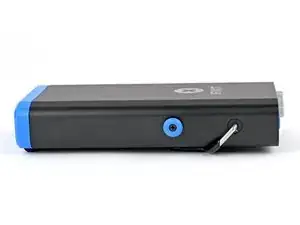
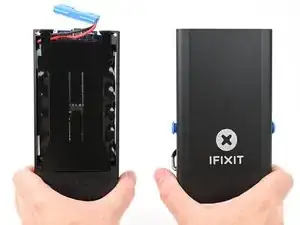
    • Hold down the blue action button for five seconds to shut down your power station.

    • Collapse the kickstand.

  2. GZUYrervSiBhFRlS
    GZUYrervSiBhFRlS
    S4iosjj4nSfCgakR
    • Throughout this repair, keep track of each screw and make sure it goes back exactly where it came from.

    • Use a T10 Torx screwdriver to remove the two 8 mm‑long screws securing the rear cover.

  3. X6k4SSPLDUySEFjE
    X6k4SSPLDUySEFjE
    tQPWUA4nLXQmkjra
    L2GSGFRkhKaVEAwD
    • Grab the rear cover and pull the bottom edge towards you.

    • Remove the rear cover.

    • Don't try to remove the enclosure while the battery is still connected, or you'll damage the battery connector.

    • During reassembly, hook in the top edge of the rear cover first, then press the bottom edge into place.

  4. cFoEkdcnK2SLXgVb
    cFoEkdcnK2SLXgVb
    ocPeqlUwvDTQEIZd
    • To avoid an electrical shock, don't use metal tools to disconnect the battery.

    • Insert the flat end of a spudger into one of the slots on either side of the battery connector. They're shaped just for this!

    • Use the spudger to begin prying up the connector.

    • If it's your first time disconnecting the battery, this may take some force.

  5. 45eQHVI1siOLMChW
    45eQHVI1siOLMChW
    TMx1aTUZs6WjZxBW
    CmaMuoL3hDFGdiXu
    • Repeat the process and pry up on alternating sides of the battery connector to "walk" it off of the two plugs, enough that you can easily grip it with your fingers.

    • You may have to reposition your spudger to fully release the battery connector. Be careful not to damage the board if you pry against it.

  6. UJD4lDjoNhJcFARt
    UJD4lDjoNhJcFARt
    TCeARe2eytxWL5yb
    • Don't try to force the connector off or you might hurt yourself on the metal edges of the enclosure. If the connector doesn't come off easily, continue prying up with your spudger until the connector is loose enough to easily disconnect.

    • Grasp the battery connector by its edges and pull straight up to disconnect it.

  7. TfkHX4NxPwGroGMB
    TfkHX4NxPwGroGMB
    KtDqeKHMABl4EgTx
    NcLHAG1UJIGNWH2Z
    • During reassembly, follow these steps to reconnect the battery:

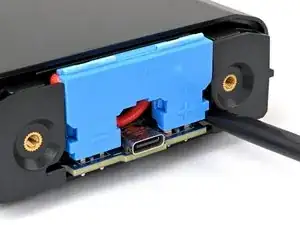
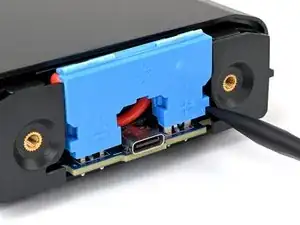
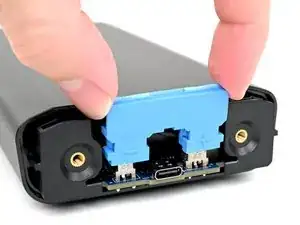
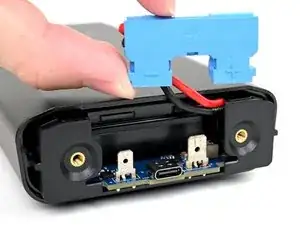
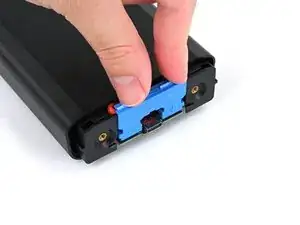
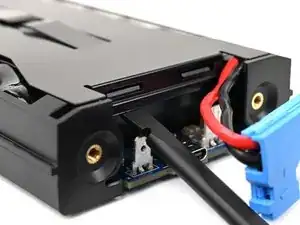
    • Tuck the wires behind the connector, so the side of the connector with positive (+) and negative (-) markings is facing outward.

    • Make sure the wires aren't pinched by the enclosure.

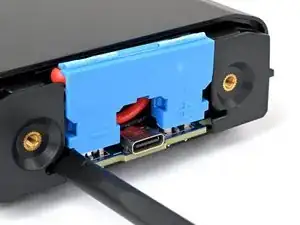
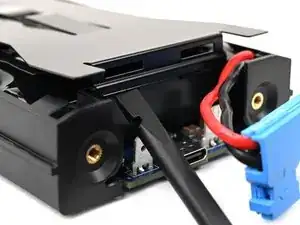
    • Align the connector over its two metal plugs so the negative (-) side is on the left of the USB‑C port and the positive (+) side is on the right.

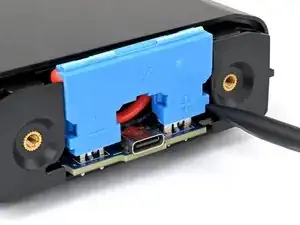
    • Slide the connector onto its plugs and push down firmly until it's fully seated.

  8. LuqFHYx1OkajCHYj
    LuqFHYx1OkajCHYj
    lKmqNTDfZOnQab6N
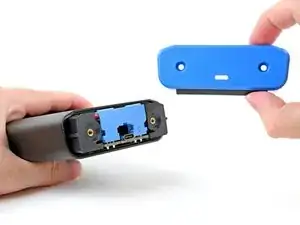
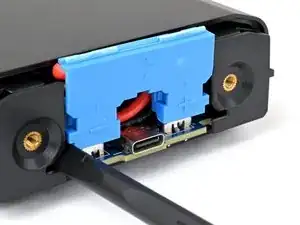
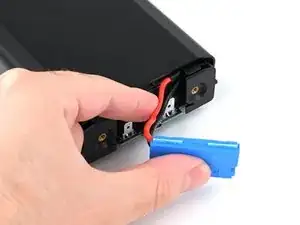
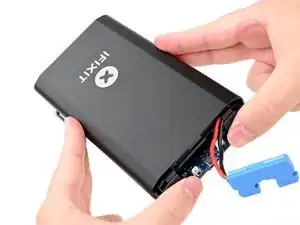
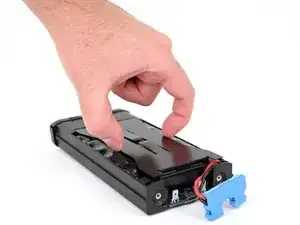
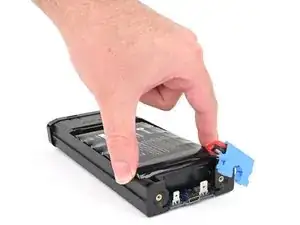
    • Place your fingers on the rear cover screw holes and push the chassis slightly out of the enclosure.

  9. rr5Om2YrwgKeQvLv
    rr5Om2YrwgKeQvLv
    jHSOOSaVMdvWjp3I
    QiFjnGmJT6GSNruJ
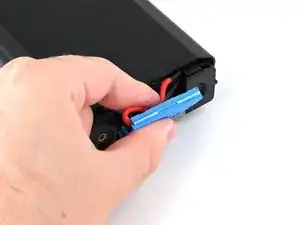
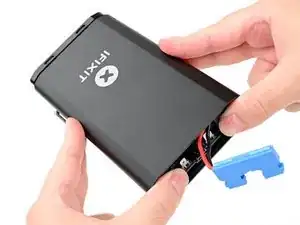
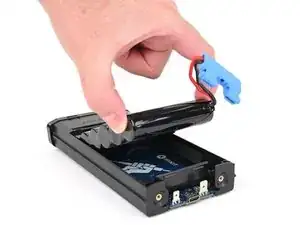
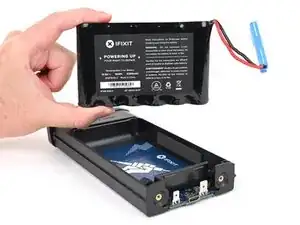
    • Slide the chassis fully out of the enclosure, making sure the battery connector doesn't get snagged.

    • During reassembly:

    • Make sure the battery is disconnected before sliding the chassis into the enclosure. Otherwise, you'll damage the battery connector.

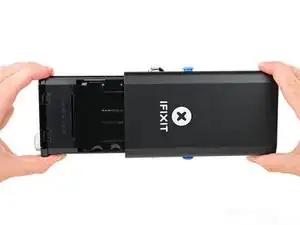
    • Insert the battery connector side of the chassis into the end of the enclosure closest to the kickstand and slide it into place.

  10. agfcrUKY2pWKxt1i
    agfcrUKY2pWKxt1i
    etW1NCVhZQRJQBXs
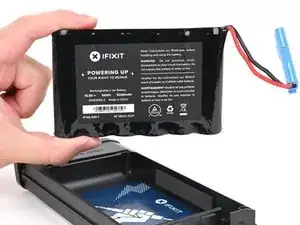
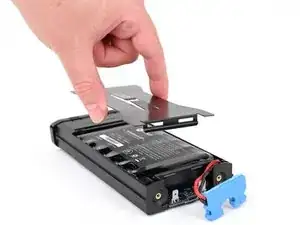
    • Use the flat end of a spudger or a clean fingernail to pry up the edge of the metal battery cover closest to the battery connector.

  11. Lhi6w45lArptgDIR
    Lhi6w45lArptgDIR
    r31R1YMLeRqdMEcx
    pFN54HnZZPeRFrKA
    • The battery cover locks the battery in place. Once removed, the battery becomes free to fall out of the power station.

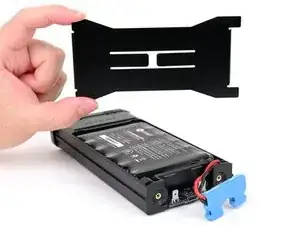
    • Remove the metal battery cover.

    • During reassembly:

    • Hook the short edge of the cover without cutouts into place at the front, near the display.

    • Firmly press down on the opposite edge of the cover until it clips into place.

    • Make sure the battery cover doesn't pinch the battery cables—they should be routed under the cover and angled inward.

  12. Sp6MEZfxAtRcweTt
    Sp6MEZfxAtRcweTt
    QTXI6mNxORRaPvIu
    OnxcaCcmH3WUOCsH
    • Remove the battery.

    • During reassembly, don't reconnect the battery until after the enclosure is installed, or you'll damage the battery connector when everything goes back together.

Conclusion

To reassemble your Portable Power Station, follow these instructions in reverse order.

Calibrate your newly installed battery after completing this guide.

Take your e-waste to an R2 or e-Stewards certified recycler.

Repair didn’t go as planned? Try some basic troubleshooting, or ask our Answers community for help.

Nick Schultz

Member since: 24/03/24

13497 Reputation

0 comments