Introduction
If this switch does not work properly, the machine will permanently indicate a missing drip tray. Replacing the Cherry D44X switch is quite simple.
These instructions may also help with other Melitta models and with coffee makers from Nivona, Siemens, and Miele—they have a very similar design.
Note: it is also possible that only the carrier plate of the microswitch is no longer properly engaged. Tilt the machine so that you can see the base plate. See if the carrier plate is clamped with two catches. If not, open the machine and press the switch firmly until it locks into place. It may have to be replaced.
Tools
Parts
-
-
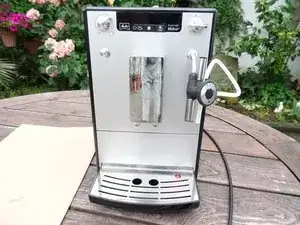
Remove the water tank and drainage tray.
-
Remove the side cover and remove the brewing unit.
-
Remove all coffee beans.
-
-
-
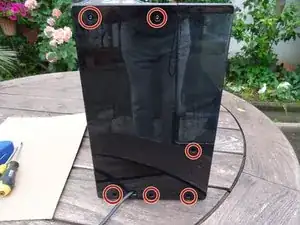
Unscrew and remove six Torx T10 on the rear.
-
Lever the rear cover off. It will most likely be quite stuck and you will need to apply some force. You must use plastic lever tools to prevent damaging the cover.
-
-
-
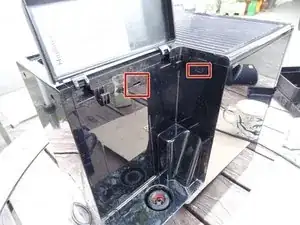
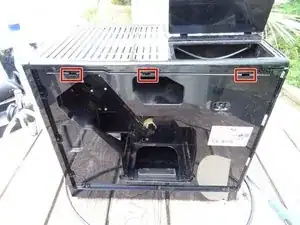
Press carefully into the slits on the sides using a minus screwdriver or a flat metal spatula, to release the clasps on the upper surface. These may be well tight and you have to use some force.
-
You should have created a separation between the upper surface and side panels. Now lever the upper covering away using a plastic tool. This may be quite stuck and you may apply some force.
-
-
-
Place a plastic tool in the crack between front panel and left side panel and widen it. Then push the side panel to the back. The side panel will be quite stuck and you may apply some force to do this.
-
Remove the hose from the water tank to the pump.
-
Remove the side panel.
-
-
-
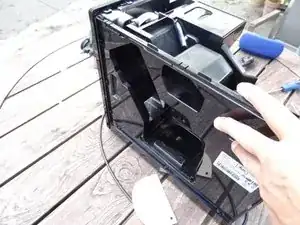
Place a plastic tool into the crack between the front panel and the right side panel and widen it. Then push the side panel to the back. This may be quite stuck and you may need to apply some force.
-
Remove the side panel.
-
-
-
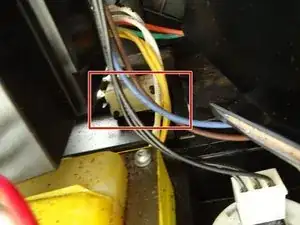
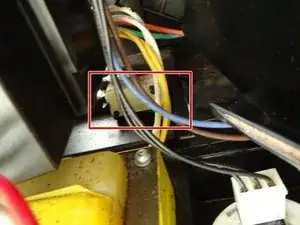
The micro switch is a little bit hidden behind cables. It is held by latches.
-
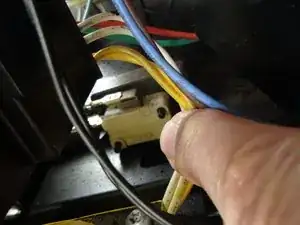
Push the cables aside, loosen the catches with a metal spudger and take the switch out.
-
Note how the cables are connected, disconnect the flat plugs and replace the switch.
-
Follow the the steps in reverse order to reassemble your device.
7 comments
bei meiner Maschine muss ich die Schale 3-4 mal rausnehmen / einsetzten damit sich das Signal von „dauerhaft an“ auf „blinkend“ einstellt, deutet das daraufhin das der mikroschalter getauscht werden sollte. Übrigens, danke für das tolle Tutorial ..lg Tom bei meiner Maschine muss ich die Schale 3-4 mal rausnehmen / einsetzten damit sich das Signal von „dauerhaft an“ auf „blinkend“ einstellt, deutet das daraufhin das der mikroschalter getauscht werden sollte. Übrigens, danke für das tolle Tutorial ..lg Tom
Hey guys, gibt es noch eine Art wie die Maschine "sieht" dass die Tropfschale voll ist? Grüße Ben
Ben -
Hello, I tried to replace the dip tray switch. It seems to work now, but I think I reassembled it back wrongly.
Now, after coffee is grinded, it falls down to a dip tray directly, also, water is being sucked but no hose is filled with coffee and nothing comes out. The main heating unit is super hot but does not provide coffee or water further.
Any idea what can be causing that? All places stick and fit back together.
All water hoses are attached, the only thing I did was to remove two cables from the dip tray switch and I put them back, it seems to work well.
Follow the way of the water, somewhere it seems to be clogged. Pull off the hose on the pump and try to get some water (Caution!!). Does it flow? Pull off the hose on other side of the heater and blow into it - does the air get through? Same procedure for the flowmeter. Good luck!
VauWeh -

bei meiner Maschine muss ich die Schale 3-4 mal rausnehmen / einsetzten damit sich das Signal von „dauerhaft an“ auf „blinkend“ einstellt, deutet das daraufhin das der mikroschalter getauscht werden sollte. Übrigens, danke für das tolle Tutorial ..lg Tom
Hans-A Shole -
Problem ist behoben, Schalter getauscht, Position des Schalters ist bei der Caffeo Solo 950 sehr gut erreichbar. Alter Schalter konnte auch wieder gangfähig gemacht werden und dient nun als Ersatz.
Hans-A Shole -