Introduction

Use this guide to remove or replace the right speaker in an Early 2020 MacBook Air.

  1. 4a1VSQBgdQXAZah2
    • Before starting this procedure, you should disable your Mac's Auto Boot feature. Auto Boot powers on your Mac when you open the lid, and may be accidentally triggered during disassembly. Use this guide to disable Auto Boot.

    • If your MacBook is running Big Sur v11.1 or later, disabling Auto Boot may not work. You can proceed normally, but make sure to disconnect the battery as soon as you're inside.

    • Completely power off and unplug your MacBook Air before you start. Close the display and flip the entire laptop upside-down.

    • Use a P5 driver to remove the following screws:

    • Two 7.9 mm screws

    • Two 7.1 mm screws

    • Six 2.6 mm screws

    • Throughout this repair, keep track of each screw and make sure it goes back exactly where it came from to avoid damaging your MacBook.

    P5 is also a PL4 (so confusing) - i like the wiha 26764 thanks to @mayer for this post. P5 pentalobe and 1.2 pentalobe screwdriver

    greg -

  2. 4Kra6VLGEa3eGmd6
    4Kra6VLGEa3eGmd6
    n2KBoBfiUOZCO63H
    t3JGRsWcjgyPKFRl
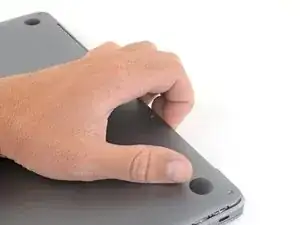
    • Wedge your fingers between the display and the lower case and pull upward to pop the lower case off the Air.

    • Remove the lower case.

    • To reinstall the lower case:

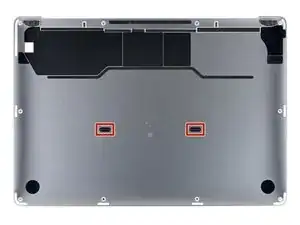
    • Set it in place and press firmly to engage the two hidden clips underneath. You should feel and hear them snap into place.

    When reassembling, the “snaps” are in the middle of the laptop (from top to bottom), and just to the left and right of center. I assumed it was near the hinge so it took a bit for me to hear the snaps.

    Laurie McCall -

    Laurie, the two clips are outlined in the third photo of step two. Hope this helps—happy fixing!

    Carsten Frauenheim -

    What tool kit should I use for this?

    Lucas Lee -

    the second picture is m1 air right?

    the antenna cable position does not match later picture

    Paul -

  3. xVJrmDjjKX3L1VEp
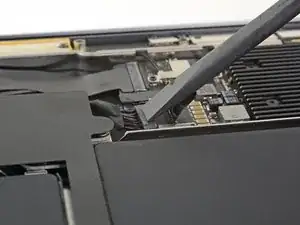
    • Peel back the tape covering the battery connector enough to reveal the connector underneath.

    This image is incorrect correct for the A2179 EMC 3302 model, also doesn’t match the next image in this guide

    Steven Friar -

    There is other guide for the model you reffer to, I was using that one until i realize it was different, this is the one you are looking for: MacBook Air 13" Retina Late 2020

    Marco Rojas -

    I initially thought the image was incorrect, but I was just looking for the connector in the wrong place. This picture IS correct for the A2179 EMC 3302. Note that the connector is on the left side of the heat sink (the black thing with parallel ridges in the picture and on the computer), and the connector wires gather together towards the left the side of the computer, not the back. Note that "left side" assumes the Air is upside-down, with the hinge on the side farthest away from you (I'm not doing the "right speaker is on the left side because it's upside-down" thing that iFixit does in step 5).

    Bryan Gillson -

    How do you find out if you have a Retina Late or Retina Early model?

    Inji E -

  4. NZT3TL4hoGyeLE6L
    NZT3TL4hoGyeLE6L
    XZ2jGZmJoO1c5OHn
    • Use a spudger to slide the battery connector parallel to the logic board and out of its socket on the logic board.

    It’s stuck can’t get it out

    Jeansceem Jeansceem -

  5. tk6HDG1MsKIfjLsa
    tk6HDG1MsKIfjLsa
    aWUlmkcaWdQyoVaj
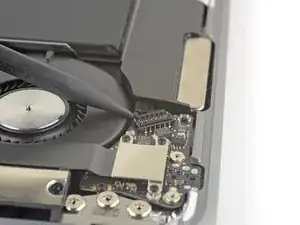
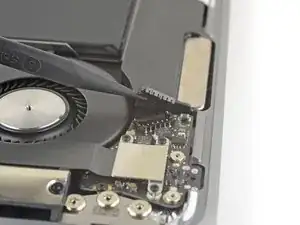
    • The right speaker will be on your lefthand side when working on the MacBook, as it's laying upside down.

    • Slide the pointed end of a spudger underneath the right speaker cable and pry straight up to disconnect it from the audio board.

  6. KTKxVtNigaWUgaOU
    • Use a T3 Torx driver to remove the 4.2 mm screw securing the right speaker to the case.

    In case you get your screws mixed up...the "speaker screws" are longer because they go through the speaker AND the battery. The battery screws are shorter and only go through the battery (the speaker rests on top of the screw).

    Yes, the instructions mention the length of the screw but it's not totally obvious. And, you CAN use a long screw as the battery screw - but then the short screw won't be long enough for the threads to "catch" after you put in the speaker. You'll then have to remove the speaker again to switch screws (hope you used removable adhesive!) or you can't affix the battery properly.

    Don't ask me how I learned this...

    Bryan Gillson -

  7. ZbMZNAZIniVpgjrR
    ZbMZNAZIniVpgjrR
    VP2sN3EETUdXfOTI
    4AKm1D6op4BmOoZZ
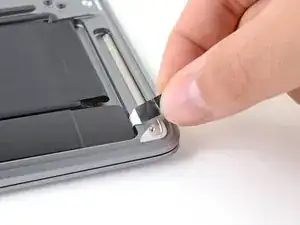
    • Use a pair of tweezers to lift up the black adhesive pull tab at the bottom of the right speaker, enough so you can grab it with your fingers.

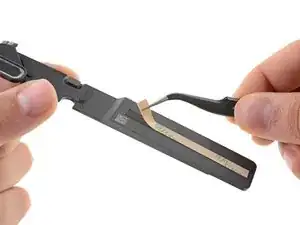
    • Grab the adhesive strip's pull tab and slowly pull the adhesive strip out from underneath the speaker.

    • Keep the angle of the adhesive strip as parallel to the laptop as you can. Try to avoid dragging it across the inside of the case.

    • Pull the adhesive strip until it's freed from under the speaker.

    • If the adhesive strip breaks, use a heated iOpener, a heat gun, or a hair dryer to help remove the adhesive:

    • Apply heat to the speaker to soften the adhesive underneath.

    • Carefully slide a spudger or opening pick underneath the speaker to separate the adhesive.

  8. wZp4MKOqSyvmEVEk
    wZp4MKOqSyvmEVEk
    f31kb5BFVvCED4R2
    • Remove the right speaker.

    • During reassembly, to ensure the speaker performs as expected, install a strip of replacement adhesive on its underside before placing it back into the case.

Conclusion

Compare your new replacement part to the original part—you may need to transfer remaining components or remove adhesive backings from the new part before installing.

To reassemble your device, follow the above steps in reverse order.

Take your e-waste to an R2 or e-Stewards certified recycler.

Repair didn’t go as planned? Check out our Answers community for troubleshooting help.

Carsten Frauenheim

Member since: 10/03/20

130781 Reputation

0 comments