Introduction

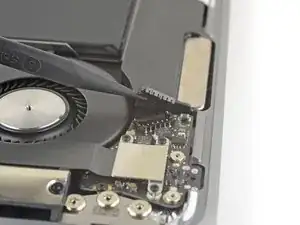
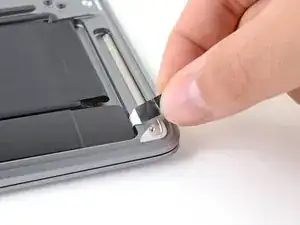
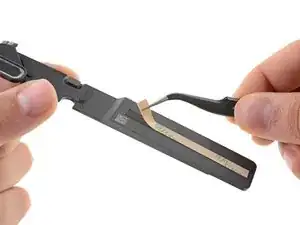
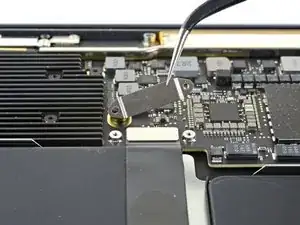
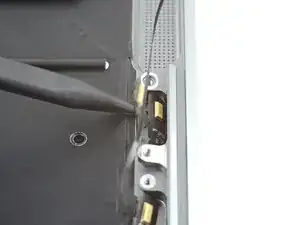
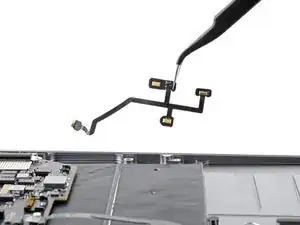
Use this guide to replace the microphone array assembly in an Early 2020 MacBook Air.

To minimize risk of damage, turn on your MacBook and allow the battery to fully discharge before starting this procedure. A charged lithium-ion battery can be very dangerous if accidentally punctured. If your battery looks puffy or swollen, take extra precautions.

Do not reuse the battery if it is swollen or was deformed in any way during the procedure. The battery is likely damaged and can be very dangerous to reuse—it should be replaced.

This guide involves removing the speakers and battery. You will need new adhesive to properly reinstall the speakers and battery.

  1. 4a1VSQBgdQXAZah2
    • Before starting this procedure, you should disable your Mac's Auto Boot feature. Auto Boot powers on your Mac when you open the lid, and may be accidentally triggered during disassembly. Use this guide to disable Auto Boot.

    • If your MacBook is running Big Sur v11.1 or later, disabling Auto Boot may not work. You can proceed normally, but make sure to disconnect the battery as soon as you're inside.

    • Completely power off and unplug your MacBook Air before you start. Close the display and flip the entire laptop upside-down.

    • Use a P5 driver to remove the following screws:

    • Two 7.9 mm screws

    • Two 7.1 mm screws

    • Six 2.6 mm screws

    • Throughout this repair, keep track of each screw and make sure it goes back exactly where it came from to avoid damaging your MacBook.

    P5 is also a PL4 (so confusing) - i like the wiha 26764 thanks to @mayer for this post. P5 pentalobe and 1.2 pentalobe screwdriver

    greg -

  2. 4Kra6VLGEa3eGmd6
    4Kra6VLGEa3eGmd6
    n2KBoBfiUOZCO63H
    t3JGRsWcjgyPKFRl
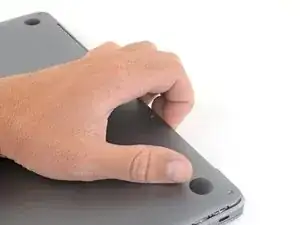
    • Wedge your fingers between the display and the lower case and pull upward to pop the lower case off the Air.

    • Remove the lower case.

    • To reinstall the lower case:

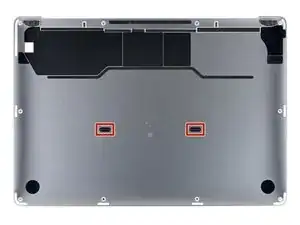
    • Set it in place and press firmly to engage the two hidden clips underneath. You should feel and hear them snap into place.

    When reassembling, the “snaps” are in the middle of the laptop (from top to bottom), and just to the left and right of center. I assumed it was near the hinge so it took a bit for me to hear the snaps.

    Laurie McCall -

    Laurie, the two clips are outlined in the third photo of step two. Hope this helps—happy fixing!

    Carsten Frauenheim -

    What tool kit should I use for this?

    Lucas Lee -

    the second picture is m1 air right?

    the antenna cable position does not match later picture

    Paul -

  3. xVJrmDjjKX3L1VEp
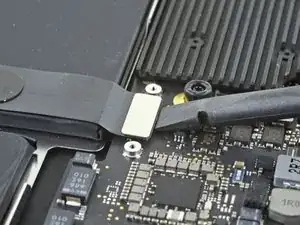
    • Peel back the tape covering the battery connector enough to reveal the connector underneath.

    This image is incorrect correct for the A2179 EMC 3302 model, also doesn’t match the next image in this guide

    Steven Friar -

    There is other guide for the model you reffer to, I was using that one until i realize it was different, this is the one you are looking for: MacBook Air 13" Retina Late 2020

    Marco Rojas -

    I initially thought the image was incorrect, but I was just looking for the connector in the wrong place. This picture IS correct for the A2179 EMC 3302. Note that the connector is on the left side of the heat sink (the black thing with parallel ridges in the picture and on the computer), and the connector wires gather together towards the left the side of the computer, not the back. Note that "left side" assumes the Air is upside-down, with the hinge on the side farthest away from you (I'm not doing the "right speaker is on the left side because it's upside-down" thing that iFixit does in step 5).

    Bryan Gillson -

    How do you find out if you have a Retina Late or Retina Early model?

    Inji E -

  4. NZT3TL4hoGyeLE6L
    NZT3TL4hoGyeLE6L
    XZ2jGZmJoO1c5OHn
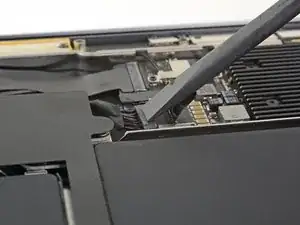
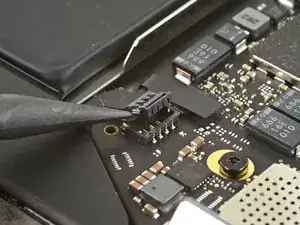
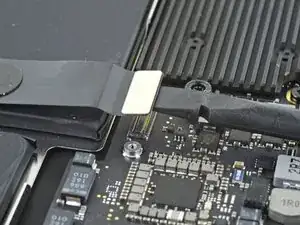
    • Use a spudger to slide the battery connector parallel to the logic board and out of its socket on the logic board.

    It’s stuck can’t get it out

    Jeansceem Jeansceem -

  5. EwtYIa1xOQM1Jo5M
    EwtYIa1xOQM1Jo5M
    pyCnYgUUpiGIGEaI
    jVOpYDlleQvpeJLy
    • The left speaker will be on your righthand side when working on the MacBook, as it's laying upside down.

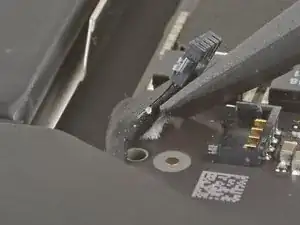
    • Slide the pointed end of a spudger underneath the left speaker cable and pry straight up to disconnect it from the logic board.

    • With the connector disconnected, slide the flat end of a spudger under the cable to separate the adhesive securing the cable to the logic board.

  6. eqOvRkPaVZMqXN3j
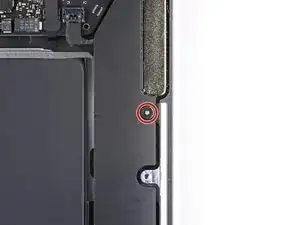
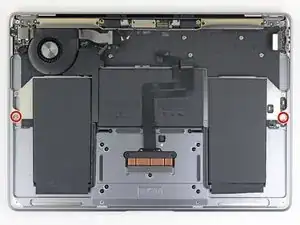
    • Use a T3 Torx driver to remove the 4.2 mm screw securing the left speaker to the case.

    El tornillo es un Torx T3

    Israel Adame -

    This seems to be a T4 screw

    Alex Carlson -

  7. L3GxWZBZUXlMbhck
    L3GxWZBZUXlMbhck
    jCxXOXarScxNAjMP
    XgGBOElANKu2ylOZ
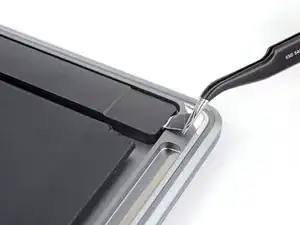
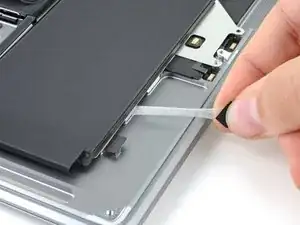
    • Use a pair of tweezers to peel back the black pull tab on the speaker's stretch-release adhesive until you can grip it with your fingers.

    • Grab the adhesive strip's pull tab and slowly pull the adhesive strip out from underneath the speaker.

    • Keep the angle of the adhesive strip as parallel to the laptop as you can. Try to avoid dragging it across the inside of the case.

    • Pull the adhesive strip until it's freed from under the speaker.

    • If the adhesive strip breaks, use a heated iOpener, a heat gun, or a hair dryer to help remove the adhesive:

    • Apply heat to the speaker to soften the adhesive underneath.

    • Carefully slide a spudger or opening pick underneath the speaker to separate the adhesive.

    TIP: Don't keep pulling from the tab like they show in the picture. The adhesive WILL break, and you'll need to do some serious spudging to get the speakers to disengage from the adhesive.

    Instead, start pulling with the tab but stop pulling as soon as it stretches about an inch (2.5cm). Then, grab the white adhesive part close to the speaker and SLOWLY stretch about another inch (so now you have 1 inch stretched from the speaker and another inch dangling past the spot you're holding. Adjust your grip again, back to the speaker side (so you now have 2" dangling) and SLOWLY pull again. Keep doing this, going only an inch before grabbing close to the speaker again. Like the instructions say, go horizontally (parallel to your table) as much as you can.

    Eventually the adhesive will break, but this should get as much off as possible so it's easier to pry off the speaker the rest of the way.

    Bryan Gillson -

  8. UN6fMZXqYxbfRIrt
    UN6fMZXqYxbfRIrt
    SoPFfYBtQTVkpv3i
    • Remove the left speaker.

    • During reassembly, to ensure the speaker performs as expected, install a strip of replacement adhesive on its underside before placing it back into the case.

    I didn't order the Tesa tape. Instead I used 3M Command Strips I had left over from some outdoor hanging hooks. I cut them down to the right size (for the speakers and the batteries) and left a little tab hanging out in case I need to do this process again. For those that aren't familiar, Command Strips also "stretch removable" like the original adhesive in the MacBook. They're designed for hanging things without leaving a mark on the walls (no, I have no relation to 3M - but more people probably have these in a junk drawer somewhere than have double-sided tape).

    Yes, the Command Strips are a little thicker than the original adhesive but the back still went on the MacBook just fine.

    Bryan Gillson -

  9. tk6HDG1MsKIfjLsa
    tk6HDG1MsKIfjLsa
    aWUlmkcaWdQyoVaj
    • The right speaker will be on your lefthand side when working on the MacBook, as it's laying upside down.

    • Slide the pointed end of a spudger underneath the right speaker cable and pry straight up to disconnect it from the audio board.

  10. KTKxVtNigaWUgaOU
    • Use a T3 Torx driver to remove the 4.2 mm screw securing the right speaker to the case.

    In case you get your screws mixed up...the "speaker screws" are longer because they go through the speaker AND the battery. The battery screws are shorter and only go through the battery (the speaker rests on top of the screw).

    Yes, the instructions mention the length of the screw but it's not totally obvious. And, you CAN use a long screw as the battery screw - but then the short screw won't be long enough for the threads to "catch" after you put in the speaker. You'll then have to remove the speaker again to switch screws (hope you used removable adhesive!) or you can't affix the battery properly.

    Don't ask me how I learned this...

    Bryan Gillson -

  11. ZbMZNAZIniVpgjrR
    ZbMZNAZIniVpgjrR
    VP2sN3EETUdXfOTI
    4AKm1D6op4BmOoZZ
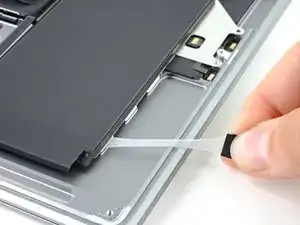
    • Use a pair of tweezers to lift up the black adhesive pull tab at the bottom of the right speaker, enough so you can grab it with your fingers.

    • Grab the adhesive strip's pull tab and slowly pull the adhesive strip out from underneath the speaker.

    • Keep the angle of the adhesive strip as parallel to the laptop as you can. Try to avoid dragging it across the inside of the case.

    • Pull the adhesive strip until it's freed from under the speaker.

    • If the adhesive strip breaks, use a heated iOpener, a heat gun, or a hair dryer to help remove the adhesive:

    • Apply heat to the speaker to soften the adhesive underneath.

    • Carefully slide a spudger or opening pick underneath the speaker to separate the adhesive.

  12. wZp4MKOqSyvmEVEk
    wZp4MKOqSyvmEVEk
    f31kb5BFVvCED4R2
    • Remove the right speaker.

    • During reassembly, to ensure the speaker performs as expected, install a strip of replacement adhesive on its underside before placing it back into the case.

  13. cowqFeLKOlkqKodi
    • Use a T3 Torx driver to remove the two 1.4 mm screws securing the trackpad cable cover.

    These screws are ridiculously tiny. Highly recommend a magnifying glass and maybe an extra light source if you don't have perfect vision or are over 45 years old. Getting them out is easy, putting them back in can be a challenge. Do NOT drop them in a keyboard, on the floor, or in a crevice of the MacBook.

    Bryan Gillson -

    These seem to be T4 acrews

    Alex Carlson -

  14. TmYjOWLiRT5MHsP2
    • Remove the trackpad cable cover.

  15. 1RLMYYeZFVfTCUYJ
    1RLMYYeZFVfTCUYJ
    keQHewb4EFDBe6vU
    • Use the flat end of a spudger to pry the trackpad cable connector up and out of its socket.

  16. woNuhKIW1yFrBoIF
    • Carefully peel the trackpad cable off of the battery.

    • The trackpad cable is secured to the battery with some light adhesive.

  17. PjGOfSFKAflkQDb4
    • Use a T3 Torx driver to remove two 2.5 mm screws securing the battery tray to the case.

  18. mjaGGosdMMFAHE2M
    mjaGGosdMMFAHE2M
    VfXZFHofZBgQxBMs
    Xm2Ghv3ikbWCj3ZZ
    • The MacBook's battery cells are attached to a metal tray as a complete assembly, which is adhered to the case with a total of six stretch-release adhesive strips.

    • Do not attempt to remove the battery cells from their metal backing tray.

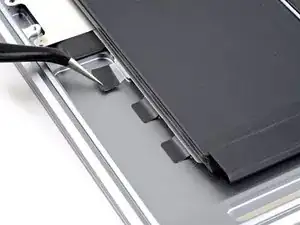
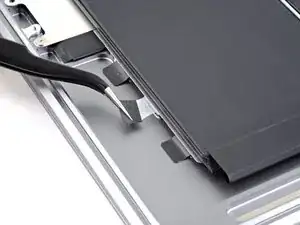
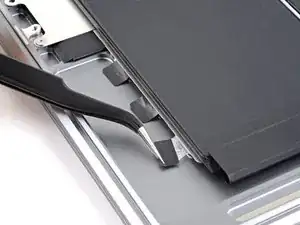
    • On the left side of the MacBook, use a pair of tweezers to peel back the three black pull tabs on the battery's stretch-release adhesive strips until you can grip them with your fingers.

  19. IFV6R5kIZYf62Noq
    IFV6R5kIZYf62Noq
    vKNOVfvpj2gEZaZY
    KfquRssBjdDWeI2P
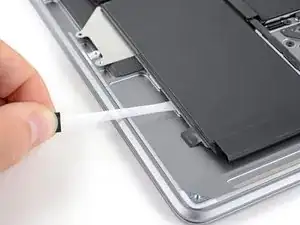
    • Grab an adhesive strip's pull tab and slowly pull it out from underneath the battery.

    • Keep the angle of the adhesive strip as parallel to the laptop as you can. Try to avoid dragging it across the inside of the case.

    • Pull the adhesive strip until it's freed from under the battery.

    • Repeat for the two remaining adhesive strips on the battery's left side.

  20. qOGPNpiLwVXt43V5
    qOGPNpiLwVXt43V5
    pTHHMQiVNvDLFTVM
    JvZ1GG6FZYmIdbpp
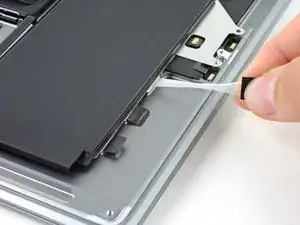
    • Repeat and remove the three adhesive strips from the right side of the battery.

    • If any of the six adhesive strips broke during removal, you can use a plastic card to finish separating the battery tray from the case.

    When replacing the battery and using adhesive on the bottom, make ABSOLUTELY SURE the 4 tiny screw holes ("speaker screws" from step 6 and 10 and "battery tray screws" from step 17) line up properly before the adhesive engages. If the battery tray is just slightly askew it's a complete pain to readjust it so the screws will seat correctly.

    Bryan Gillson -

  21. DuS6neX6DRAH4jks
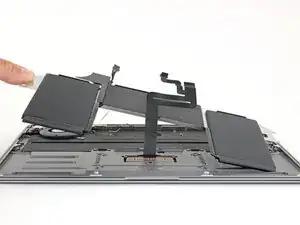
    • Remove the battery assembly.

    • During reassembly, secure the battery tray with strips of Tesa tape if your replacement battery doesn't come with pre-applied adhesive.

    • If you're installing a new battery, follow the calibration procedure:

    • Charge it to 100%, and keep charging it for at least 2 more hours.

    • Unplug and use it normally to drain the battery.

    • When you see the low battery warning, save your work, and keep your laptop on until it goes to sleep due to low battery.

    • Wait at least 5 hours, then charge your laptop uninterrupted to 100%.

    • If you notice any unusual behavior or problems after installing your new battery, you may need to reset your MacBook's SMC.

  22. I4SIov5RlL2unlxA
    I4SIov5RlL2unlxA
    MSldlPsrqCvJIoDI
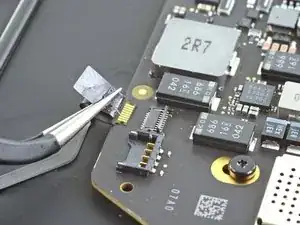
    • Use a pair of tweezers to peel back the tape covering the microphone cable connector.

  23. 2teQ2G5YqAswTB5N
    2teQ2G5YqAswTB5N
    c1VZhsQFeQAYuANk
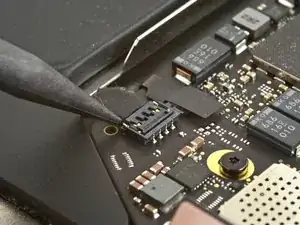
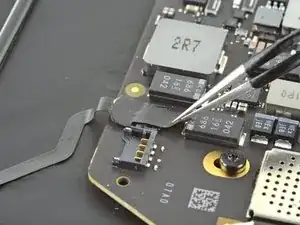
    • Use the pointed end of a spudger to lift up the small locking flap on the microphone cable's ZIF connector.

  24. lGNrTIuUZqRn2BSl
    lGNrTIuUZqRn2BSl
    NYbNCAxo3TROnaxe
    • Slide the microphone cable out of its connector.

    • If possible, grip the cable by the tape, not by the cable itself.

  25. 3cHbmceiOVvlZySJ
    3cHbmceiOVvlZySJ
    gNy642sJ2LAluFSD
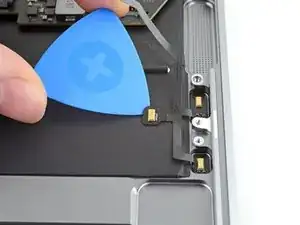
    • Slide an opening pick underneath the microphone cable to separate it from the upper case.

    • The cable is secured with some light adhesive.

    • If the adhesive is stubborn, do not force the pick. Lightly heat the microphone assembly using an iOpener or a hair dryer to soften the adhesive.

  26. UUwKZpH26FPTcjgu
    UUwKZpH26FPTcjgu
    rZOtXJRdLd2XWXG2
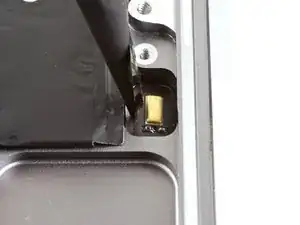
    • Slide an opening pick underneath the microphone closest to the center of the MacBook to slice through the adhesive securing it to the upper case.

    • Lift up to pry the microphone out of its recess in the case.

  27. G1wAXTuMKSSRLZaY
    G1wAXTuMKSSRLZaY
    ChpqWbOXC2sTEdLC
    ZImR6ToLOMHFR5cM
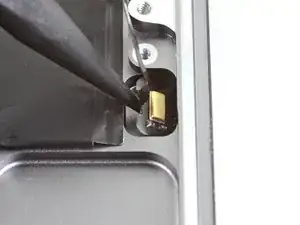
    • Use the pointed end of a spudger to carefully pry one of the remaining microphones out of its recess in the upper case.

    • If the adhesive is stubborn, apply heat to the microphone to soften the adhesive.

    • Don't force the spudger under the microphone or you risk ripping the cable.

    • Remove the third and final microphone from the case.

  28. uN5ZpQmqLKCnJOAe
    • Remove the microphone array.

Conclusion

Compare your new replacement part to the original part—you may need to transfer remaining components or remove adhesive backings from the new part before installing.

To reassemble your device, follow the above steps in reverse order.

Take your e-waste to an R2 or e-Stewards certified recycler.

Repair didn’t go as planned? Check out our Answers community for troubleshooting help.

Carsten Frauenheim

Member since: 10/03/20

130781 Reputation

0 comments