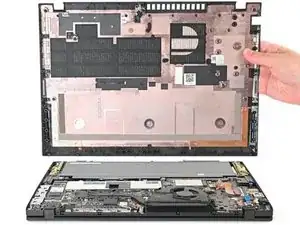
Introduction
Follow this guide to replace the fingerprint reader in your Lenovo ThinkPad T16 Gen 3 laptop.
Before completing this repair, make sure the issue with your current fingerprint reader isn't software compatibility related.
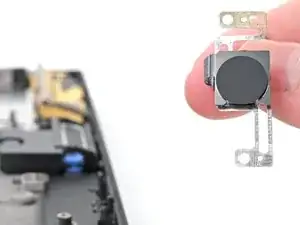
The Lenovo part number for the fingerprint reader is 5F30V26016, 5F30V25983, 5F30V26018, or 5F30V25993, depending on the model. This guide features the first model, but the process is the same for the others.
-
-
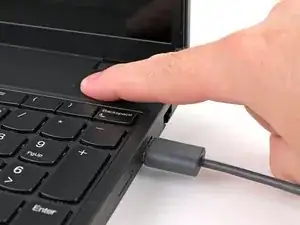
Completely shut down your laptop (don't just put it in sleep mode) and disconnect all cables.
-
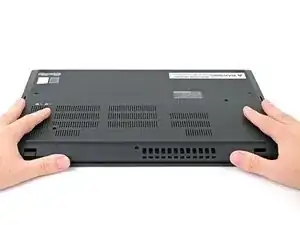
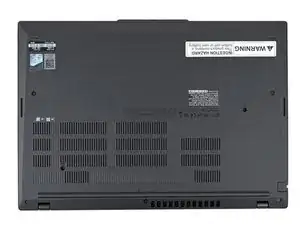
Flip the laptop upside-down, and rotate it so the screen hinge faces towards you.
-
-
-
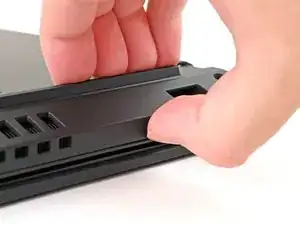
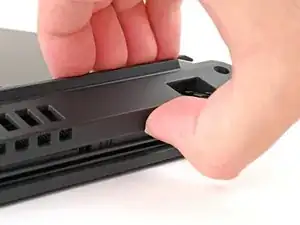
Insert your fingernail or an opening pick into the gap between the base cover and keyboard deck, next to one of the screen hinges.
-
Pry up the base cover until the clips unfasten.
-
-
-
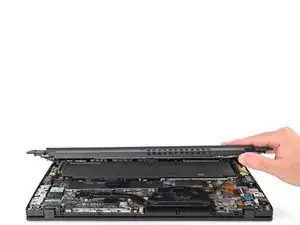
Grasp the base cover along the screen hinge edge and lift slowly to unfasten the remaining clips.
-
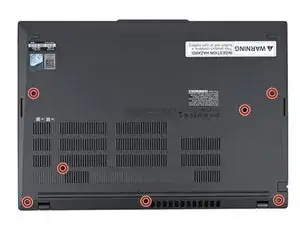
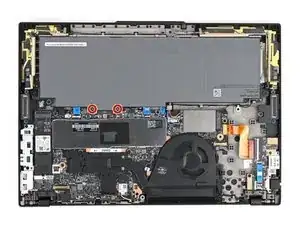
Lift and remove the base cover.
-
-
-
Use a Phillips screwdriver to fully loosen the two captive screws securing the battery connector.
-
-
-
Lift the edge of the battery with the connector to disconnect it.
-
Remove the battery
-
Slide the plastic tabs on the long edge of the battery into their recesses in the frame.
-
Lower the battery into place so the connector goes over its socket.
-
-
-
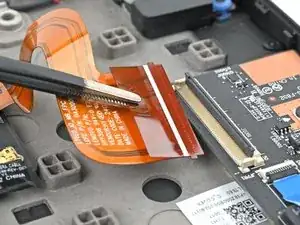
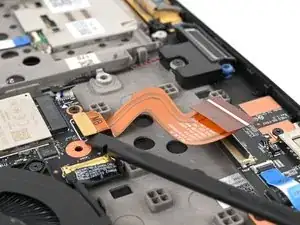
Use a clean fingernail or the flat end of a spudger to flip up the locking flap on the interconnect cable ZIF connector, located on the I/O board.
-
Use tweezers or your fingers to grip the cable's plastic pull tab and gently pull the cable out of its socket.
-
-
-
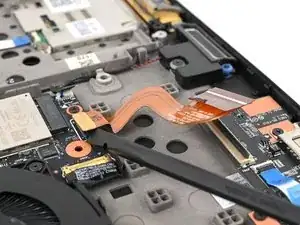
Insert the flat end of a spudger under a short edge of the interconnect cable press connector located on the motherboard and pry up to disconnect it.
-
Remove the interconnect ribbon cable from your laptop.
-
-
-
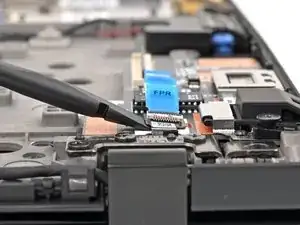
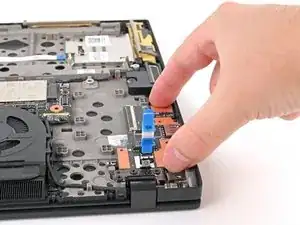
Use your fingernail or the flat end of a spudger to flip up the locking flap on the fingerprint cable ZIF connector, located on the I/O board.
-
Use tweezers or your fingers to grip the cable's plastic pull tab and pull the cable out of its socket.
-
-
-
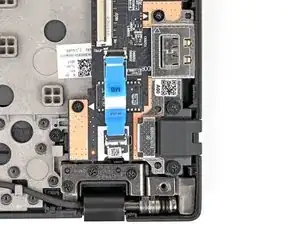
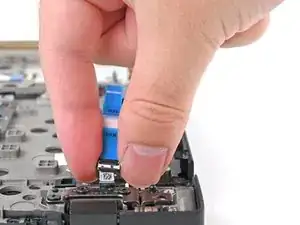
Slide the flat end of a spudger under the PCB on the fingerprint reader cable and pry up to separate the adhesive securing it.
-
-
-
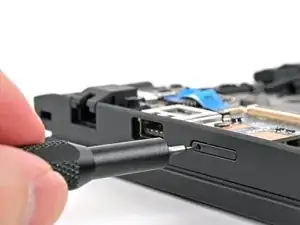
Use a Phillips screwdriver to remove the two 8 mm‑long screws securing the ethernet flap.
-
Use a Phillips screwdriver to remove the 4 mm‑long screw securing the ethernet flap and I/O board.
-
-
-
Use a Phillips screwdriver to remove the two 3 mm‑long screws securing the fingerprint reader.
-


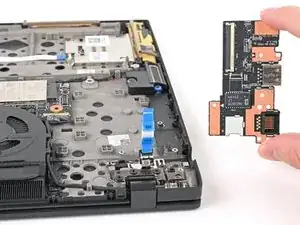


Compare your new replacement part to the original part—you may need to transfer remaining components or remove adhesive backings from the new part before you install it.
To reassemble your device, follow these instructions in reverse order.
Take your e-waste to an R2 or e-Stewards certified recycler.
Repair didn’t go as planned? Try some basic troubleshooting, or ask our Answers community for help.

One comment
Does this work to add a fingerprint reader to a model that didn't originally ship with one?