
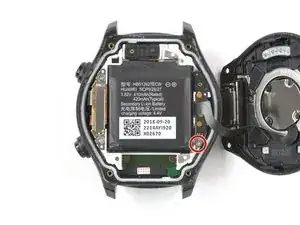
Introduction
Use this guide to replace a worn-out or dead battery in your Huawei Watch 2.
For your safety, discharge your battery below 25% before disassembling your Huawei Watch 2. This reduces the risk of a dangerous thermal event if the battery is accidentally damaged during the repair.
Note: If your battery is swollen, take appropriate precautions.
Note: This guide instructs you to replace only the battery. However, if you want to replace the battery assembly, it’s a different procedure and you can find the appropriate battery assembly guide here. Make sure you have the correct part before starting this guide.
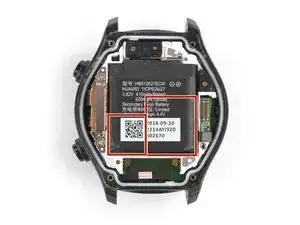
You’ll need replacement adhesive to reattach components when reassembling the device.
-
-
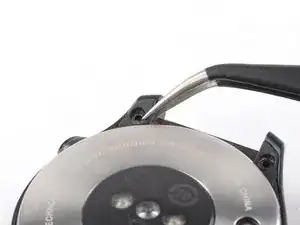
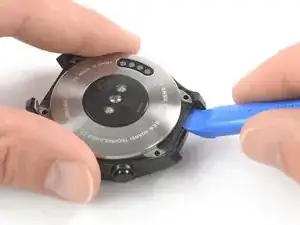
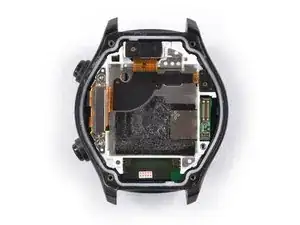
Insert an opening tool into the gap between the back cover and the watch case at the bottom edge of the back cover.
-
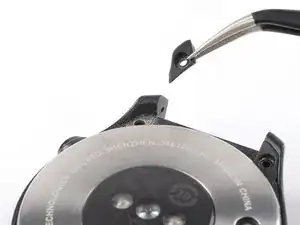
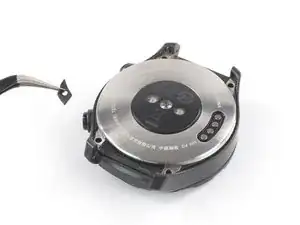
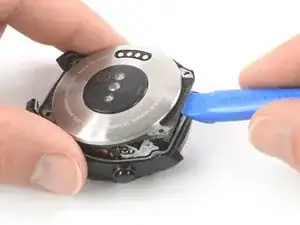
Use the opening tool to pry up the back cover of the Huawei Watch 2.
-
-
-
In order to avoid damage to the flex cables running underneath the battery, only pry in the red marked areas.
-
-
-
Apply a heated iOpener to the screen to loosen the adhesive which is holding the battery in place. Apply the iOpener for at least two minutes.
-
-
-
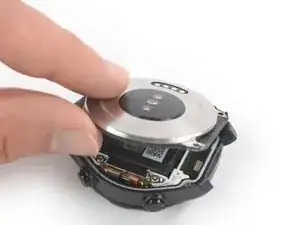
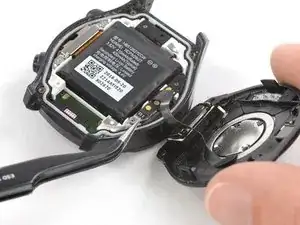
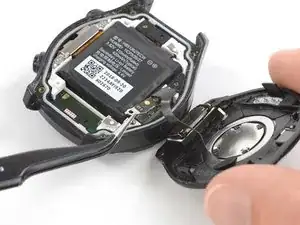
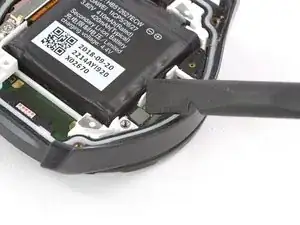
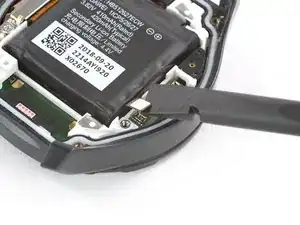
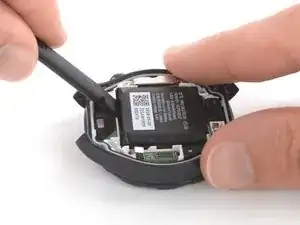
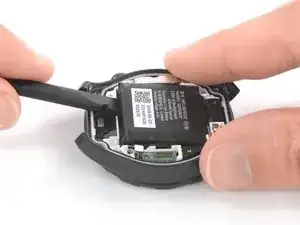
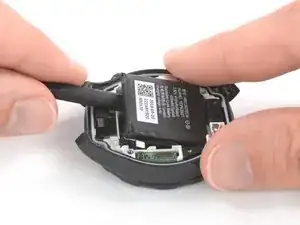
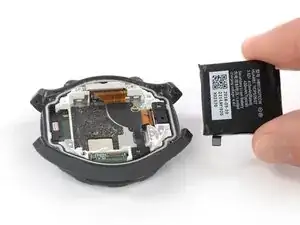
Insert the flat end of a spudger between the bottom edge of the battery and the back cover.
-
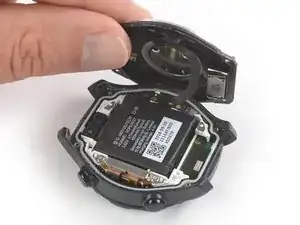
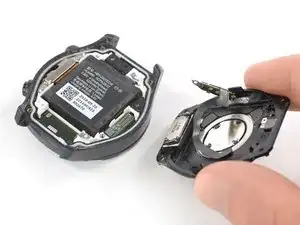
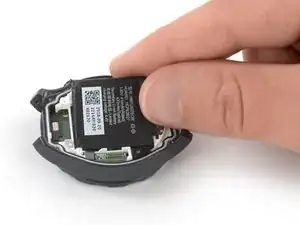
Use the spudger to carefully pry the battery out of its recess.
-


To reassemble your Huawei Watch 2 follow these instructions in reverse.
If possible, turn on your Huawei Watch 2 and test your repair before installing new adhesive underneath the battery and resealing.
For optimal performance, calibrate your newly installed battery: Charge it to 100% and keep charging it for at least 2 more hours. Then use your device until it shuts off due to low battery. Finally, charge it uninterrupted to 100%.
Take your e-waste to an R2 or e-Stewards certified recycler.
Repair didn’t go as planned? Check out our Answers community for troubleshooting help.

17 comments
Do you know what’s the model of the battery? My watch is starting to die really early (it says it’s at 77 but it then quickly drops to 0) and I need to replace it
Trickiest part is getting the heart rate sensor connector back in. There’s a little hook at the end opposite the screw hole that has to be slipped into place before laying the rest of it down. Took a few tries before it got seated. Whole thing took 10-15 mins start to finish.
I wish I had read this comment before following these instructions, this was the only step that was frustrating until i noticed the hook.
Like Richard, I found this the trickiest part of the job. I had not realised there was a very tiny hook and eventually positioned it accurately by luck rather than skill or judgement. I also had difficulty getting the battery connector seated properly and, again, it was by trial and error that I eventually got it attached correctly.
before you begin make sure you have a t2 star screwdriver and hear a drier or something to heat up the battery from top so it will come off easier.
if you in usa you can get one from micro center called Mako Precision bit set it about 38$
but if you just want to do this job you can get from online for about 3$. and one prier flatspudger like the plastic one they sail here
and one tweezer. Without these tools, you cant complete job