Introduction

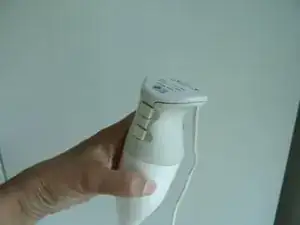
For most repairs the ESGE Magic Wand - Bamix has to be disassembled.

  1. cNmcWxjEySZ2gRpD
    cNmcWxjEySZ2gRpD
    QCjZGctNTeDUvtMq
    IYdEGBQvpsZDRIlU
    • Unplug the power cord and remove the cutter blade.

    • The top cover is fastened with two Torx TR10 security screws. These screws are different from normal Torx screws: they are equipped with a center pin. Use the right bit or screwdriver with center hole.

    • Remove two Torx TR10 screws.

    • Carefully lift off the cover. It is latched at the front.

  2. oaNH1XUgEkDNNIGo
    oaNH1XUgEkDNNIGo
    djaAvCDgTjVLdHgq
    QHhPDVVH6BZuBec6
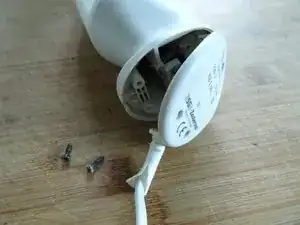
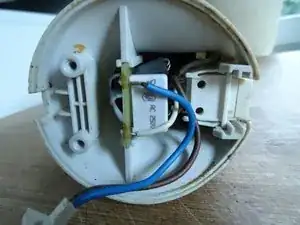
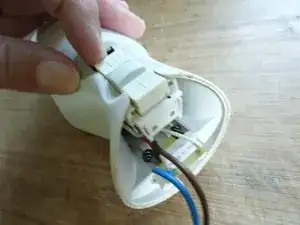
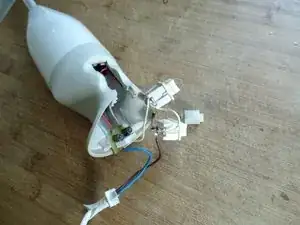
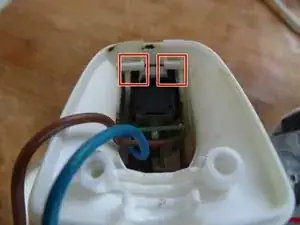
    • This is what it looks like under the cover.

    • Slide out the two buttons and the small circuit board. The buttons are only snapped in.

  3. R11MNWpSPA2GLXvA
    R11MNWpSPA2GLXvA
    uYVGA3XqDURhfCrk
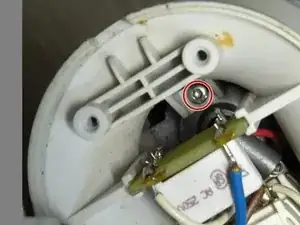
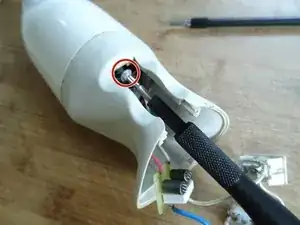
    • The handle is fastened with a Torx T8 machine screw and a Torx T8 plastic screw. You will need a long screwdriver.

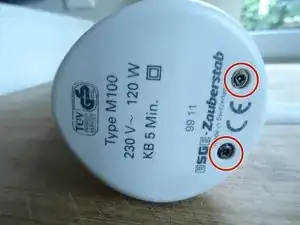
    • Remove two Torx T8 screws.

  4. cmGOBNVDbyEEjoRj
    cmGOBNVDbyEEjoRj
    5bohVGdkdWLGS1LK
    bGv6hs1bmUa2Fihm
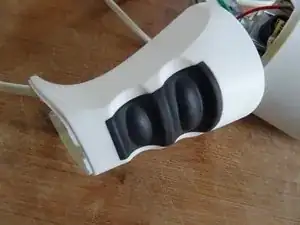
    • On newer models, the handle looks slightly different, see picture 1.

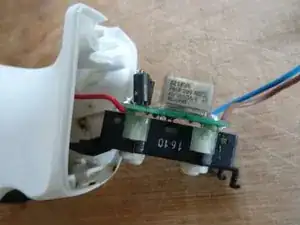
    • Carefully press the two catches on the switch module down a little. Then pull the module inwards a little.

    • Carefully pull the switch module out of the device.

    • Unscrew the Torx T8 screw and the Torx T10 screw inside.

  5. jhN2ipY3Y5rP2rnG
    jhN2ipY3Y5rP2rnG
    ZjusUkdm2YyFJsEM
    • Unclip the handle from one side.

    • Unthread the cable, the buttons and the board.

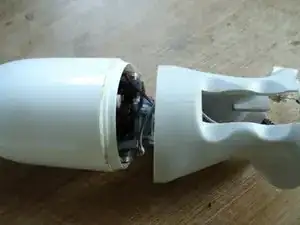
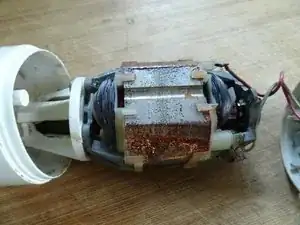
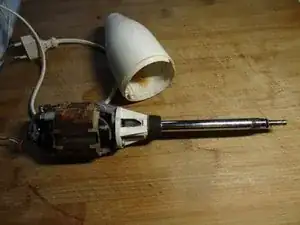
    • The motor ist exposed. However, it is not yet completely accessible, since the lower plastic housing part cannot yet be slid over the bell. The bell must first be removed.

    Super Anleitung, habe den Zauberstab zerlegt, die Welle gereinigt und wieder zusammengesetzt. Einwandfrei.

    Georg Strasser -

  6. SI1g5qkuEAwH3RSE
    SI1g5qkuEAwH3RSE
    eIrWGQEVNVlyOTVa
    vknmRo1JXRbRqjZP
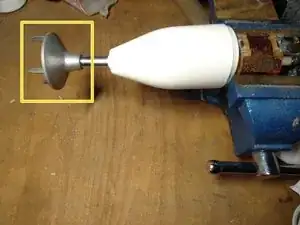
    • First try If the bell can be unscrewed. It is fastened with a left-hand thread, so turn it in the "wrong direction", clockwise, to loosen it.

    • Pull on the knife to remove it

    • The bell sits probably quite tight, as it should not come loose during normal operation. When reassembling, glue it in place with a few drops of fluid threadlocker, if needed.

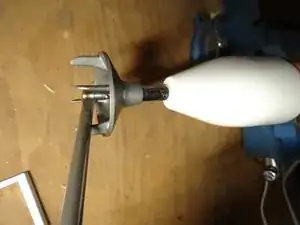
    • If it does not come off easily, then slide the lower plastic part towards the bell and clamp the motor in a vice. Do not tighten the vice very much, the motor is sensitive.

    • Use a long screwdriver as a lever between the bell and the shaft. Then carefully unscrew the bell. Reminder: the wrong way round, i.e. clockwise.

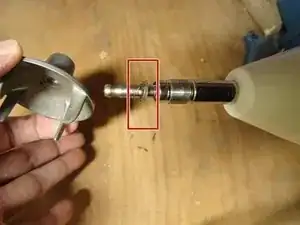
    • Pay attention to the washer between the shaft and the bell, do not lose it.

    Es fehlt leider wie man das Messer entfernt bevor man die Glocke entfernen kann, wäre super wenn man den Schritt noch hinzufügt.

    kapott -

    Aber das ist doch das "normale" Wechseln der Einsätze (gibt ja verschiedene), so wie in der Gebrauchsanleitung beschrieben. Es kann halt nur sein, dass er nicht oft abgenommen wurde (sollte man tun, um ihn sauber zu halten) und deswegen festklebt. Dann in heißem Wasser erwärmen und vorsichtig mit einer Zange abziehen oder einem starken Schraubendreher abhebeln. Wenn dann der Messereinsatz zu leicht geht, kann man die Metallraste vorsichtig mit der Zange zusammen drücken.

    VauWeh -

  7. tKIUcCrSMlduMu1N
    • Pull off the lower case over the shaft.

    Leider endetz die Erklärung zu früh. Beimeinem Gerät dreht sich die Welle nicht bei eingeschaltetem Motor.Der Motorläuft alleine perfekt-Offensichtlich ist mit der Kupplung zwischen Motor und Welle etwas nicht in Ordnung. Wie kann man dioes eaustauschen bzw. prüfen-?

    Saronni -

    Da durfte die Gummikupplung am oberen Ende der Welle gerissen sein In dieser Anleitung, Schritt 8, drittes Bild ist das Teil gut zu sehen. Eine Schraube ist eingegossen, die muss herausgedreht werden, dann kann das Ersatzteil eingedreht werden, leider relativ teuer, google nach Gummikupplung ESGE.

    VauWeh -

Conclusion

To reassemble your device, follow these instructions in reverse order.

VauWeh

Member since: 19/10/15

234462 Reputation

3 comments

Danke für die Anleitung.

Mein Zauberstab fängt sehr schnell an schleppend zu laufen (irgendwo entsteht Wiederstand), wird langsamer, wenn ich heisse Sachen püriere. Woran könnte das liegen?

LG Aaron

Aaron -

Da würde ich wirklich die Achse freilegen und mit etwas Silikonöl schmieren.

VauWeh -

Auch dir Danke für die Anleitung.

Mein Modell ist ein M100 aus dem Fundus meiner Tante und schon sicher über 35-40 Jahre alt.

Torx-Schrauben waren damals noch unbekannt.

Daher ging Schritt 3 leider nicht. Vielmehr sind 2 Kreuzschlitzschrauben unter 2 Kunststoff-Stopfen versteckt. Diese konnte ich nur mit einem kleinen Trick aus dem Gehäuse entfernen: 1 Tropfen Heißkleber und ein unten abgeschnittener Thai-Spieß als Griff. Ich habe da Fotos von gemacht, aber da ich neu hier bin, weiss ich nicht, wo hoch laden bzw. wie man die Anleitung editiert.

Wenn sich da jemand auskennt, gerne sagen, dann sende ich die Fotos zu.

Liebe Grüße

falo_hu -