
Introduction
Use this guide to replace a worn-out or dead battery in your Apple Watch Series 7.
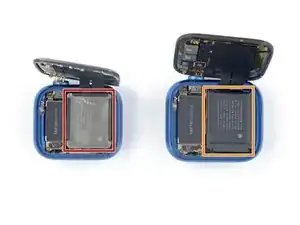
Note: The battery replacement procedure for the 41 mm Series 7 Apple Watch differs slightly from the 45 mm version. This guide shows how to replace the battery for both sizes.
Before you begin, make sure you have the appropriate replacement battery for your watch. You will only need a Tri-point Y000 screwdriver during the battery replacement in the 45 mm model.
If your battery is swollen, take appropriate precautions. For your safety, discharge your battery below 25% before disassembling your device. This reduces the risk of fire if the battery is accidentally damaged during the repair.
This guide shows the procedure on the cellular/LTE version of the watch, but the GPS-only version is similar.
You’ll need replacement adhesive to reattach components when reassembling the device.
Tools
-
-
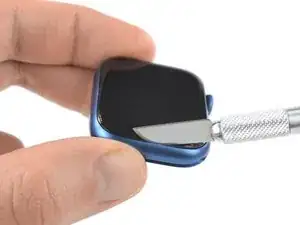
Because the gap between the screen and watch body is so thin, a sharp blade is needed to separate the two. Read the following warnings carefully before proceeding.
-
-
-
Prepare an iOpener and apply it to the screen for at least two minutes to loosen the adhesive underneath.
-
-
-
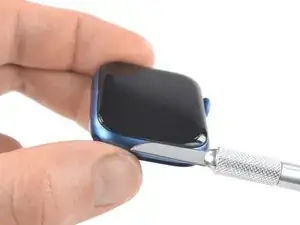
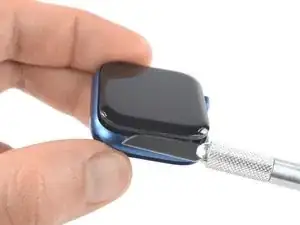
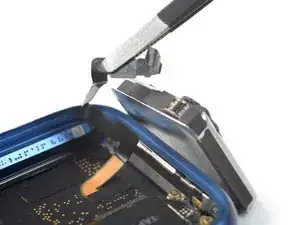
Place the edge of a curved blade into the thin gap between the display and the outer case. Start at the short side of the display, most distant to the digital crown.
-
Once inserted, tilt the blade to pry the display open slightly and create a gap between the screen and the watch body.
-
-
-
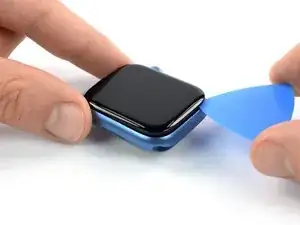
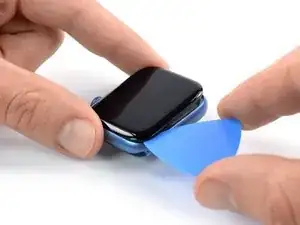
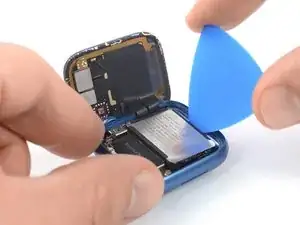
Insert an opening pick in the gap your created.
-
Slide the opening pick along the short edge of the watch to slice the adhesive.
-
-
-
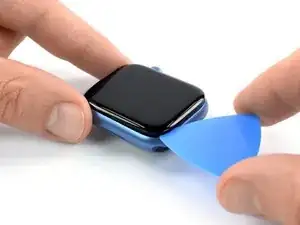
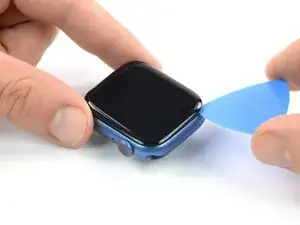
Slide the opening pick around the corner and along the long edge on the opposite side of the watch crown to slice the display adhesive.
-
-
-
Slide the opening pick around the corner to slice the remaining adhesive on the short edge of the watch next to the watch crown.
-
-
-
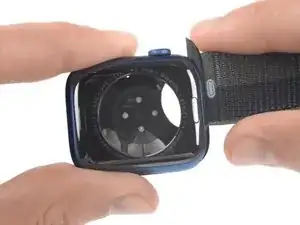
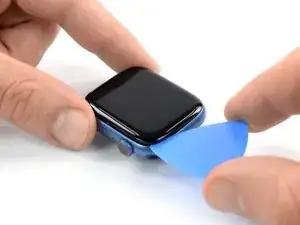
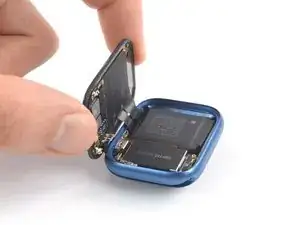
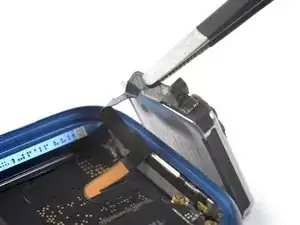
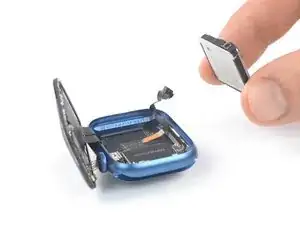
Lift the display and carefully pull it towards the watch crown.
-
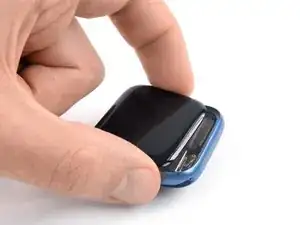
Swing the display open to an upward position.
-
-
-
Prepare an iOpener and apply it to the rear side of your Apple Watch for at least two minutes to loosen the adhesive underneath the battery.
-
-
-
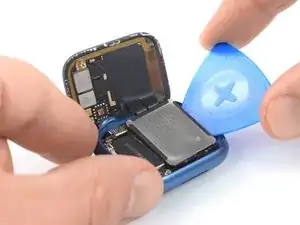
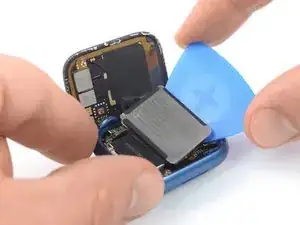
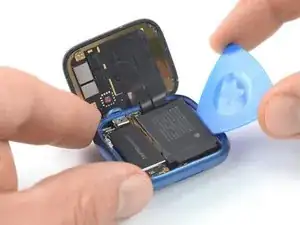
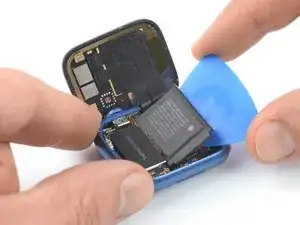
Insert an opening pick between watch body and the long edge of the battery.
-
Use constant, steady pressure to slowly pry up the battery.
-
-
-
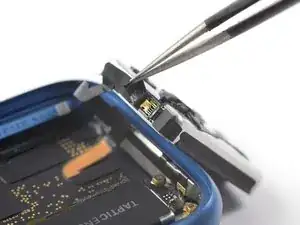
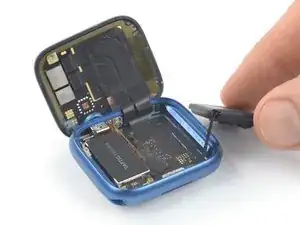
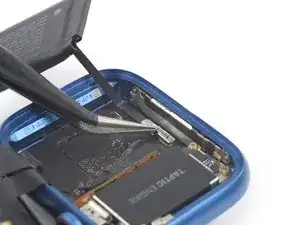
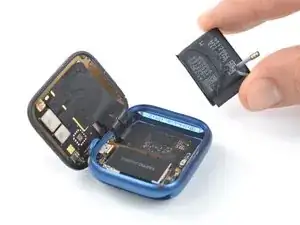
Use one arm of your tweezers or the pointed end of a spudger to pry up the lock bar on the ZIF connector securing the battery cable.
-
-
-
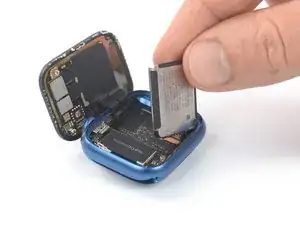
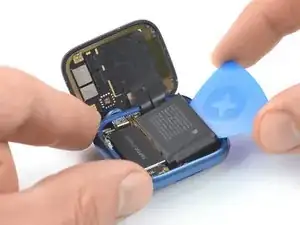
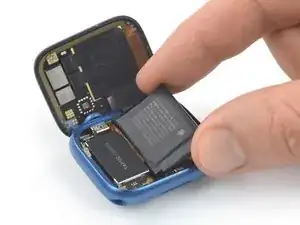
Insert an opening pick between watch body and the long edge of the battery.
-
Use constant, steady pressure to slowly pry up the battery.
-
-
-
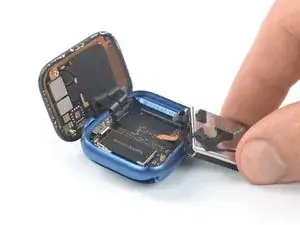
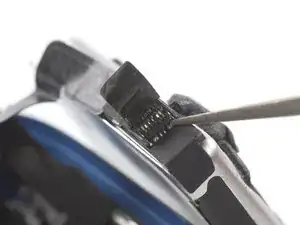
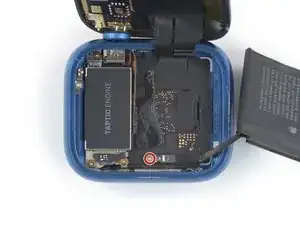
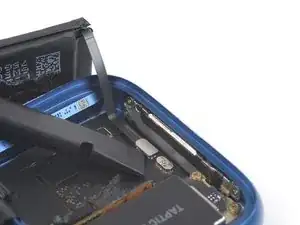
Use a Tri-Point Y000 screwdriver to remove the 1.1 mm-long screw securing the battery connector bracket.
-
-
-
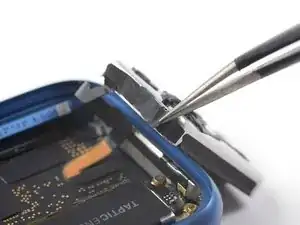
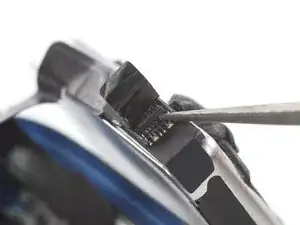
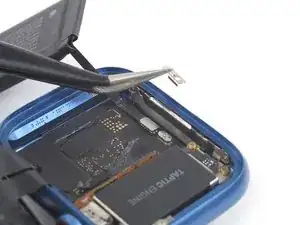
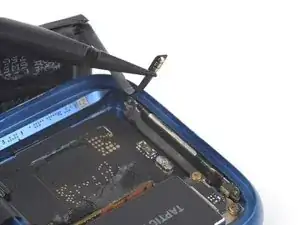
Use a spudger to disconnect the battery cable by prying the connector straight up from its socket.
-


If possible, turn on your device and test your repair before installing new adhesive and resealing.
To reassemble your device, follow these instructions in reverse order.
For optimal performance, calibrate your newly installed battery after completing this guide.
Take your e-waste to an R2 or e-Stewards certified recycler.
Repair didn’t go as planned? Try some basic troubleshooting, or ask our Answers community for help.

6 comments
Is it still waterproof after that? I swim daily. Watch is 2.5 years old doing great but the battery is at 76%.
Will the adhesive on the screen seal back up good enough?
Hi Matt,
retaining water resistance after the repair depends on how clean the mating surfaces are and how accurately the adhesive is reapplied. Your device will lose its factory-given IP (Ingress Protection) rating. Personally I wouldn‘t advise to go swimming with the watch after resealing it with tape.
if the socket that the battery plugs into breaks, is that something worth paying to fix, or should i just buy a new watch?
river D -
Bravissimo,tutto molto chiaro.