Introduction

  1. 5pJ3VKVOSrCZZpPi
    5pJ3VKVOSrCZZpPi
    QdsLWROIU22ytkpX
    • Allow your phone's battery to drain below 25%, as a charged lithium-ion battery is a potential safety hazard.

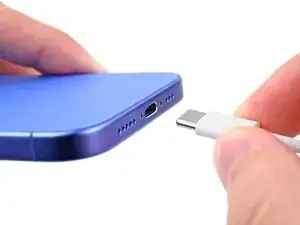
    • Unplug any cables from your phone.

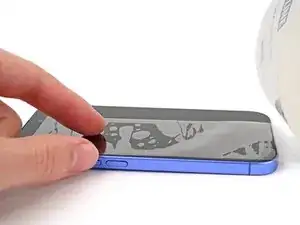
    • Hold the power and either volume buttons and slide to power off your phone.

  2. xKXG1PAUjnVT3Ytk
    xKXG1PAUjnVT3Ytk
    Rty6gBTj2f5HkMOL
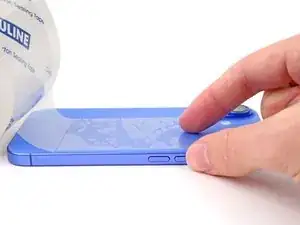
    • If your screen or back glass is badly cracked, lay overlapping strips of packing tape over the glass to protect yourself and make disassembly easier.

    • Make sure there's a smooth area near the bottom edge that's big enough for a suction cup to stick to.

  3. FqeUZCsnVQWJs54Z
    FqeUZCsnVQWJs54Z
    XLKiwVtYaS1XhT1P
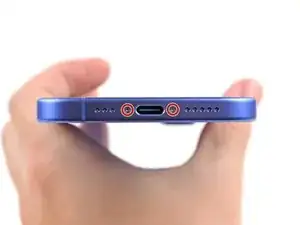
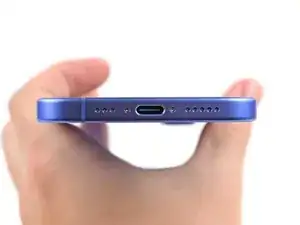
    • Use a P2 pentalobe driver to remove the two 7.7 mm-long screws on either side of the charging port.

  4. 6UPwoloGBO4tmVoS
    6UPwoloGBO4tmVoS
    BmSYPJmOy6dbHipF
    3EOdQPAGOmiuhoKU
    • If inserted too far, an opening pick can damage your device. Follow this step to mark your pick and prevent damage.

    • Measure 3 mm from the tip and mark the opening pick with a permanent marker.

    • You can also mark the other corners of the pick with different measurements.

    • Alternatively, tape a coin to a pick 3 mm from the tip.

    Got to step 2 and realized the fix kit doesn't include an opening pick! Looks like a guitar pick, and I have those lying around. Is that expected? Looks like the pick is used in many steps below. There's a little blue crowbar that isn't mentioned in the instructions. Perhaps that replaces the opening pick?

    Sloan Looney -

    Hi! I can't see which guide you were using when writing this comment. Can you reply here with which guide and fix kit you used?

    Clay Eickemeyer -

    I see you posted this in Meta. I hope it's resolved soon! In the meantime, a guitar pick may work well enough for your repair.

    Clay Eickemeyer -

    what fix kit?

    Meow Purr -

    My fix kit didn't include an opening pick either

    WILLIAM HARRIS -

    Make sure you check inside the black boxes after emptying them. My pick was stuck inside one of the boxes.

    AndyF -

    My AliExpress refurbished screen came with a pick that has a coin-like circle that pops out, so no modification was necessary

    Gijs Leegwater -

    the picture shows 3 cm but the description says 3 mm's. Which one is it?

    John Pena -

    That is a misunderstanding. It is a ruler with a scale for cm, it shows 0.3 cm, i.e. 3 mm.

    VauWeh -

    Oh, come ON!

    Big Ed -

    It will ALWAYS be millimeters on a phone, but this step is ridiculous, skip it!

    Leif DeWolf -

    @leifdewolf I wouldn't skip it for a first repair.

    Gabriel-Science -

    It's not an Ifixit KIT if it doesn't include everything. You'll need to order the opening pic separately. Or head to Walmart like myself and look for guitar pics. Hopefully, this will work just as well.

    Jaleeljb97@icloud.com -

    No pick in mine as well. It’s really not clear that you have to order this separately when ordering an IPhone SE 202/2022 screen repair kit. Is this the case?

    Jackson Castiglione -

    Frustrated, I ordered a compact package where everything was encapsulated. Useless suction tools could not separate the screen. If it is unable to decouple the screen, then why sucking suction tools you have provided.

    Shourob Datta -

    For my kit the triangle pick was stuck inside the box with the screen not with the other tools maybe it's also there for you

    Henry Scheibehenne -

    Y’all are getting far, FAR too detailed with some of this stuff…. Measuring and marking the pick that you won’t actually use to open the device?!? lol that’s kinda funny. Just heat it up, grab a spudger, and the back just pops right off! The iFixit tech need to stick to the KISS method more often, you know KEEP IT SIMPLE STUPID!!! Like l, for reals, I’ve been doing this stuff for YEARS and using iFixit guides regularly and this is just ridiculous at this point!

    Leif DeWolf -

    Will the phone still work if the sensor assembly on the back of the screen is damaged?

    Mutshidzi Rambau -

    I don't have a pick, but how much better are these picks than an old credit card for opening an iPhone 13 mini?

    mike eng -

    The pick in my iFixIt kit was packed with the battery, not with the rest of the toolkit.

    Tony Houlihan -

  5. YEDuCZaLSQ2TcVXG
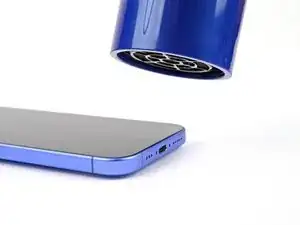
    • Use a hair dryer or heat gun to heat the bottom edge of the screen until it's hot to the touch.

    • You can also use an iOpener to heat the back glass. Follow these instructions to heat and apply the iOpener properly.

  6. uIEILR2vQUmVS24N
    uIEILR2vQUmVS24N
    NqEHBjHOLLNipbI1
    AEDRBCBbQh6YrvLG
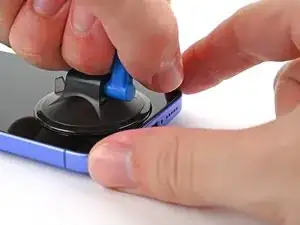
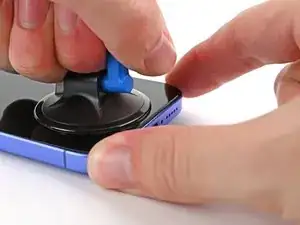
    • Apply a suction handle to the bottom edge of the screen.

    • While supporting the frame with one hand, pull up on the handle with a strong, steady force to create a gap between the screen and the frame.

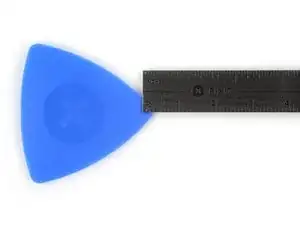
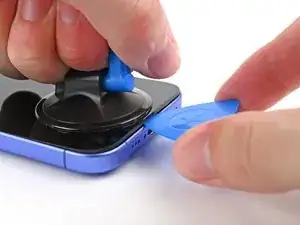
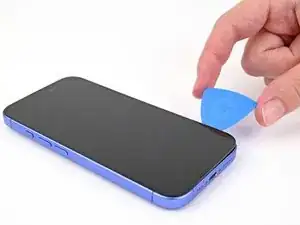
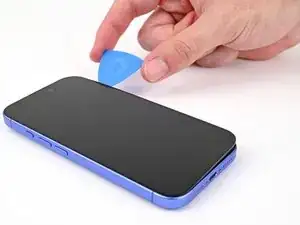
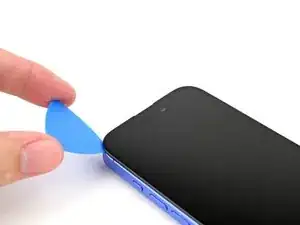
    • Insert the tip of an opening pick into the gap.

  7. BAcvxUFOOEZGJ21j
    BAcvxUFOOEZGJ21j
    dwHyLgccFFE1Jecq
    • As you slice the adhesive securing the screen in the following steps, don't insert your pick deeper than 3 mm to avoid damaging the following areas:

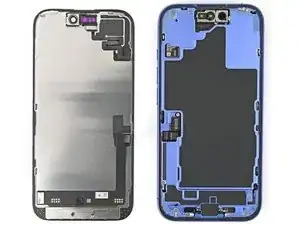
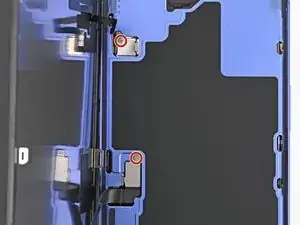
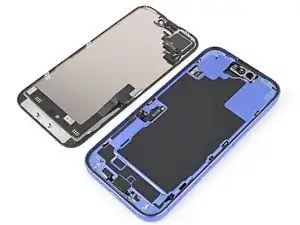
    • Two delicate cables connecting the screen to the phone—one just above the Action button and the other about halfway between the volume down button and the bottom of the phone.

    • Multiple spring contacts around the perimeter of the phone.

  8. pLFSjb1CqsSlFV42
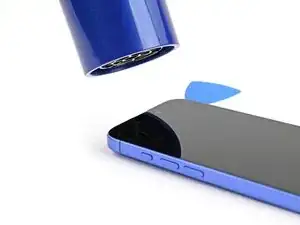
    • Use a hair dryer or heat gun to heat the right edge of the screen until it's hot to the touch.

  9. Loyw3oluxJWgBAiW
    Loyw3oluxJWgBAiW
    xvsOx62FAFZYbHcp
    jFWlZHVrr2uCSi2o
    • Don't insert your pick deeper than 3 mm to avoid damaging the spring contacts.

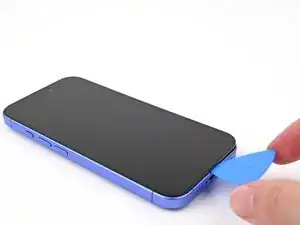
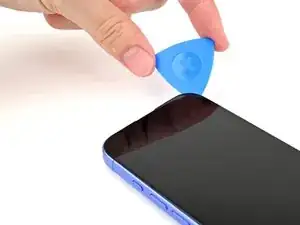
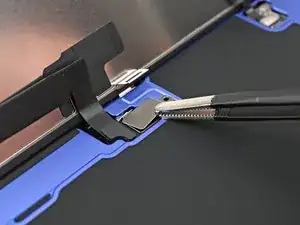
    • Slide your opening pick around the bottom right corner and up the right edge of the screen to separate the adhesive and release the metal clip.

    • You'll hear and feel the metal clip release as you pass it.

  10. ZFf1odhJrEc5gcX6
    • Use a hair dryer or heat gun to heat the top edge of the screen until it's hot to the touch.

  11. DRbiLIMQCesxQxQm
    DRbiLIMQCesxQxQm
    BKnwhIgo6jCk5JaG
    • Don't insert your pick deeper than 3 mm to avoid damaging the spring contacts.

    • Continue sliding your pick around the top right corner and across the top edge to separate the adhesive and release the two metal clips.

  12. WlAuyJoAGPUylXQV
    • Use a hair dryer or heat gun to heat the left edge of the screen until it's hot to the touch.

  13. SA2sRMRsfjKjSf3j
    SA2sRMRsfjKjSf3j
    6fXemrjVeDvPsYPA
    • Don't insert your pick deeper than 3 mm to avoid damaging the screen cables and the spring contacts.

    • Slide the opening pick down the left edge of the screen to separate the remaining adhesive and release the last two metal clips.

  14. nIcdQ1JHoadh3toJ
    nIcdQ1JHoadh3toJ
    2iWilqhGARUQ5eK3
    MJBpdVELUVXZFATB
    • At this point, the screen should be free from the frame. If the screen feels stuck, go back around the perimeter with your pick to check for missed sections of adhesive or stuck clips.

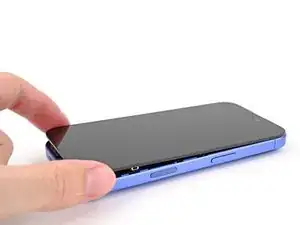
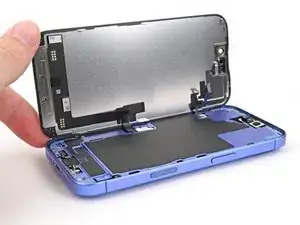
    • Swing open the screen over the left edge of the phone and support it with a clean, sturdy object.

  15. uItPoh2eU5AVGSOB
    uItPoh2eU5AVGSOB
    JbqBYKqxvKhP1FNO
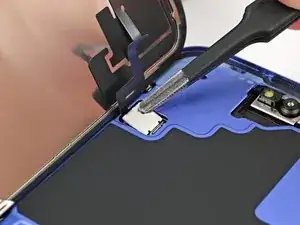
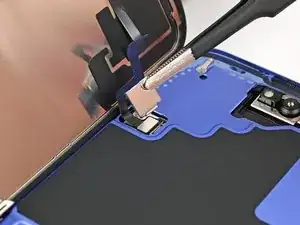
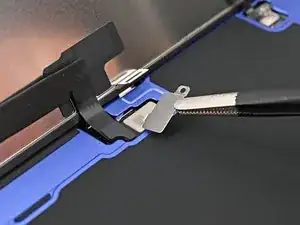
    • Use a tri-point Y000 driver to remove the two 0.9 mm‑long screws securing the front sensor and screen connector covers.

  16. B6LJgNYSjQSFqWql
    B6LJgNYSjQSFqWql
    OUoQL2StbvV6RTSZ
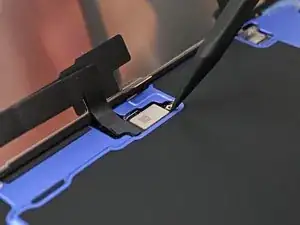
    • Use tweezers, or your fingers, to lift the front sensor cover to a 90-degree angle and unhook it from its slot in the logic board.

    • Lift the cover out of its slot and remove it.

  17. MIOvWErQFsDS2WtH
    MIOvWErQFsDS2WtH
    Tc6OKOdKciM5ErTS
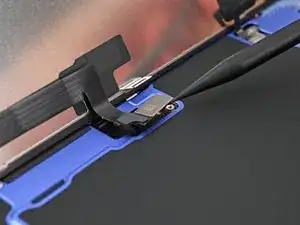
    • Use tweezers, or your fingers, to lift the screen connector cover at a slight angle to unhook it from its slot in the logic board.

    • Lift the cover out of its slot and remove it.

  18. OyqbCjiFH4hZJ5yk
    OyqbCjiFH4hZJ5yk
    FuBxvM5BxSppJHmr
    vlydeRnFXKXrGfb3
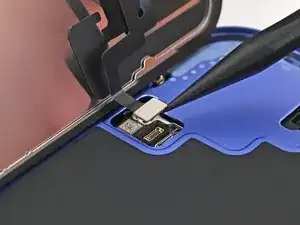
    • Use the tip of a spudger to pry up and disconnect the screen press connector.

    • Repeat for the front sensor press connector.

  19. bITA6cKWt2AyPX3e
    • Lift the screen off the frame and remove it.

  20. ABkEwaNZvtPQYDLC
    ABkEwaNZvtPQYDLC
    osrdv1cDM3TkiN6C
    jfFOUYJyOTt6FLbA
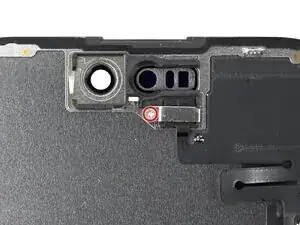
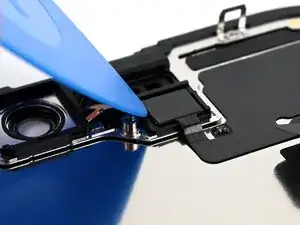
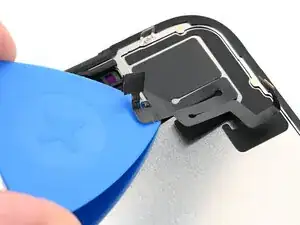
    • Use a Phillips screwdriver to remove the 1.3 mm‑long screw securing the ambient light sensor bracket.

    • Use a pair of tweezers or your fingers to lift and remove the ambient light sensor bracket.

  21. RORcwTGLCLuSefcD
    RORcwTGLCLuSefcD
    ZNmTW1WySxSJufjs
    Sk3TJPqNNGUZ3GDW
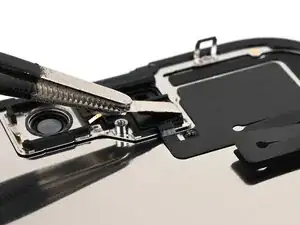
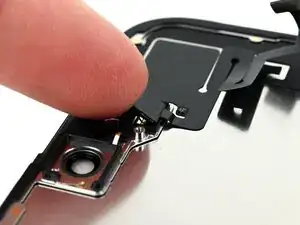
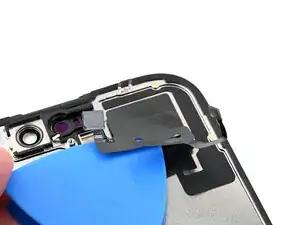
    • Use a hair dryer, heat gun, or heated iOpener to soften the adhesive under the ambient light sensor and ambient light sensor cable.

    • Use an opening pick to pry up the ambient light sensor.

  22. NdJSvDEyM3KRH3Uq
    NdJSvDEyM3KRH3Uq
    LAYyIguCAuaOuExT
    • Use your finger to push the ambient light sensor away from its recess.

  23. wFciQQBfKCQWtDUD
    wFciQQBfKCQWtDUD
    DWYrIkIOSLyxO1KS
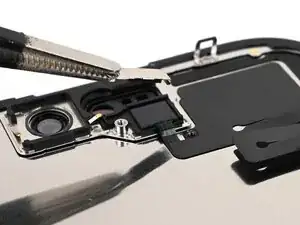
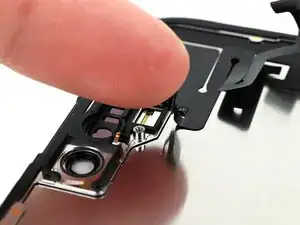
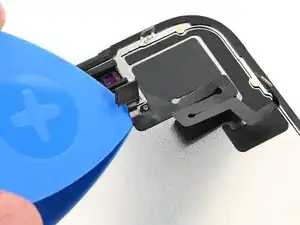
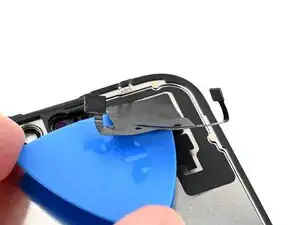
    • Gently slide an opening pick under the ambient light sensor cable, starting near the sensor and moving towards to the opposite corner.

    • If the adhesive doesn't peel up easily, apply more heat.

  24. IikMJWKUQ1GTK3X1
    IikMJWKUQ1GTK3X1
    WdkXuS5QVTsChgCA
    3BiajJIUBSBLrAdj
    • Continue slowly sliding the opening pick under the ambient light sensor cable until the cable is free from the screen.

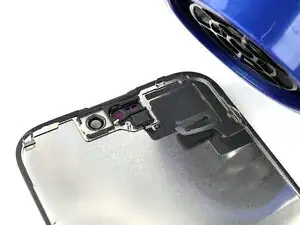
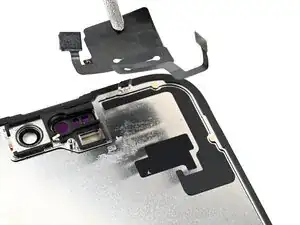
    • Use a pair of tweezers to lift the ambient light sensor off of the screen.

Alex Diaz-Kokaisl

Member since: 16/01/22

168721 Reputation

0 comments