Introduction
Is your Sonos Era 100 not producing the sound quality you expect? If so, here is the guide to fix the problem by replacing the tweeters. To do this, you'll need the following, which are all included in the IFixit tool kit.
- Plastic and Metal Spudger(s)
- Screwdriver with Torx T10H and a Torx T20H bit
- Tweezers
- Screwdriver extension
-
-
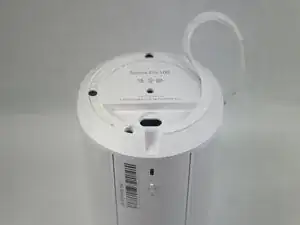
Gently pull off the rubber foot on the the bottom of the speaker.
-
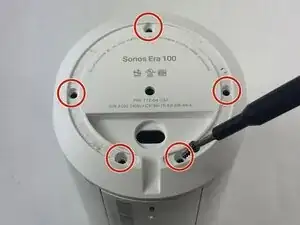
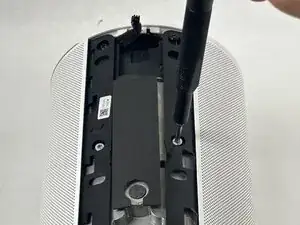
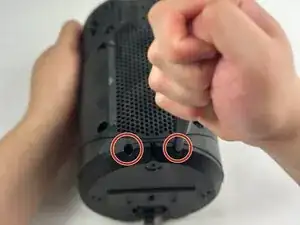
Remove the five 11 mm Torx T20 screws that secure the bottom plate.
-
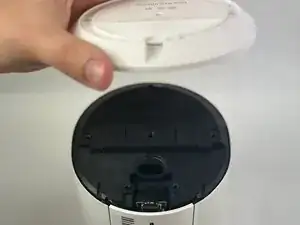
Carefully lift off the bottom plate.
-
-
-
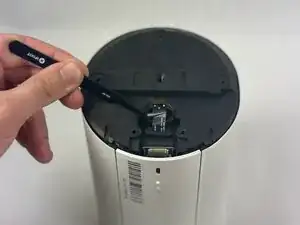
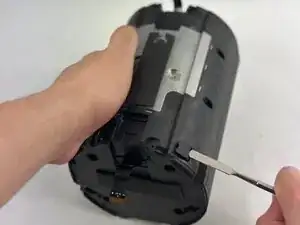
Carefully disconnect the ribbon cable connected underneath the bottom panel.
-
To detach the back panel, gently push it in a downward motion.
-
Use tweezers to disconnect the USB-C PCB from the back panel.
-
-
-
Using a halberd spudger, carefully remove the foam tape. Do this by keeping tension on the foam shown in the images and slicing underneath the tape.
-
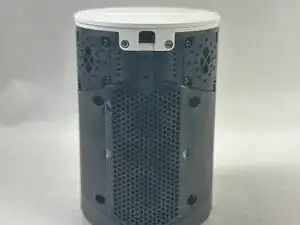
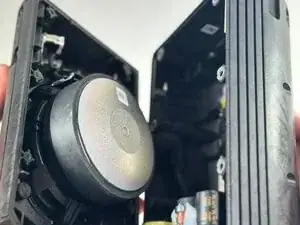
Pull the speaker grille off.
-
-
-
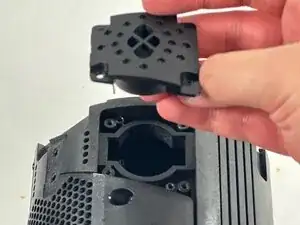
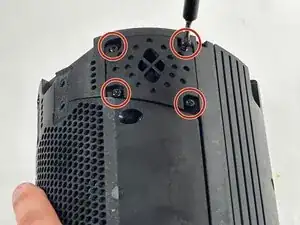
Remove all four T10 Torx screws securing the touch bar assembly.
-
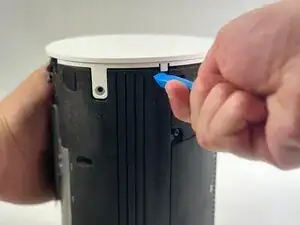
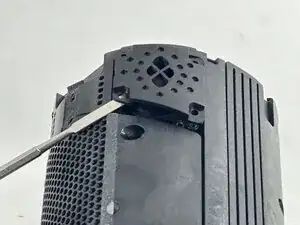
Use an opening tool to release all four white retaining clips.
-
Lift the touch bar assembly perpendicular to the unit, with care not to strain the connected ribbon cable.
-
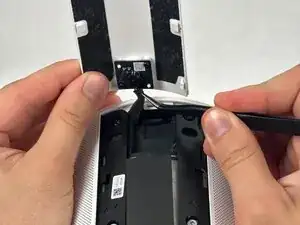
Lift the black ZIF locking flap that secures the touch bar assembly ribbon cable.
-
Disconnect the ribbon cable.
-
Remove the touch bar assembly.
-
-
-
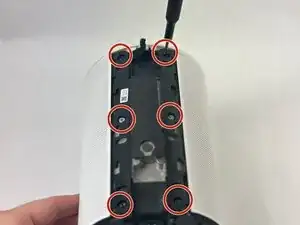
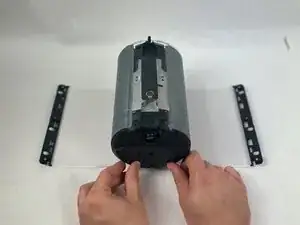
Remove the four T10 Torx screws on the back of the device.
-
Pry open the speaker body to access the internals.
-
-
-
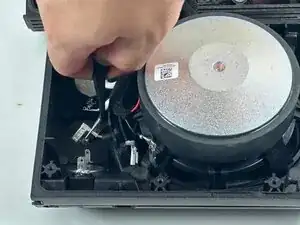
Remove the four 11 mm T10 Torx screws from the front of the tweeter assembly.
-
Use a spudger to lift the tweeter out of the housing.
-
Repeat the two previous steps for the other tweeter.
-


To reassemble your device, follow the above steps in reverse order.
Take your e-waste to an R2 or e-Stewards certified recycler.
Repair didn’t go as planned? Try some basic troubleshooting or ask our Answers community for help.
