Introduction

This guide will provide instruction for how to replace the power control board. The battery life of the Shark UltraCyclone CH951 is 15 minutes per 6 hours of charging. If you notice that the vacuum does not turn on at all, or is not staying on while fully charged, you may need to replace the power switch.

Please note that you must remove the battery connection first, as dealing with electric components could be potentially hazardous. However, the entire battery does not need to be removed.

  1. xIONpYyrKTupWvgi
    xIONpYyrKTupWvgi
    GPvdThj1wBe5JlEW
    MxWfqtthD1dwILPD
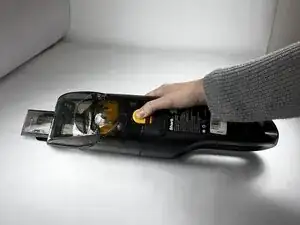
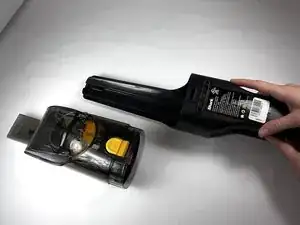
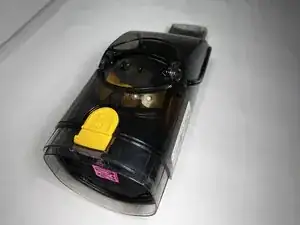
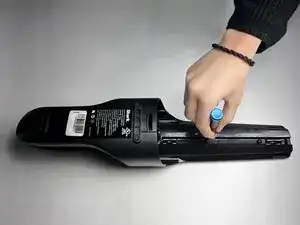
    • Press the dust cup release button and gently pull the dust cup away from the body of the vacuum.

  2. cF3trWP1OF3bo1Nr
    cF3trWP1OF3bo1Nr
    FNWB1QrGLBTB2gGp
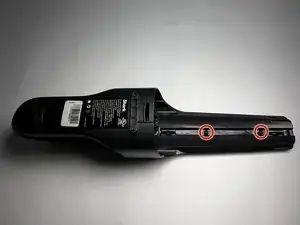
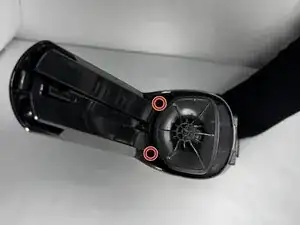
    • Use a TR9 Torx screwdriver to remove the two 8.7 mm screws previously behind the dust cup.

  3. Ks4Mfwv5FTQvTNUi
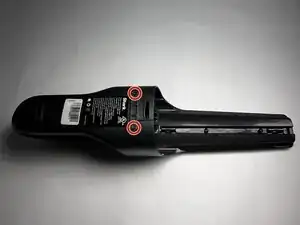
    • Remove the two 12.2 mm screws underneath the dust cup button using a TR9 Torx screwdriver.

  4. mSVIUPN6GXRQxOpF
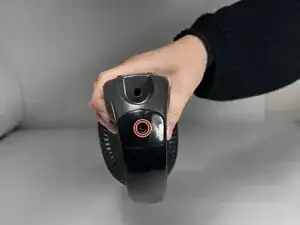
    • Remove the 13.9 mm screw beneath the charging port using a TR9 Torx screwdriver.

  5. cGocnxAWtmjNyWtR
    • Use the TR9 Torx screwdriver to remove two 11.6 mm screws that hold the exterior motor in place.

    • They are located underneath where the dust cup previously was and above the exterior motor.

  6. VsxXKbF3WZUQ636U
    VsxXKbF3WZUQ636U
    YRbbQ56Wg4tKWvEB
    64RpJneILdZ4x4w6
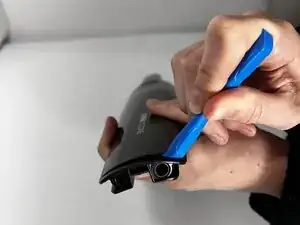
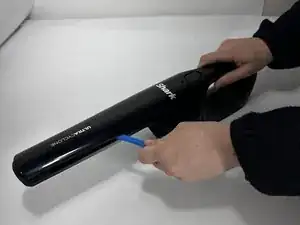
    • Run an iFixit Opening Tool under the casing along the vacuum body until the shell is removed starting around the attachment port, and sliding down towards the charging port.

    • If necessary, apply gentle force.

  7. vdeIismwQofBVTXY
    vdeIismwQofBVTXY
    QKupTB2ISMNHxEhM
    VKk2nOJRvjdyWpSp
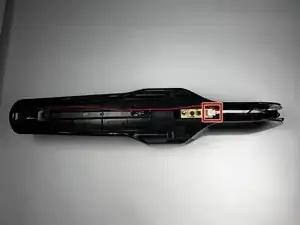
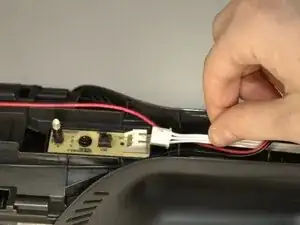
    • Press down on the connection point of the white wire and disconnect it.

    • The connector looks like a white latch. Push down on the edge to pop it out of place.

  8. a2hImfXDJnfJ5SFq
    • Remove the 8.7mm screw in the center of the button control board.

  9. i1bGpWidSCyRSvPO
    i1bGpWidSCyRSvPO
    O4wZAwwRmwVSTMok
    SrRawNlQJ5GpAQLI
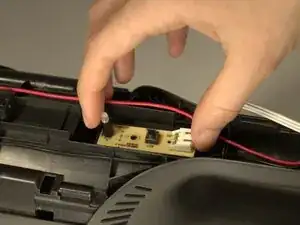
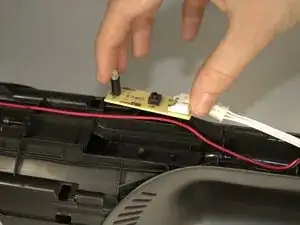
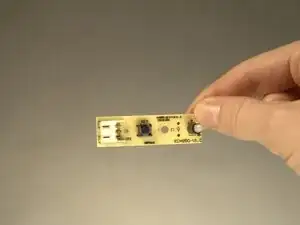
    • Remove the board by using your fingers and lifting the component from the body of the device.

Conclusion

To reassemble your device, follow these instructions in reverse order.
Jessica Beck

Member since: 24/01/25

587 Reputation

0 comments