Introduction

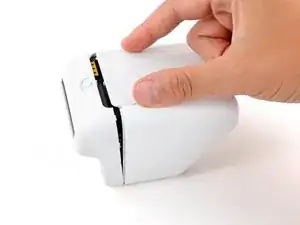
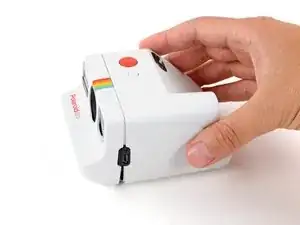
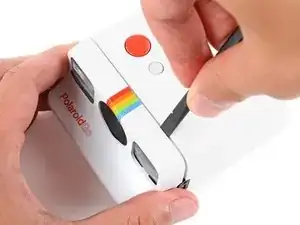
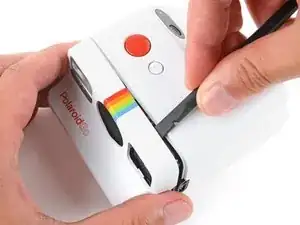
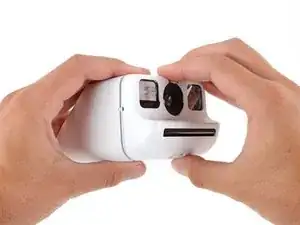
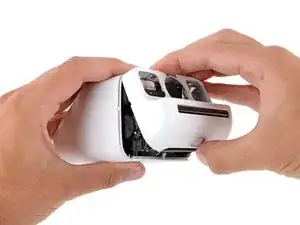
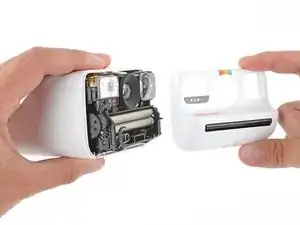
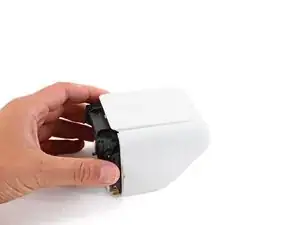
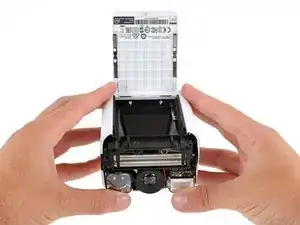
Use this guide to replace, change, or upgrade the rear shell (aka rear cover) on your Polaroid Go (Gen 1 or 2) instant camera.

You may want to change the rear shell if it's cracked or damaged, or if you want to customize your camera with different colors.

  1. rU2hrRf2SXjnVNRx
    rU2hrRf2SXjnVNRx
    Ec64TRQ4TRtqe5TP
    • If you have any film left, take some photos! Disassembly will expose any leftover film.

    • Before you begin, unplug all cables from your camera and fully power it down.

  2. TQdZNg1jV5ZeVECL
    TQdZNg1jV5ZeVECL
    nmrlaZwrgaLOH2sC
    HinDQxYMVCi5Uovi
    • Throughout this guide, directional words (front, back, left, right) are from the perspective of using the camera—or when the lens faces away from you.

    • Set your camera down so the bottom is facing up.

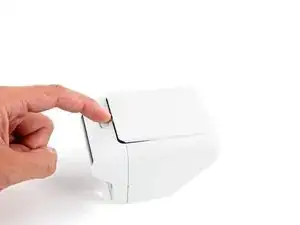
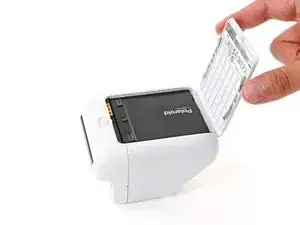
    • Use the latch on the bottom of the camera to open the film door.

    • Use your fingers to lift and remove the film cartridge.

    • The camera mirror is now exposed. Be careful not to smudge it or get any debris on it. If you accidentally do, use a lint‑free cloth to gently wipe the mirror clean.

  3. O5icvViQQ4KYFSX4
    O5icvViQQ4KYFSX4
    2DMgFlX3q6CxebUf
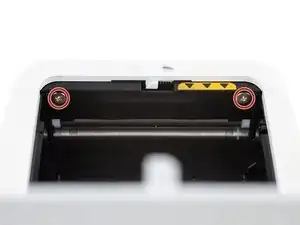
    • Given the location of the screws, it's difficult to keep your screwdriver properly aligned. You'll need to use a flexible extension or a very short screwdriver to remove the screws without stripping them.

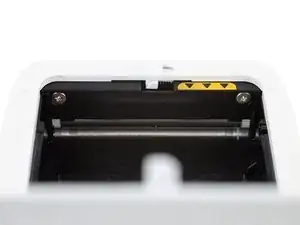
    • Use a Phillips screwdriver to remove the two 4.2 mm‑long front shell screws from the film compartment.

    • Throughout this repair, keep track of each screw and make sure it goes back exactly where it came from.

  4. W6uWVyCi6tKgnYC2
    W6uWVyCi6tKgnYC2
    AjYOwFRuOCpBFswu
    ZCwhkxJGLgfUiVkJ
    • Secure the back of the camera with one hand, and use your free hand to gently pull the front shell away from the camera until a slight gap forms.

    • There needs to be enough of a gap that the film door latch won't re‑engage when the door is closed.

    • Close the film door, making sure the latch doesn't re‑engage.

    • Flip your camera over so the take button is facing up.

  5. LLNaENek6IkI2e4b
    LLNaENek6IkI2e4b
    PGQAIBr2IVTcEcEE
    QPsbeSxwUqmVbBCh
    • Releasing the two clips is tricky and will likely take multiple attempts. Take your time and don't try to force the clips free, or you may break them.

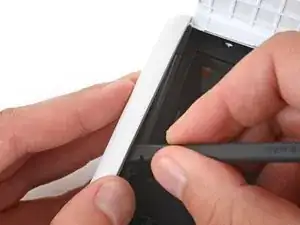
    • Insert the flat end of a spudger at a downward angle between the top edge of the front and rear shells, near the viewfinder.

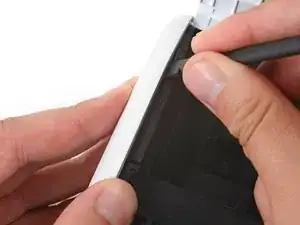
    • Push your spudger into the gap and lower it towards the back of the camera to pry up the front shell and release the first clip.

    • Repeat the process on the other side of the camera to release the second clip.

  6. CuYlGCNPEpa5HnmJ
    CuYlGCNPEpa5HnmJ
    GnhSVEbmvYZs5jmJ
    TRKIiGmDlYPFLY5q
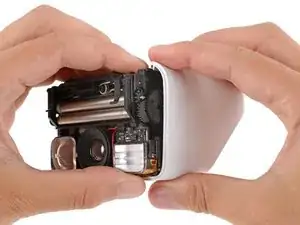
    • Firmly secure the main body of the camera with one hand, and use your free hand to grip the front shell.

    • Rotate the bottom edge of the front shell upwards to separate it from the camera and remove it.

    • The shell can easily get caught on the flash unit and viewfinder. If you're having trouble, try gently wiggling the shell.

    • During reassembly:

    • Firmly push the front shell back onto the camera to engage the clips.

    • Be very careful that the clip on the right side of the camera doesn't dislodge any of the gears.

    • Check around the perimeter of the shell seam and make sure there are no gaps. If there are, firmly press the shells together to engage the clip near the gap.

  7. uPWVPlK3s6D1tIrQ
    uPWVPlK3s6D1tIrQ
    64ZrHgPhdhAfGTdG
    • Set your camera down so the bottom is facing up.

    • Open the film door.

  8. UeBbkXUjEvuSM6cS
    UeBbkXUjEvuSM6cS
    IpIVPYGEuZpgUPZx
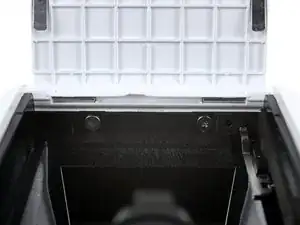
    • These screws are positioned similarly to the front shell screws. Remember to make sure your screwdriver is properly aligned when removing them.

    • Use a Phillips screwdriver to remove the two 2.9 mm‑long rear shell screws from the film compartment.

  9. wKPDIRBNab2vO4VX
    wKPDIRBNab2vO4VX
    UvMPTYagVkv5ECAd
    KatlqITyTtJkMV3F
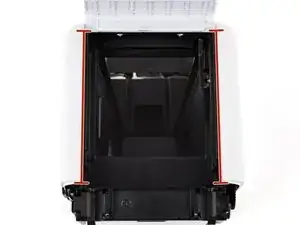
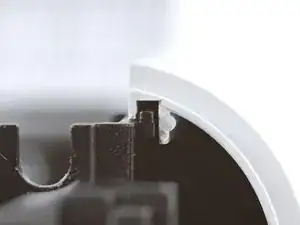
    • Two rails secure the rear shell to the chassis. In order to remove the shell, you'll have to fully separate both rails.

    • Separating these rails is tricky, as they re‑engage very easily. Work slowly and start over if it feels like the plastic is bending too much.

  10. YFBPPRSFGS2dJRKR
    YFBPPRSFGS2dJRKR
    wTjOZMKTapOcdrXU
    W3c5pHbSyiNZrXSG
    • The edges of the rear shell are sharp. Work carefully and consider wearing gloves to protect yourself.

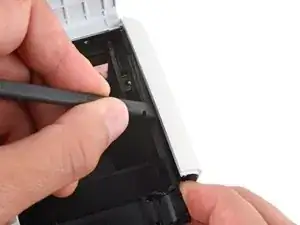
    • Hold a spudger in one hand, so the flat end is near one of the rear shell rails.

    • With your free hand, pull the front corner of the rear shell away from the rail to create a small gap.

    • Insert the flat end of a spudger into the gap.

  11. bpPTZvmCsTTgJZS4
    bpPTZvmCsTTgJZS4
    dcJGZyxGOQEIDIpr
    5lb2W2YLMnokeU2M
    • With one hand, firmly secure the chassis.

    • With your free hand, slide the spudger along the rail towards the back of the camera to separate the shell.

    • The spudger only needs to stay inserted a few millimeters in order to separate the shell. Don't insert it farther, or you may damage your camera.

  12. LxxPgTcmjZV6oQYW
    LxxPgTcmjZV6oQYW
    2RYAn12pULkXRiCK
    fZkMXfTia5FFMjYZ
    • Repeat the previous two steps to separate the rear shell from the other rail.

    • The other rail may re‑engage when separating the shell. Check both sides and make sure they're separated before continuing.

  13. c3VDrMYKWlTOmpf5
    c3VDrMYKWlTOmpf5
    X3YtyiH6HcX3UNAW
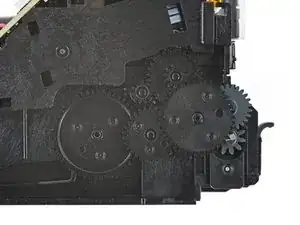
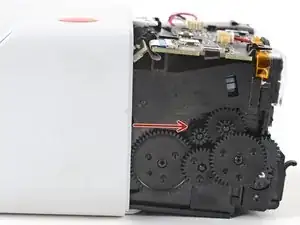
    • Be very careful not to lose any of the gears on the right side of the camera—they can easily fall out at any point when the rear shell is removed.

    • With one hand, firmly secure the chassis so the camera is upside down.

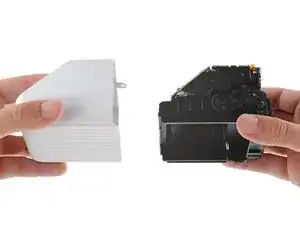
    • With your free hand, pull the rear shell straight down to fully separate it from the chassis.

    • You should feel and hear the shell detach.

  14. IQxZYXCKoZK4CWrQ
    IQxZYXCKoZK4CWrQ
    I6agVI6TcssTmskH
    ySQ3sRmiEgvyfQUa
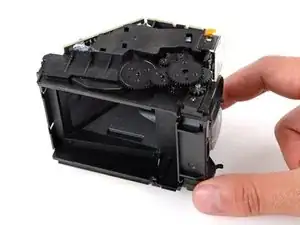
    • With the right side of the camera (with gears) facing up, pull the rear shell off the chassis and remove it.

    • Set the chassis down on its side so the gears are facing up.

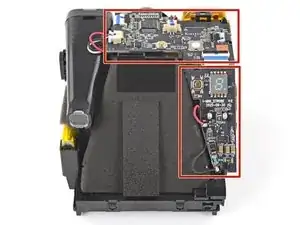
    • Don't touch the exposed boards on the top and right side of your camera. The capacitor in your Polaroid Go holds an electrical charge and can deliver a potentially dangerous electric shock.

    • Be especially careful not to touch the solder joints labelled TP1, TP2, and TP3.

  15. hDIBfoNHULLLwwaV
    hDIBfoNHULLLwwaV
    3HTrWJVjfQmriIDB
    • If any of the gears fell out, use these photos to reinsert them in their correct positions.

  16. u3mKWhsV2WNDpwxY
    u3mKWhsV2WNDpwxY
    eY3oCNcGFRaVlejK
    NINTQfcHQlLuhYAF
    • During reassembly, when sliding the rear shell back onto the chassis, be very careful of the following areas:

    • The clips on the right side can easily dislodge the gears.

    • The top clip can scrape the surface‑mounted components on the top board.

    • Slide the rear shell over the chassis, making sure the rails on the bottom go into their cutouts on the shell.

    • Firmly squeeze the chassis and rear shell together until they "click" into place—you should feel and hear them snap together.

    • To make sure the shell is fully attached, make sure the rear shell screw holes are flush in the chassis.

Conclusion

To reassemble your device, follow these instructions in reverse order.

Repair didn’t go as planned? Try some basic troubleshooting, or ask our Answers community for help.
Spencer Day

Member since: 14/09/22

117606 Reputation

0 comments