Introduction

Over time, wear and tear can take a toll on your Oreck XL U4120H2 vacuum cleaner's performance. A worn-out beater bar and belt can leave your carpets less than pristine and your vacuum struggling to keep up. Thankfully, replacing these parts is a simple process that can breathe new life into your vacuum. You'll just need a replacement beater bar, belt, and a screwdriver to get started.

Once your repair is complete, be sure to perform routine maintenance and keep an eye on these components to ensure your Oreck XL U4120H2 remains in tip-top shape for years to come.

  1. 2tJyWeiuJSbYsXdW
    2tJyWeiuJSbYsXdW
    bFbXaRvEW5rJP55b
    DBKumU2dThFOZrYu
    • Remove five screws with a long neck Phillips #2 screwdriver.

  2. sbGIf4G1Ewg3DBPN
    sbGIf4G1Ewg3DBPN
    hCjQOvUGLOCiRQ42
    H32GfoqElHfNFFr1
    • Remove the cover by lifting straight up.

    • Be sure to gently remove in case of bending the plastic.

  3. ZyWX46jkLuJZrGM3
    ZyWX46jkLuJZrGM3
    P3hPSFNXoWFTXSMI
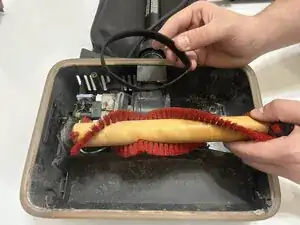
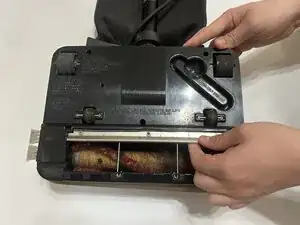
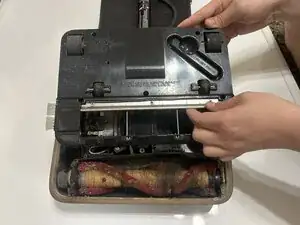
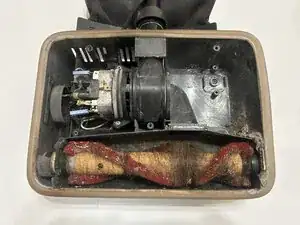
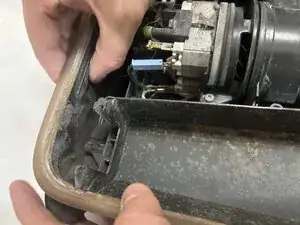
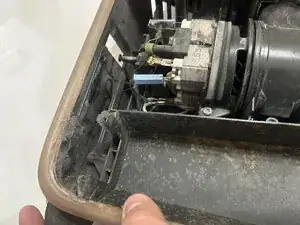
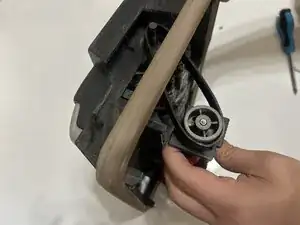
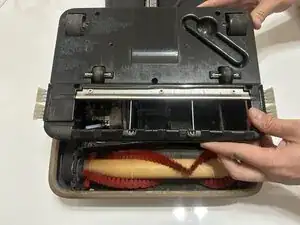
    • Next remove the agitator and belt.

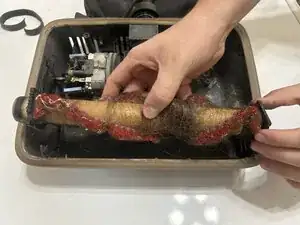
    • Pull the belt out first so it is easier to lift up the agitator.

    • Retrieve the new beater bar and belt.

  4. Xv3mJ4KXA3ock6wC
    Xv3mJ4KXA3ock6wC
    GSwnLgrwy4QshOgB
    1lDM64KkZTqTXDJt
    • If it is difficult to remove the belt, remove the side panel first.

    • Remove the screw and slide the panel to remove it.

  5. FEXF3plGeNkp3uo2
    FEXF3plGeNkp3uo2
    N1HopW5icQy2u4DP
    5EYJMJvNerhTXlyD
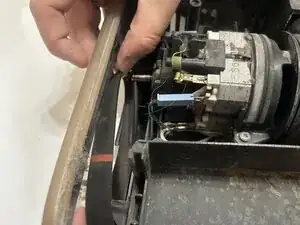
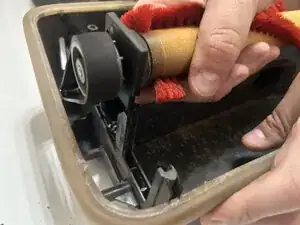
    • Connect the belt to the motor.

    • Attach the other side to the beater bar.

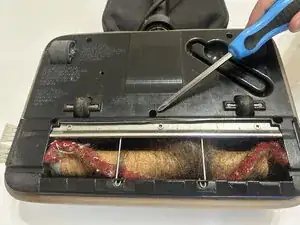
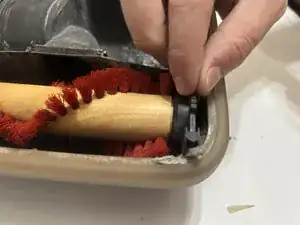
    • Slowly pull the beater bar into the grooves and push it down.

    • To make the process easier be sure to stretch the belt out manually before replacing.

  6. CZxGCR46vt3FraQI
    CZxGCR46vt3FraQI
    FVZt6t1Ev4buNCHO
    • Make sure it is secure in both sides.

  7. W3SpU2VSANHyi3BP
    W3SpU2VSANHyi3BP
    46RCvXqgC26sA6TM
    • Slide the side panel back on and tighten the screw.

  8. CfAMrHPKsoaP23te
    CfAMrHPKsoaP23te
    KJOyedYHvwWqAnvP
    lnlUAIYWbBTU2gfw
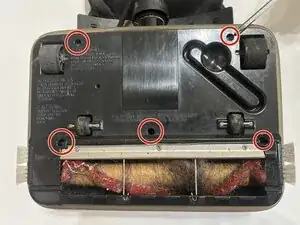
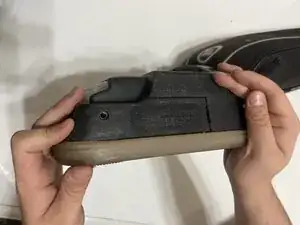
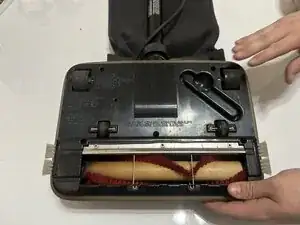
    • Place the bottom back on the vacuum.

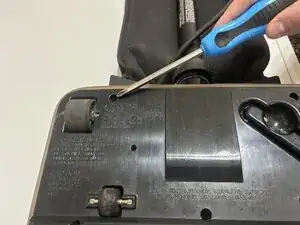
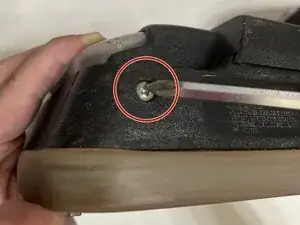
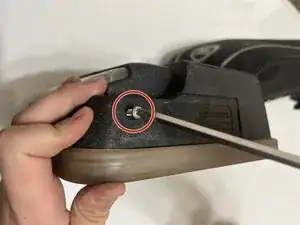
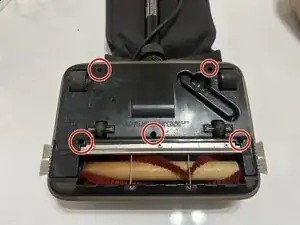
    • Screw in all five of the Phillips #2 screws to reassemble your vacuum.

Conclusion

If you follow the correct steps in order the vacuum should be running and cleaning up messes faster than before.

Isaiah Allard

Member since: 21/01/25

157 Reputation

0 comments