Introduction
Before replacing the motherboard, daughter board, or internal mechanical parts, you’ll need to carefully open the device to expose its inner components. This guide will walk you through the disassembly process required to reach the internal hardware safely.
Be sure to unplug the device and work on a clean, static-free surface. Handle all parts carefully, especially wiring and small connectors.
-
-
Remove the ten 13.6 mm Phillips screws from the perimeter of the outer cover.
-
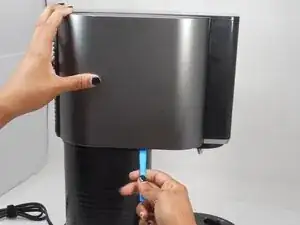
Lift the black plastic cover straight up and off.
-
-
-
Remove the four 12.2 mm Phillips screws from the black plastic cover.
-
Lift the black plastic cover straight up and off.
-


Conclusion
To reassemble your device, follow these instructions in reverse order.