Introduction

If your Moto G Stylus 4G isn't quite holding a charge, or isn't charging at all, use this guide to replace your faulty battery.

The battery supplies power to all components in the phone. A malfunctioning battery won't distribute power at all, or will have greatly reduced use time.

Before continuing with this guide, be sure to inspect the charging port for any debris that could interfering with the charging cord. you can use tools such as isopropyl alcohol or an ESD-safe brush to remove anything inside the port.

Steps 1 and 6 require you to remove the backplate (Step 1) and Battery (Step 6) from the phone with the use of a heating tool, such as an iOpener, a heat gun, or a hairdryer.

Be sure to completely power off the phone and disconnect the phone from any direct power sources before starting the repair.

  1. DPXPSXGpa1nJsrhx
    DPXPSXGpa1nJsrhx
    CDPoGcR2SPDJJxWx
    GOMiHZFwdZpWTYFM
    • Push a SIM tray ejector into the hole.

    • Remove the SIM card and tray.

    You can use a paper clip, as well, to remove the sim card. Just gotta bend it a bit, but it's the same dimension as a sim key!

    M. F. Espinoza -

  2. SsbpeKZEUwv1L1gQ
    SsbpeKZEUwv1L1gQ
    EnDgsQBVpCDp1SVn
    • Before you begin, discharge the battery below 25%. A charged lithium-ion battery can catch fire and/or explode if accidentally punctured.

    • Power off your phone and disconnect the charger and any peripheries before beginning disassembly.

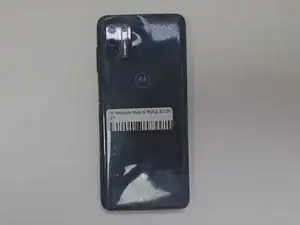
    • Lay the phone face down.

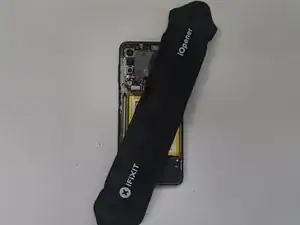
    • Heat an iOpener and apply it to the rear case.

    • Alternatively, use a hair dryer to heat the rear case until it's almost too hot to touch.

  3. tcDnhugH3PXPaVN1
    tcDnhugH3PXPaVN1
    HLCxRQ4NXf1Fewhb
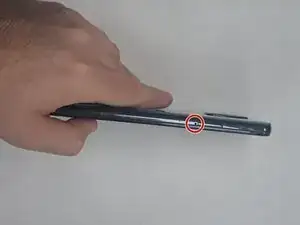
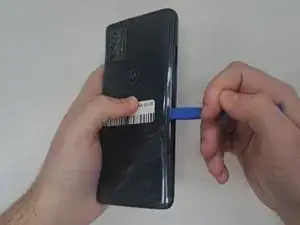
    • Insert an opening tool into the seam between the rear case and chassis.

    • Once you create a gap, insert an opening pick a couple of millimeters into the gap.

    • Slide the opening pick around the entire perimeter to sever the adhesive that secures the rear case.

    • If you feel excessive resistance, reheat the problem area(s).

    • Remove the rear case.

    I used the iOpener (heat pack) and microwaved it for 30 sec using a 1,000 Watt microwave. It came out hot enough, and I placed it on the back cover for about 2 minutes to get the adheasive mobile enough to use the opening tool to fit into the seam & pry it open a bit. This was the first time I'd ever removed the back, so I had to be pretty firm with pushing in the opening tool, but once it was wedged in enough to lift the back cover/insert the opening pick, I was able to move the pick a bit around the perimeter to remove the entire back. Notes about removal: the back cover is very thin & quite flexible, so be mindful not to use to much force when pulling it off. There is also adheasive around the perimeter of the back camera, so I used the opening pick/gentle upward pulling to get it loose - but go slow with this part if you have difficulty to avoid damaging the back cover. The adheasive is pretty determined, so the edges can restick to the back case perimeter as you maneuver around the camera area!

    M. F. Espinoza -

    That's a good point! The back panel is pretty thin and thinner than the average phone back panel.

    Even if it is your first time removing the back panel, it shouldn't require too much force. As long as the back is warm enough and the adhesive is melted enough you should be able to firmly wedge the pick between the phone and the back panel. Likewise, while removing the back panel you should be able to seperate and the back panel without much force. Also, the adhesive tends to quickly cool so you may have to reapply the heating pack while removing the back panel.

    Leaf Sampeck -

  4. 3LnTBhq2TMW2swcH
    3LnTBhq2TMW2swcH
    KXwwpCSRHipTOSQa
    btCrjAJ5BDhRPKfk
    • You may need to use your heating device again to remove glue from covering the screws.

    • Use a T4 Torx screwdriver to remove all eleven 3.2 mm screws securing the midframe.

    If you have a Moto G Stylus 2023 model, this is the guide: Motorola Moto G Stylus 4G (2023) Battery Replacement - once you've removed the back cover, you can skip to Step 2 in that guide (there are only seven 4 mm screws to remove for the 4G, 2023 model. I have a 5G, 2023 model, and that model actually has 8 screws - 2 of which are partially blocked by the back camera.

    M. F. Espinoza -

    p.s. Use the opening pick along the edges to separate the camera lens glass from the board.

    M. F. Espinoza -

    p.p.s. For the 5G 2023 model, once you remove the camera lense glass, you'll see 2 additional phillips screws that will aslo need to be removed to remove the midframe (so 10 screws in total for this model). Be very gentle when removing the camera lense glass with the opening pick to avoid breaking, especially for the thin portions around the lenses.

    I used the pick mostly for picking up the perimeter of the lense glass, then gently pulled up to get it all the way off of thee rest of the adhesive. For the screws that were only partially blocked by the lense glass, my phone had some adhesive that was also slightly covering the screws. Rather than remove it, I just peeled it back enough to remove the screws so I wouldn't need to replace the adhesive.

    M. F. Espinoza -

  5. SsWauYpRLEvNPI5j
    SsWauYpRLEvNPI5j
    m2NMTLFGjW2Q5VVZ
    • Use an opening tool to lift and remove the midframe.

  6. dwrKmE6TfSpZfQLI
    dwrKmE6TfSpZfQLI
    ego325XUZNbXkkud
    ioZDiBm5hTkIFisL
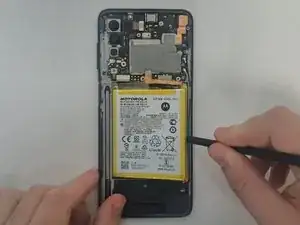
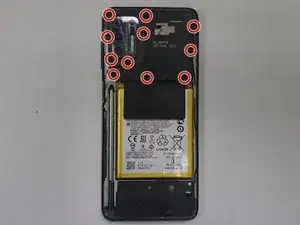
    • Remove the black graphite tape from the battery and surrounding components.

    • Use an opening tool to lift and disconnect the press connector above the battery.

  7. fTutQJ1OSaCYLJo6
    fTutQJ1OSaCYLJo6
    td1BYoivvdnCuCXG
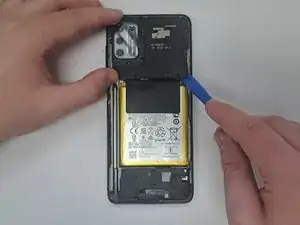
    • Use an iOpener or hair dryer to gently warm the battery to loosen to adhesive that secures it.

    • Warm the battery until it's uncomfortable to touch for more than a few seconds.

    • Use a spudger to gently pry around the entire perimeter of the battery until it fully releases.

    • Do not deform or damage the battery.

Conclusion

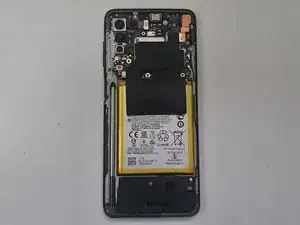
To reassemble your device, follow the above steps in reverse order.
For optimal performance, after completing this guide, calibrate your newly installed battery.
Take your e-waste to an R2 or e-Stewards certified recycler.
Repair didn’t go as planned? Try some basic troubleshooting or ask our Answers community for help.
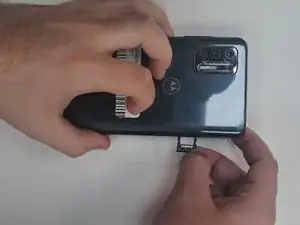
Milton Nichols

Member since: 28/08/24

159 Reputation

0 comments