Introduction

  1. QCU1Kr4aURSIRW56
    QCU1Kr4aURSIRW56
    CwU6cApjRL1XcweD
    CM2XMiXawgMjBIyr
    • Drain your eReader's battery as much as possible before starting your repair. Ideally, it should be fully discharged.

    • Optionally, to drain the battery faster, navigate to MoreSettingsEnergy saving and privacy and set Automatically go to sleep after and Automatically power off after to Never.

    • When working on or near the battery, don't use sharp metal tools to avoid puncturing and shorting the battery.

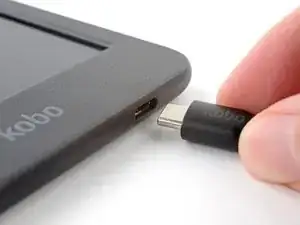
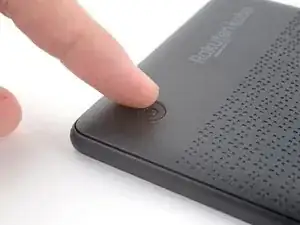
    • Unplug all cables and fully shut down your eReader.

    • Your screen should be black and say Powered off.

  2. awqP2GDCEv2q1Gip
    awqP2GDCEv2q1Gip
    PTsQGRWD4CALYKq6
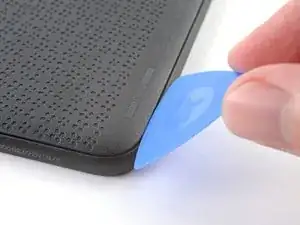
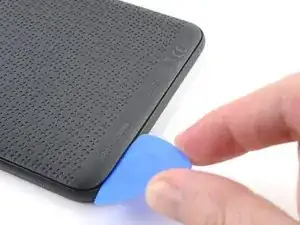
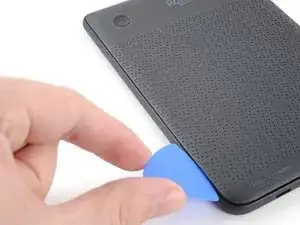
    • Lay your eReader down so the back cover is facing up.

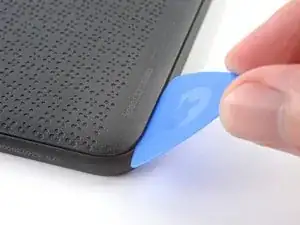
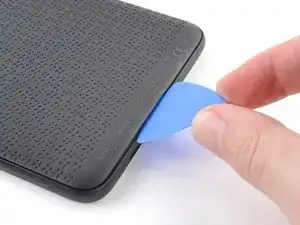
    • Insert the flat edge of an opening pick between the frame and the bottom left corner of the back cover.

    • Push the pick downwards at a slight angle until it slides under the back cover.

  3. JHSCBsdfXdXyrBlj
    JHSCBsdfXdXyrBlj
    NMWvYdZIyobdYRUu
    Kgrh2Udq6BqY2PMM
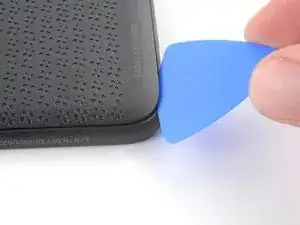
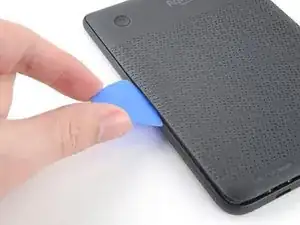
    • Slide the pick toward the bottom right corner to release the clips along the bottom edge.

  4. xrRL4gFPnCQVD66u
    xrRL4gFPnCQVD66u
    FPdLgXMeEQ16L4OR
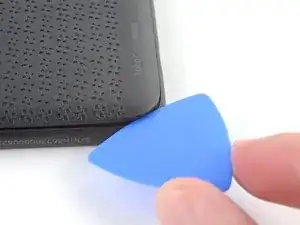
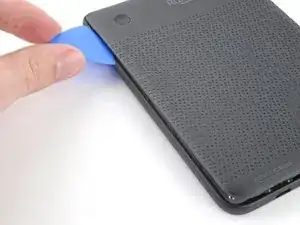
    • Remove the pick and reinsert it under the bottom left corner.

    • Angle the pick flat under the back cover and rotate it around the bottom left corner to release its clips.

    • If you're having trouble, try twisting the pick to lift the corner clips out of their slots.

  5. gZwNcpcZAwbgURWY
    gZwNcpcZAwbgURWY
    QuTZWngGpbicuBsP
    G3GCGn1XgJQMuGXB
    • Slide the pick toward the top left corner to release the clips along the left edge.

  6. XrwhQFfhdAXAZZw5
    XrwhQFfhdAXAZZw5
    hZDct5xsqUpwWyWk
    6C5PIUKvA1UIgxS6
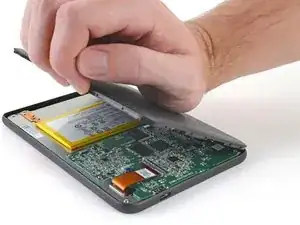
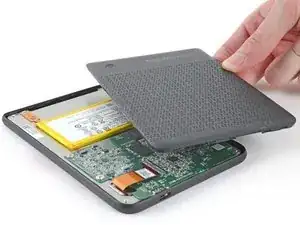
    • At this point, you should be able to grip the back cover and release its remaining clips. If not, slide a pick under the perimeter of the back cover until you can grip an edge.

    • Grip the left edge of the back cover and lift it away from the eReader to release the remaining clips.

    • Remove the back cover.

    • During reassembly, align the back cover over the eReader and press along the perimeter until all its clips snap back into place.

  7. r2jwgcMWWKuoNfXb
    r2jwgcMWWKuoNfXb
    F1Xda3JgVUD6O1PN
    joD2ZNOHHliOik6D
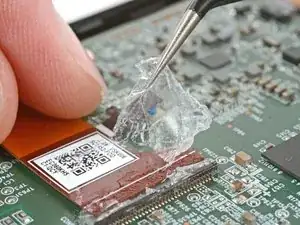
    • Nearly the entire surface of the eReader's internals is covered in a thin, plastic-like waterproof coating. Keep the following in mind as you continue disassembly:

    • While this won't hurt your device, removing the coating compromises the device to potential water damage.

    • The coating is brittle and can flake into many small pieces. Heating the coating helps, but working with it is still a time-consuming process.

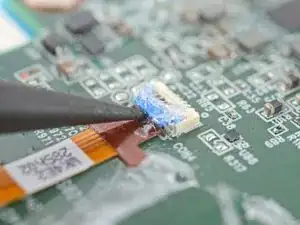
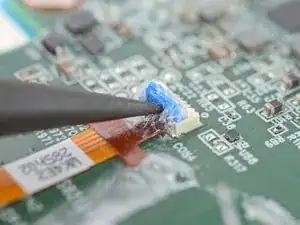
    • The ZIF connector locking tabs are coated in a gel that can jam the hinge and keep the locking tab from completely unlocking. Make sure the tabs are completely upright before disconnecting any cables.

    • Depending on your repair, you might have to remove the coating completely from the connectors and their cables.

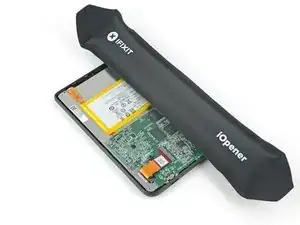
    • If at any point the coating becomes too difficult to work with, heat it for 90 seconds with an iOpener or a hair dryer.

  8. PUcLYrXh15Dg3YpG
    PUcLYrXh15Dg3YpG
    OJSFA4KKElYrjclF
    • Use a clean fingernail or the flat end of a spudger to pry up and disconnect the battery press connector.

    • Don't pull on what looks like a clear connector pull tab. The tab is secured to the socket gasket.

  9. KhFyRwZRLXBopU4x
    KhFyRwZRLXBopU4x
    K3B5A4s42hShfRy1
    lEVXJtloUOhFnNPv
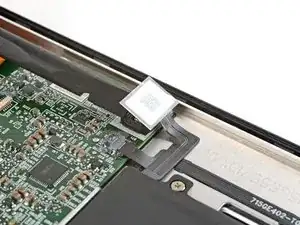
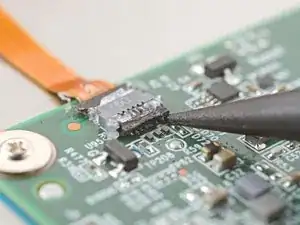
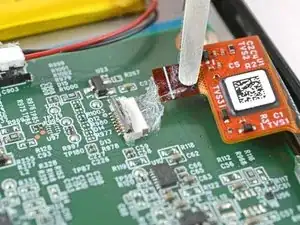
    • Various small, fragile surface-mounted components surround the motherboard ZIF connectors. Avoid prying against them.

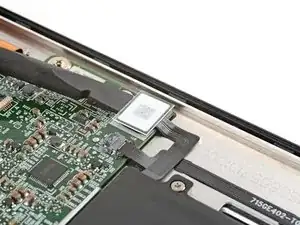
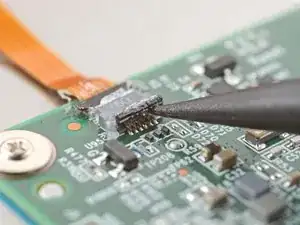
    • Use the point of a spudger to lift up the locking tab on the power button cable ZIF connector.

    • The locking tab should be nearly vertical when unlocked. If it isn't, gently push the tab forward to compress the waterproofing gel and unlock the tab.

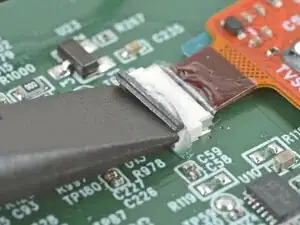
    • Use a pair of blunt nose tweezers to grip the cable close to the head and pull it away from its ZIF connector slowly and steadily to separate the coating.

    • During reassembly:

    • Inspect the head of the cable and the ZIF connector for any remaining coating that could prevent a good connection.

    • Peel off the coating—heating the cable and the ZIF connector when the coating becomes too brittle.

    • It doesn't have to look pretty! You just need to remove enough coating to have the cable sit properly in its connector.

  10. QMT2lOZKQDJX4AVr
    QMT2lOZKQDJX4AVr
    fHyNn1fcRB2hE2Vb
    QOcCaVP1SLhbfjii
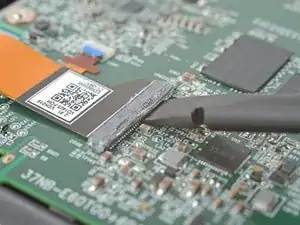
    • Use the flat end of a spudger to lift up the locking tab on the digitizer cable ZIF connector.

    • The locking tab should be nearly vertical when unlocked. If it isn't, gently push the tab forward to compress the waterproofing gel and unlock the tab.

    • Use a pair of blunt nose tweezers to grip the cable close to the head and pull it away from its ZIF connector slowly and steadily to separate the coating.

    • If the coating feels stubborn, you may need to lightly heat it with an iOpener or a hair dryer.

    • During reassembly:

    • Inspect the head of the cable and the ZIF connector for any remaining coating that could prevent a good connection.

    • Peel off the coating—heating the cable and the ZIF connector when the coating becomes too brittle.

    • It doesn't have to look pretty! You just need to remove enough coating to have the cable sit properly in its connector.

  11. FvVsyGjRKUnmWpXA
    FvVsyGjRKUnmWpXA
    GXsODrykIVgGLxBA
    VqPBsOFxk6Hv6SJa
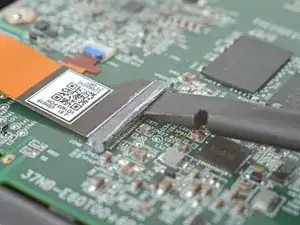
    • Use the flat end of a spudger to lift up the locking tab on the display cable ZIF connector.

    • The locking tab should be nearly vertical when unlocked. If it isn't, gently push the tab forward to compress the waterproofing gel and unlock the tab.

    • Use a pair of blunt nose tweezers to grip the cable close to the head and pull it away from its ZIF connector slowly and steadily to separate the coating.

    • If the coating feels stubborn, you may need to lightly heat it with an iOpener or a hair dryer.

    • During reassembly:

    • Inspect the head of the cable and the ZIF connector for any remaining coating that could prevent a good connection.

    • Peel off the coating—heating the cable and the ZIF connector when the coating becomes too brittle.

    • It doesn't have to look pretty! You just need to remove enough coating to have the cable sit properly in its connector.

  12. dkrN144fh3cpTAAU
    dkrN144fh3cpTAAU
    pmSXG2usMirpdHBF
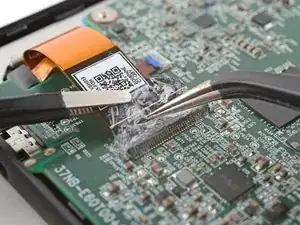
    • Pull the display cable away from its ZIF connector slowly and steadily at a level angle to separate the coating at the corners.

    • If you're having trouble, try rocking the cable side-to-side while pulling.

    • Once the cable comes completely out of its socket, lift it up and peel off any remaining coating holding it to the motherboard.

    • Lift the display cable out of the way of the backlight cable underneath.

  13. MTZgojIeVNAfZfmf
    MTZgojIeVNAfZfmf
    UGYepVB3oHOi6Odu
    FnQ3hujAqHRkIsMM
    • Use the point of a spudger to lift up the locking tab on the backlight cable ZIF connector.

    • The locking tab should be nearly vertical when unlocked. If it isn't, gently push the tab forward to compress the waterproofing gel and unlock the tab.

    • Use a pair of blunt nose tweezers to grip the cable close to the head and pull it away from its ZIF connector slowly and steadily to separate the coating.

    • If the coating feels stubborn, you may need to lightly heat it with an iOpener or a hair dryer.

    • During reassembly:

    • Inspect the head of the cable and the ZIF connector for any remaining coating that could prevent a good connection.

    • Peel off the coating—heating the cable and the ZIF connector when the coating becomes too brittle.

    • It doesn't have to look pretty! You just need to remove enough coating to have the cable sit properly in its connector.

Conclusion

To reassemble your device, follow these instructions in reverse order.
Carsten Frauenheim

Member since: 10/03/20

145028 Reputation

0 comments