Introduction
This guide demonstrates how to replace the LCD in a Huawei Matebook D 15.
For user safety, the battery is removed during this guide, removing the risk of shocks.
The device used in the images in this guide has cosmetic damages, including missing most of the screen bezel. Your device may differ slightly to the device shown.
-
-
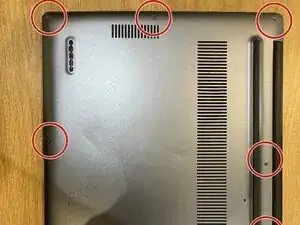
Remove the 10 P5 screws securing the case.
-
Use a spudger to pry the edges of the case up, releasing the plastic tabs holding the base in place.
-
-
-
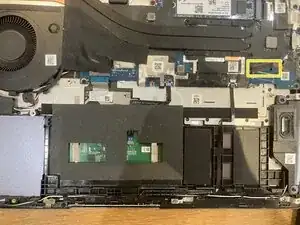
Remove the 3 PH00 screws holding the battery in place.
-
Slide the battery forwards and lift it from its housing.
-
Pry the end of the battery connector from its housing.
-
Remove the battery.
-
-
-
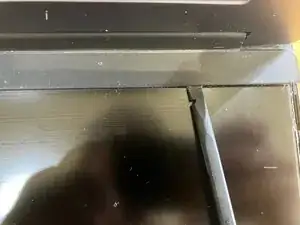
Using a spudger or pry tool, separate the screen bezel from the case.
-
Separate the bezel from the hinge housing and remove it.
-
-
-
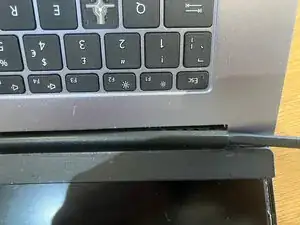
Insert a pry tool onto either side of the LCD and slide downwards towards the keyboard.
-
Repeat for the opposite side once all adhesive is broken. There are no delicate cables between this LCD and the top of the laptop case.
-
Fold the LCD upwards towards the keyboard.
-
-
-
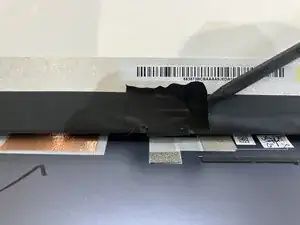
Remove the piece of tape holding the LCD cable in place
-
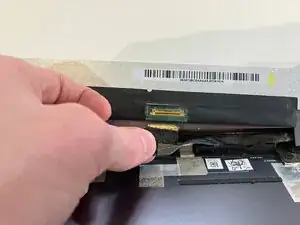
Pull the cable away, removing it from the LCD.
-
Remove the LCD.
-
Follow these steps in reverse order to reassemble.
-


To reassemble your device, follow these instructions in reverse order.