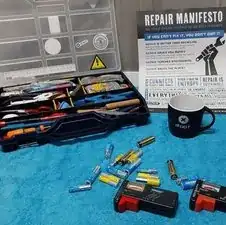
Introduction
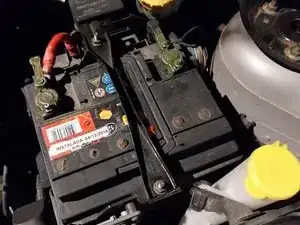
An automobile battery is an example of a composite wet-cell used to store the electrical potential of a chemical reaction. Each cell consists of alternate plates made of either a lead alloy (the cathode) or coated with lead dioxide (the anode). The plates are submerged in a sulfuric acid solution that facilitates the reaction, known as the electrolyte. The cells are connected in series from the positive plates of one cell to the negative plates of the next, ending in a pair of external lead posts mounted at the top or sometimes the side of the battery.
For many decades, cells each had a filler cap through which the electrolyte level could be checked and which allowed water to be added to the cell. Those caps had a small vent hole which allowed the hydrogen gas byproduct of charging the battery to safely escape from it.
-
-
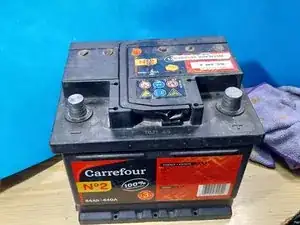
The long-standing problem with current car batteries is that, mostly due to government regulations, they are marketed as "SEALED WITHOUT MAINTENANCE" by design from the factory.
-
That they are sold pre-sealed for safety reasons can be understood as true and a benefit on its face, but the claim of "No Maintenance"…that demands much closer scrutiny. If you neglect a car battery by failing to replace the distilled water that simply must evaporate from inside it over time substantially reduces its useful life.
-
Your vehicle's battery can function longer and do so more reliably if you carefully replace the evaporated water on occasion, as was customarily done in years past.
-
-
-
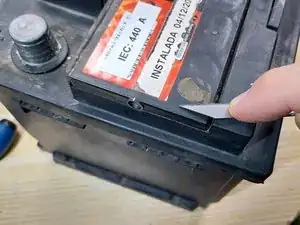
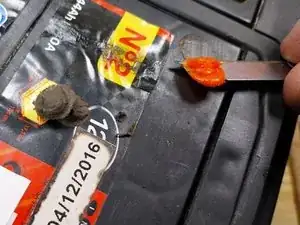
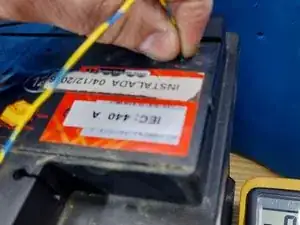
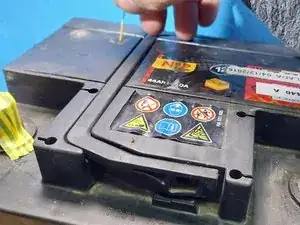
As you can see in the photos, this battery has several small drops of colored silicone on its top. Wondering why they are there? I carefully placed placed them there to seal the access holes I made on previous occasions when I refilled it with water. Every car battery that was sold used to have them not so long ago.
-
This is a playlist of videos on YouTube that will help you see everything more clearly.
-
-
-
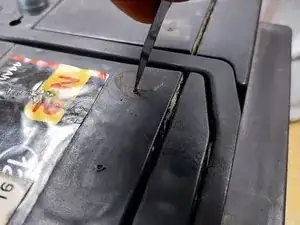
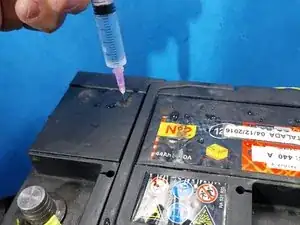
To access each of the six independent cells inside of this battery, I carefully drilled a small hole into the top of each one using a standard 3/32in. bit. Be precise with the drill when making them; you should only drill deep enough to fully penetrate the plastic shell, a depth of no more than approximately ½ inch.
-
We drill holes that are 3/32in. in diameter because they are just large enough for water to flow naturally but can still be sealed easily. Holes that are 1/16in. or smaller in diameter would require us to use a tube and syringe to refill with water, while those that are ⅛in. or larger become more difficult to plug securely.
-
-
-
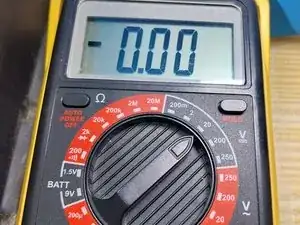
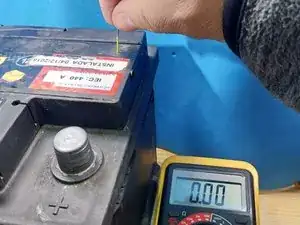
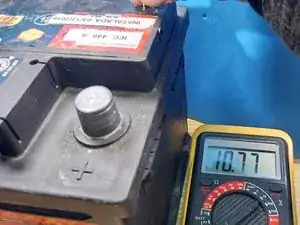
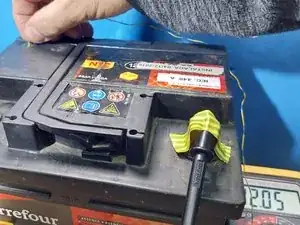
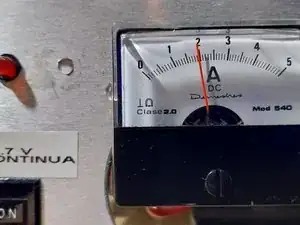
To check the internal levels of the electrolyte, we will use a multimeter set to measure volts in DC as a proxy for determining how concentrated the fluid is. Use the scale closest to 12V, which on this multimeter is the one marked 20V.
-
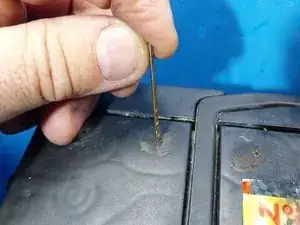
For a probe to connect the multimeter with the electrolyte pool, we will use a suitable length of any thin, rigid wire such as a multi-strand data cable, which works very well for this task. Ordinary Category 3 telephone wire is also excellent for this situation.
-
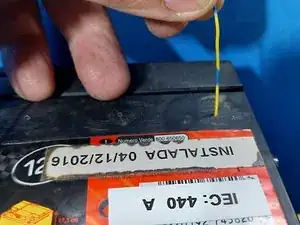
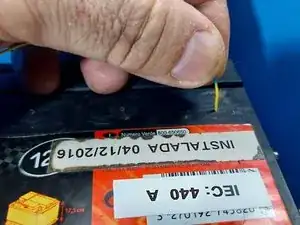
Connect the selected probe wire to the positive (+) terminal of the multimeter (usually colored red) and them use an appropriate form of adhesive tape to secure the multimeter's negative (-) terminal (usually colored black) so it stays in firm contact with the negative (-) post of the car battery.
-
In order for the wire to detect the concentration of the electrolyte fluid, we first need to strip a bit of the insulation from the end that will be inserted into the cells; since the connection is being made to a liquid, even as little as ⅛in. is sufficient, though a bit more makes things easier.
-
-
-
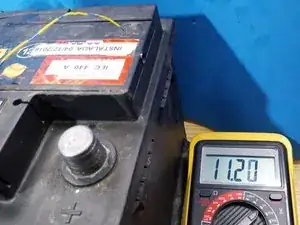
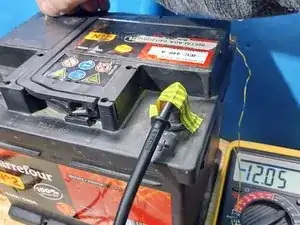
With the wire fully straightened and rigid, begin inserting it into the hole for the cell that is located the furthest from the battery's negative (-) post. When the bare end of the wire eventually makes contact with the electrolyte, the multimeter will register a live measurement of its electrical potential in volts.
-
In this YouTube playlist, you will find several videos demonstrating exactly how to calculate the electrolyte concentration level using the measurement of its voltage.
-
-
-
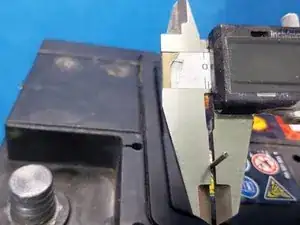
Once certain that the multimeter's reading is steady, record it and then remove the wire from the hole while keeping a firm grip on it at the point that was just above the top of the battery just before the multimeter lost the reading.
-
By holding the wire at that point outside and in front of the battery, you can quickly gauge the height of the fluid in the cell relative to the battery's overall height. In this particular case, doing this led us to realize that the manufacturer still placed tabs indicating the maximum and minimum fluid levels right on the battery casing.
-
-
-
We will repeat this process for each cell in turn, until finally we reach the final one that is directly below/alongside the battery's negative post.
-
Since that post is physically connected to the final cell, we must switch the placement of our taped multimeter probe to the battery's positive (+) post in order to still have a complete circuit to measure.
-
Though this final reading will instead be the cell's inverse electrical potential, we can simply ignore the negative sign in front; a cell's potential is not affected by the "direction" in which it's measured.
-
-
-
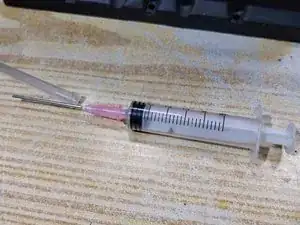
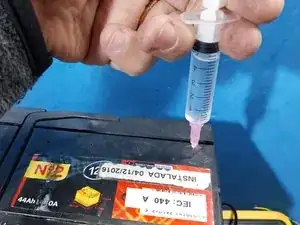
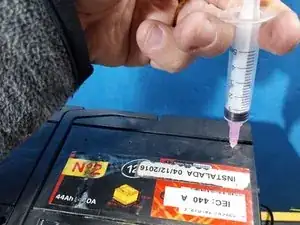
To add water to replace what's evaporated from the battery, a wide-bore syringe makes things easiest (the type commonly used to refill inkjet printer cartridges).
-
Use only DISTILLED WATER, or when truly desperate, water taken from an air conditioner is typically similarly pure. Refill it a little bit at a time; this process has no "Undo" button if you add too much. To determine when the level is correct, we must repeat steps 6, 7 and 8.
-
-
-
Once the water has been replaced, we will fully charge the battery,using a portable battery charger if necessary.
-
Another playlist on YouTube containing some further tips regarding automotive batteries.
-
Here is a video demonstrating an alternate method for checking an automotive battery's electrolyte levels, however it only works with one that have translucent white plastic shells.
-
Once the battery has been recharged for a maximum of 8–12 hours, disconnect it and allow it to rest for at least an hour to allow any gases collected inside to escape.
-
Then use J-B WaterWeld, DAP, Gorilla caulk or another equivalent acetic bathroom silicone (they smell of vinegar and are often marketed as "mold/mildew resistant") to fashion plugs for the six holes that were made. Allow the silicone to dry for 2–3 hours before reinstalling and reconnecting it in the vehicle.
-


Since a battery's performance is affected most by the concentration of the acid in its electrolyte solution and it is widely known that today's "sealed" automotive batteries do, in fact, still lose water from their electrolyte slowly to evaporation, we are well-served to continue the practice of measuring the fluid levels in our vehicles' batteries and replenish them when needed to maximize their lifespan and minimize the waste created by their disposal.