Introduction

Follow these instructions to use an Anti-Clamp to open a device.

  1. mrpdQUQtBhsRRJlb
    mrpdQUQtBhsRRJlb
    icTbUkI3VLtalwQf
    UALiVJAZHpaEx4ML
    • The Anti-Clamp needs smooth, even surfaces for its suction cups to adhere to.

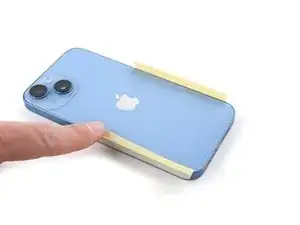
    • If your device has cracked glass or a slippery surface, follow this guide to apply the included tape pad.

    • Packing tape also works to cover a cracked display.

    • If your back glass is badly shattered, the tape might damage it further. Refer to your specific guide to use a suction handle instead.

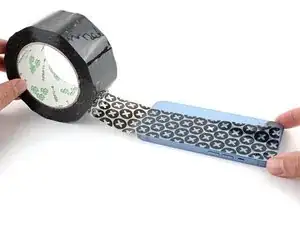
    • If your device can be opened from both its screen and back cover, follow this guide to apply the included tape strips.

  2. D54NuMTREEanNvSg
    D54NuMTREEanNvSg
    tTBQtQlTwLMyEUwd
    • Pull the blue handle backward to disengage the arms of the Anti-Clamp.

    • The handle may be stiff the first time you unlock the arms.

  3. CqAkQKHuyZ1AWOD2
    CqAkQKHuyZ1AWOD2
    BBxbWeKQosXjtD4c
    trG2q3Am2rEqxei5
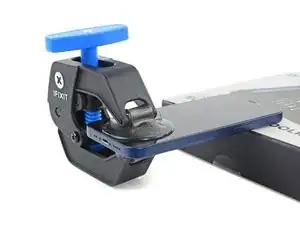
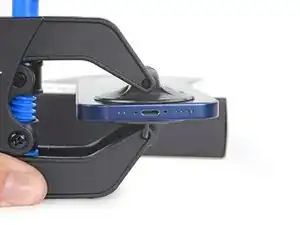
    • Rotate the Anti-Clamp to the side so it doesn't obscure your starting edge. Refer to your original guide for which edge to start with.

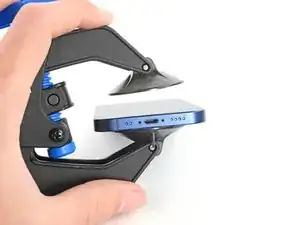
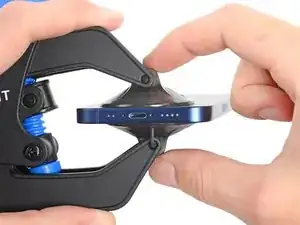
    • Center the suction cups over a smooth area of the device near the starting edge.

    • Avoid buttons, gaps, seams, and speakers, as they will prevent a good hold.

  4. gX6n2hB5BGQRNw5l
    gX6n2hB5BGQRNw5l
    gduA3FccDSc1cYVn
    • Squeeze the suction cups together to secure them to the device.

    • If the cups are stiff and hard to secure, use your hands to warm them up.

  5. IgMuJAR1IRvsXXJb
    IgMuJAR1IRvsXXJb
    WhDW5CbjnDZ2RdrF
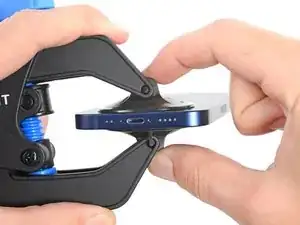
    • The suction cups need to be aligned with each other for the Anti-Clamp to work properly.

    • Improper alignment may cause the cups to separate prematurely. Pull the cups off the device using their pull tabs and re-center them.

  6. oAq44mODDcaCQaQp
    oAq44mODDcaCQaQp
    XQLhVyKo3B5Q3DFJ
    • Push the blue handle forward to lock the arms.

  7. MTT4rJWpyHnjjqdM
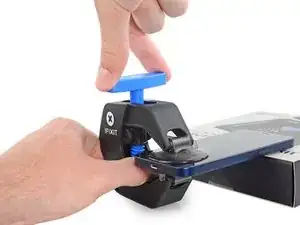
    • Place a support under your device so the Anti-Clamp stands upright without being held in place.

  8. IQ3hGIi3JXNDggpc
    IQ3hGIi3JXNDggpc
    CZFgGlAa1YX3Qsnj
    • Most adhesives separate under constant tension rather than more force. Take your time during this process to avoid breaking the suction cups free or violently opening your device.

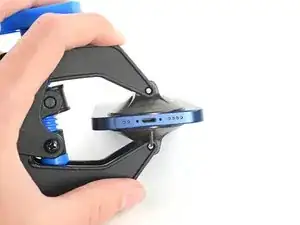
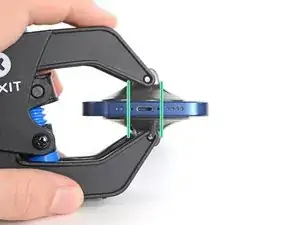
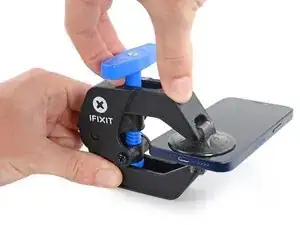
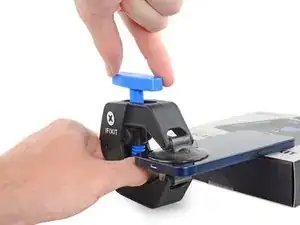
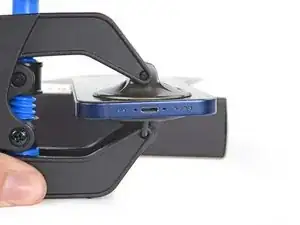
    • Twist the handle clockwise one full rotation (360 degrees) or until the cups begin to stretch.

  9. XUXaHwjhp2cfjMOq
    XUXaHwjhp2cfjMOq
    KmHBZIJZOd2OpY1d
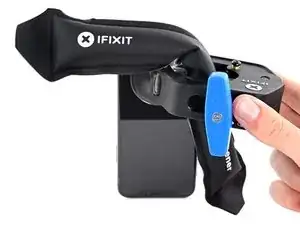
    • For smaller devices, thread a heated iOpener through the arms of the Anti-Clamp to heat your device.

    • For larger devices, or iPhone models 12 and newer, use a hair dryer or a heat gun to soften the adhesive along your starting edge.

    • iPhone models 12 and newer have a tougher adhesive that the iOpener is less effective at opening than a hair dryer or heat gun.

    • Be careful not to overheat your device. The edge should feel slightly too hot to touch.

  10. h2EerpnmfAtQrA6C
    h2EerpnmfAtQrA6C
    PorZxVFEOVyIMTql
    URbtu6lWDnA4i2Vu
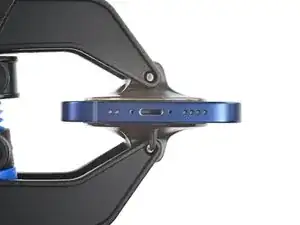
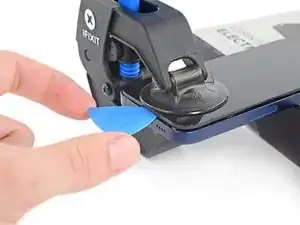
    • Wait one minute to give the adhesive a chance to release and present a gap.

    • If the Anti-Clamp doesn't separate the adhesive after one minute, apply more heat and wait another minute. Be patient and let the Anti-Clamp do the work for you.

    • If, after several rounds of heating, the device doesn't show any signs of opening, twist the knob one quarter-turn.

    • Don't twist the knob more than three additional quarter-turns. Only use additional heat at this point. The more you twist the knob, the more likely the device is to suddenly pop open.

  11. ZGEyXWGTHCUvUMHx
    • Insert an opening pick into the gap created by the Anti-Clamp.

  12. M4CT1MtM2ZDgHttG
    M4CT1MtM2ZDgHttG
    sAkCCfN6DfJEpCcU
    lpLmSmSNeZDP2cIV
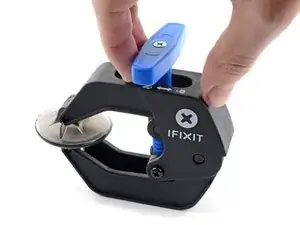
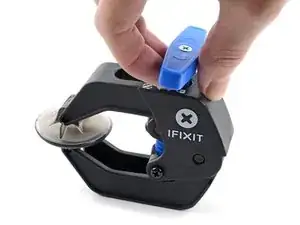
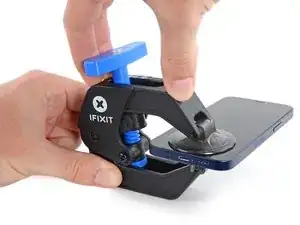
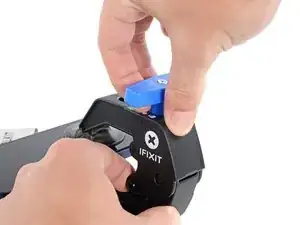
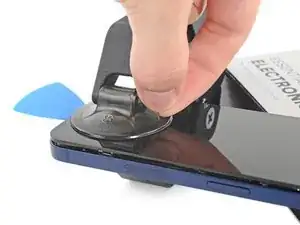
    • Pull the blue handle backward to the unlock icon to disengage the arms.

    • Pull the suction cups off of the device using their pull-tabs.

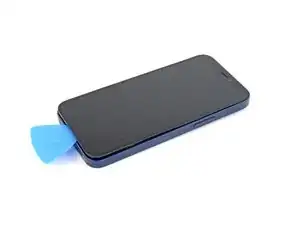
    • Remove the Anti-Clamp and set your device on a flat surface.

  13. hPgh6HyuUdofNwXF
    • Return to your original guide and continue disassembly, skipping any steps that open the device with a suction handle.

Conclusion

For other general electronics skills guides, click here.

For a fun way to decorate your Anti-Clamp, click here.

Alex Diaz-Kokaisl

Member since: 16/01/22

168721 Reputation

10 comments

Very clear step-by-step guide. The next time I do a battery replacement I intend to use one of these.

4surferboy -

Engaging the Opening Mode the first time takes a bit of a push, don't be afraid, keep pushing until you hear a click. Seems to be easier to engage after the first time.

Ed Reeder -

Hi Ed,

Thanks for the helpful feedback! I've implemented your note into the guide step.

Arthur Shi -

Looks like an answer to a problem that I don't have right now but I plan to purchase one of these before I do any more battery replacements.

glynn -

I used mine to open a Samsung Galaxy Tab A7 tablet. Very frustrating, seemed like you needed three hands to put it in place (though later I found a better procedure). The OEM case glue was quite powerful (used a heating pad to get the tablet Very hot). The Anti-Clamp had difficulty holding to the back of the case and kept losing its grip. I didn't try the packing tape trick, just now noticed it. I mainly used the top suction cup just by itself.

The replacement battery had a very long battery cable and didn't lay flat, which caused a bright spot on the display where the cable "kink" was. So time to remove the case again. This time I stuck each suction cup individually, screen side first, the case - firmly pressing each cup flat after placement. No need to "fight" the Anti-Clamp to get it in place, plus I think I got a better hold with the cups. The B-7000 glue I used was much easier to break loose than the OEM case glue.

To loosen the suction cups I slid an opening pick under the edge of the cup.

Ed Reeder -

Excellent step-by-step guide.

ADEL ALGHAMDI -

Thank you ,hope more lessons like this, for example change battery or something else

Thank you again

Ron

ron -

gracias excelente presentación.

yimi triana brand -

Hi everyone, i have a question, this tool can help me open my watch? is 41 mm diameter?

Andrés Felipe Osorio Alarcón -

I couldn't help but notice that in this guide it has it aligned perpendicular to the phone but in the YouTube video you guys posted online on how to use it it is parallel with the phone. Does it not matter or is it best practice to do one or the other?

Ammon Reeves -