Introduction
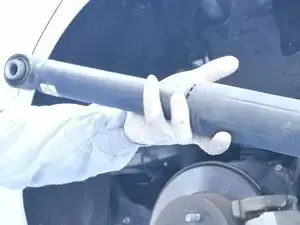
This guide shows how to replace the rear shocks on your 2018-2024 Toyota Camry.
Shock absorbers do exactly as they say: they absorb shock, generally slowing your suspension travel down, helping keep your tires in contact with the road, ensuring more secure handling. Their proper operation is important for your vehicle's safety.
Excessive bouncing, uneven tire wear, or a rough ride are symptoms of worn-out shocks.
Note: Several fasteners must be torqued to specific values on reassembly, so a torque wrench is an essential tool.
Tools
Parts
-
-
Position a floor jack at the designated rear jack point and raise the vehicle high enough to reach all shock fasteners.
-
-
-
Slide jack stands under the rear pinch welds on both sides and lower the vehicle onto the stands.
-
-
-
Compress the shock slightly and rotate it to gain tool access to the lower 22 mm nut.
-
Use a 22MM combination wrench to break the 22MM nut loose and remove it, retaining the washer for re‑installation.
-
Use a 12 mm socket on the stud hex end to unscrew the stud from the control arm. This is very tight.
-
You can remove the shock at this point and go on to the next step.
-
-
-
Pry off the plastic dust cap to expose the upper 17 mm nut.
-
Hold the shock shaft with a 6 mm hex key and remove the 17 mm nut with a box wrench or pass‑through socket to release the mount.
-
When the 17 mm nut is removed, you can slide the mount off the shock body.
-
-
-
Slide the upper mount onto the new shock in the same orientation as removed.
-
Tighten the 17 mm nut until it bottoms out while holding the shaft with the 6 mm Allen key.
-
-
-
Thread the stud back into the lower control arm and torque it securely. Use a 12 mm hex socket on the hex end to turn it.
-
-
-
Position the floor jack under the lower control arm to carry the suspension weight.
-
Remove the 12 mm bolt securing the brake hose bracket to the body.
-
Unthread the 14 mm bolt at the upper control arm mount to allow the suspension to drop.
-
-
-
Slowly release the jack to drop the control arm until the shock can be slid free of the wheel well.
-
Use the same motion during installation to guide the new shock into position without forcing components.
-
-
-
Slide the shock eye onto the stud, install the saved washer, and thread on the 22 mm nut.
-
Use a 22 mm socket to tighten the nut firmly while keeping the shock correctly seated on the stud. Torque this nut to 92 ft-lb (125Nm) with a torque wrench per ALLDATA.
-
Raise the jack to return the suspension to its normal height.
-
-
-
Use a 17 mm socket to install the two upper mounting bolts.
-
Use a torque wrench to torque the two upper 17 mm shock mounting bolts to 29 ft lb (39.3 Nm) to secure the shock to the body.
-
Reinstall the 14 mm upper control arm bolt and use a torque wrench to tighten to 54 ft lb (73 Nm)
-
Reinstall the 12 mm brake hose bracket bolt, tightening to 21 ft lb (29 Nm).
-
-
-
Install both wheels, tighten the lug nuts, and remove the jack stands.
-
Lower the Camry slowly so the new shocks compress in a controlled manner.
-
After driving a short distance, re‑check lug nuts for proper torque.
Dispose of used shocks as directed by the manufacturer. They contain oil and pressurized gases.
Repair didn't go as planned? Ask our Answers Community for help.

