
Introduction
Basic tools such as a Philips screwdriver and a plastic spudger should be all that is needed. Small pliers could help in a couple of spots
-
-
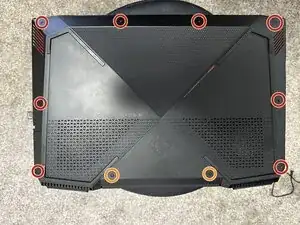
Power the laptop down fully. Remove the 10 screws on the black panel with a #2 Philips screwdriver. The two center screws (pictured in orange) at the rear are captive and do not need to be removed entirely, only loosened.
-
-
-
Remove the battery for safety. Remove the four screws holding down the battery pack. Lift straight up and slide slightly forward to fully unseat the battery pack from the hold-down tabs at the bottom of the pack.
-
-
-
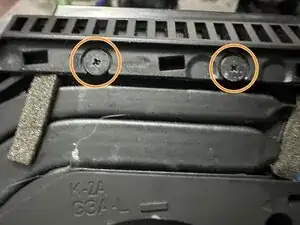
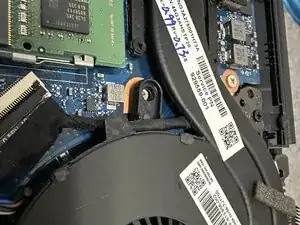
Remove the 10 screws pictured. The two orange-marked screws must be removed to pull the vent-style piece off the back of the laptop to access a hidden screw labeled with the green arrow. The vent will pop off with light force pulling away from the computer. Once all screws are removed the hold-down bracket over the fan will come right off
-
-
-
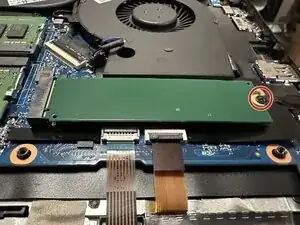
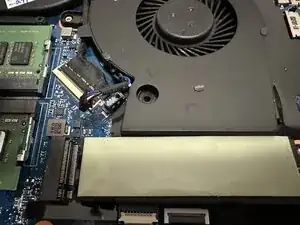
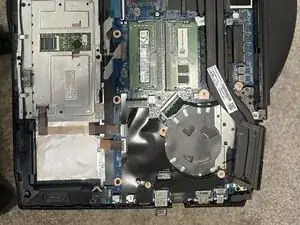
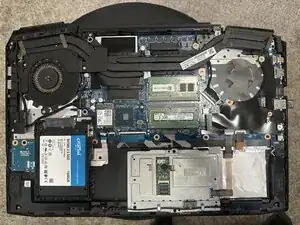
Remove the hold-down screw for the SSD. Gently lift the SSD away from the thermal pad and pull it out of the connection slot.
-
-
-
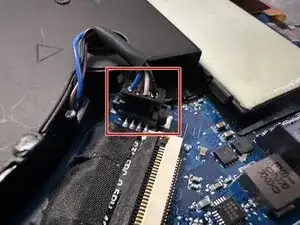
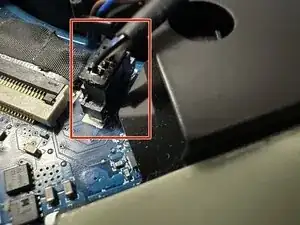
Pull directly up on the connector body, and be careful not to pull the wires off the fan. Since there is no locking mechanism holding the connector in place, mild force should be sufficient to disconnect the fan from the motherboard.
-
-
-
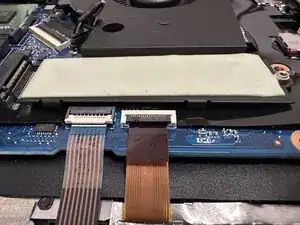
This fan will include a place for the SSD's thermal pad. If your pad is in good shape, carefully transfer it to a new fan. If the pad is damaged, it must be replaced. The OEM pad should be sticky on the back to hold it on the new fan.
-
-
-
At this point, the old fan can be removed. Note the cable running over one of the fan mounting locations. Take care not to catch this cable during the removal of the fan. Slide the bracket arm under the cable and remove the fan.
-
-
-
Reassembly is the reverse of teardown. To assemble the laptop, follow the steps in the opposite order. When reconnecting the fan, ensure the connector is appropriately lined up with the port on the motherboard to prevent damage to the pins.
-


To reassemble your device, follow these instructions in reverse order.