Introduction

Use this guide to replace the WLAN module (aka Wi‑Fi card) in your HP EliteBook 840 G7 laptop.

You may need to replace the WLAN module if your laptop frequently drops Wi‑Fi connections or experiences unusually slow speeds despite a strong signal. Depending on your laptop configuration, you may be able to upgrade your WLAN card to one with newer Wi-Fi standards, if necessary.

Still under warranty? Contact HP to learn your warranty status, receive a repair under warranty if eligible, or for further warranty information.

  1. puhVjJCRCYqHx4Lv
    puhVjJCRCYqHx4Lv
    JynbORmcorgOaWP4
    • Before starting your repair, allow your laptop's battery to drain below 25%—a charged lithium-ion battery is a potential safety hazard if accidentally damaged.

    • Save your work, fully shut down your laptop, and unplug all cables.

  2. hrfBs4HVDBEwVNtf
    hrfBs4HVDBEwVNtf
    RSfhtT2LVUNsB3mY
    • Despite the standards, Phillips screwdrivers can vary in size and shape—two drivers labeled as the same size may fit differently in the same screw. Use the size that fits the most snug into the screw head to avoid stripping it.

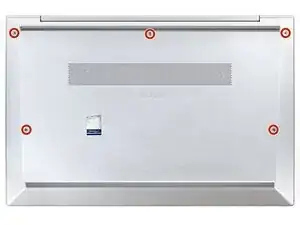
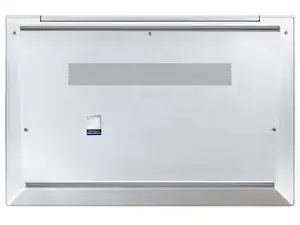
    • Use a Phillips screwdriver to fully loosen (but not remove) the five captive screws securing the bottom cover.

  3. D5sZo1kqYHjf2AWA
    D5sZo1kqYHjf2AWA
    ExwrCQpwuKY2ihLS
    ubDE62wtAsdo5Fkd
    • Position your laptop so the rear edge (with the screen hinge) is closest to you.

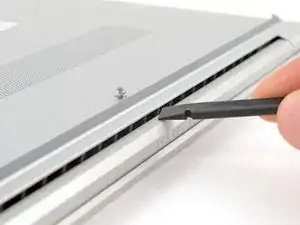
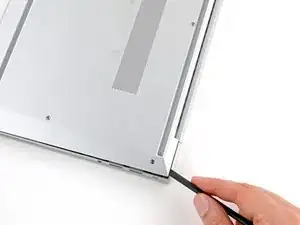
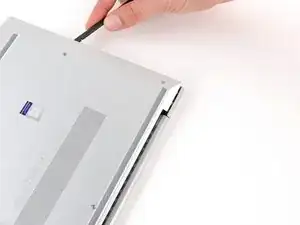
    • Insert the flat end of a spudger between the rear edge of the bottom cover and the frame, near the middle screw and ELITEBOOK text.

    • If you're having trouble inserting your spudger, make sure the screw is fully loosened. If necessary, use your fingers to gently pull the screw up.

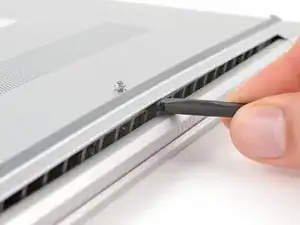
    • Use your spudger to pry up the cover to release the clip securing it.

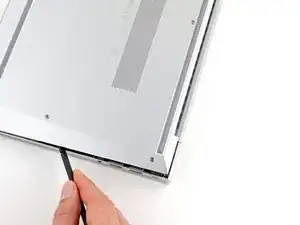
    • Leave the spudger inserted under the bottom cover for the next step.

  4. DoEXCJAJCQ5FMQOK
    DoEXCJAJCQ5FMQOK
    KXMfNsuD51COLuqC
    C3oj1cfTFGluKCZ5
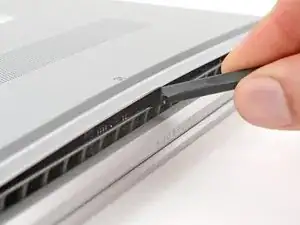
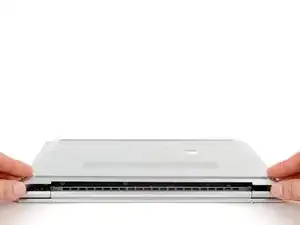
    • Slide your spudger along the rear edge toward one of the corners to release the rear edge clips.

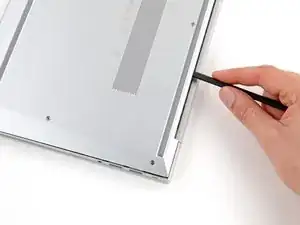
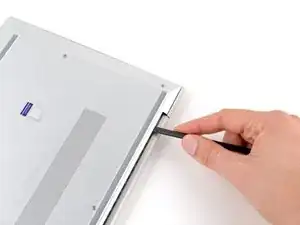
    • Rotate your spudger around the corner and up the edge to release the clips securing the short edge of the cover.

  5. b42iAcquGMpVPDQX
    b42iAcquGMpVPDQX
    rACDKrVwnjuUYenU
    HkkRBICYcpGZUPDC
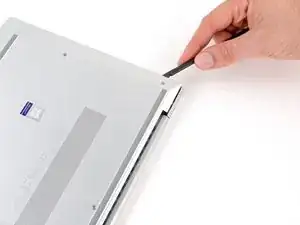
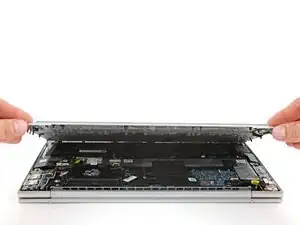
    • Reinsert the flat end of a spudger near the ELITEBOOK text.

    • Repeat the previous step for the other side of the cover to release the remaining clips.

  6. sv1LLWPHSofRTsuG
    sv1LLWPHSofRTsuG
    C4Rxj3EqQUyh3uYo
    qqQwAIZgGfJnNoQ1
    • Lift and remove the bottom cover.

    • The cover should lift away easily. If you feel resistance, use the flat end of a spudger to release any remaining clips, and check that all screws are fully loosened.

    • During reassembly, slide the clips along the front edge of the cover (opposite the hinge) into their slots on the frame, then lay the cover down. Press firmly around the perimeter to engage all of the clips.

  7. dDOQ3fXNQk2x4C1T
    dDOQ3fXNQk2x4C1T
    qBYCWasnjYVsGuq5
    cUZhtVaMXevGVOTN
    • Position your laptop so the front edge (opposite the screen hinges) is closest to you.

    • Use the point of a spudger or your fingernail to push on alternating sides of the battery's sliding connector to walk it completely out of its socket.

  8. kuxVXULOtjfDtnvo
    kuxVXULOtjfDtnvo
    o1qqWOgNb6Sen4qV
    5PAHOSXAI1tTosj1
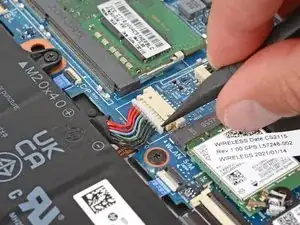
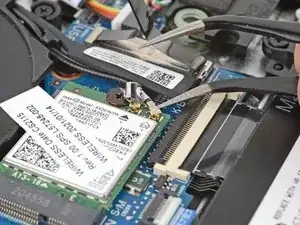
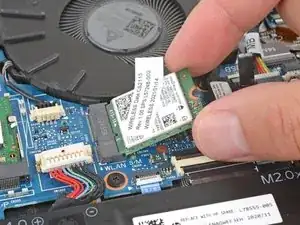
    • Slide an arm of a pair of angled tweezers under the metal neck of one of the coaxial connectors on the WLAN (Wi-Fi) module, located just below the fan.

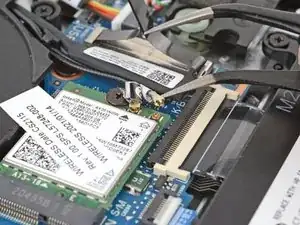
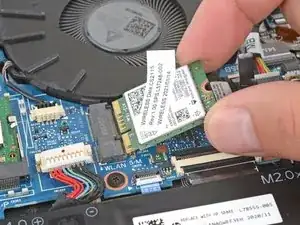
    • Lift straight up to disconnect the cable.

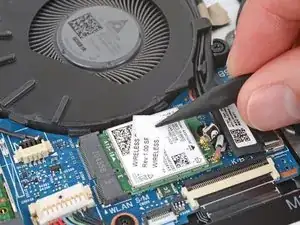
    • Repeat to disconnect the second connector.

    • During reassembly:

    • Connect the cable with black tape to the socket with a black arrow below it, and the cable with white tape to the socket with a white arrow.

    • Use tweezers to hold a connector in place over its socket and gently press down with your finger or a spudger—the connector should "snap" into place. If you're having trouble, reposition the head and try again. Don't use excessive force.

  9. P32vuAEnOQqdZsIq
    P32vuAEnOQqdZsIq
    PQX6TFRUhPJD2L2f
    • Use a spudger or tweezers to peel up any tape that's stuck to the fan.

    • You don't need to fully remove the tape—it can stay on the Wi-Fi module.

  10. IIQfuIvvmon1braE
    IIQfuIvvmon1braE
    lXMEbxdVCEw2HSMC
    • Use a Phillips screwdriver to remove the 2.4 mm‑long screw securing the Wi-Fi module.

    • With the screw removed, the module may pop up at a slight angle.

    • During reassembly, gently hold down the module while installing its screw.

  11. PNUGETw4dChjYJxR
    PNUGETw4dChjYJxR
    agNmDqmsU4ftYVKC
    • Don't pull up at a sharp angle, or you may damage the Wi-Fi module and its socket.

    • Grip the Wi-Fi module by its edges and pull it straight out of its socket to remove it.

    • During reassembly, insert the module into its socket at a slight downward angle.

Conclusion

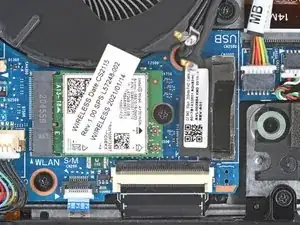
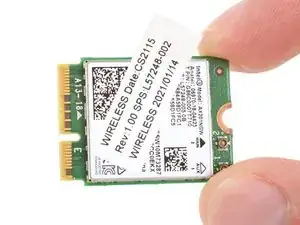
Compare your new replacement part to the original part—you may need to transfer remaining components or remove adhesive backings from the new part before you install it.

To reassemble your device, follow these instructions in reverse order.

Take your e-waste to an R2 or e-Stewards certified recycler. Depending on your region, used HP devices and parts can be returned for reuse or recycling through the HP Planet Partners program.

Repair didn’t go as planned? Try some basic troubleshooting, or ask our Answers community for help.

Spencer Day

Member since: 14/09/22

117606 Reputation

0 comments