Introduction
The SSD is where a computer stores information, including the operating system. If your hard drive is damaged, it can cause a variety of problems including crashes and (in Windows computers) the infamous blue screen.
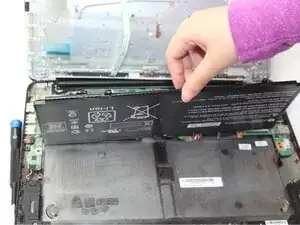
This guide will run you through how to open your HP 14-SMB Chromebook, disconnect the battery and take out the hard drive.
-
-
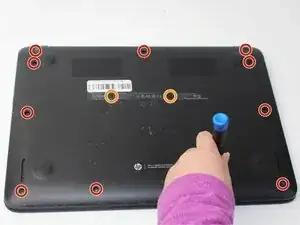
Lay the laptop down with the lower case facing up.
-
Remove eleven screws using a Phillips screwdriver.
-
Remove the two rubber stoppers, then remove the two Phillips screws.
-
-
-
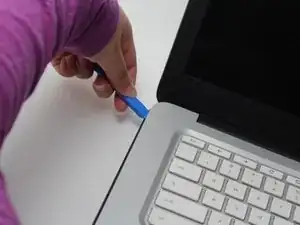
Flip the laptop over and open the lid.
-
Insert an opening pick into the seam between the keyboard and chassis.
-
Slide the opening pick a few centimeters along the seam to begin to release the clips.
-
Once there's enough space in the seam, insert an opening tool into the seam.
-
Pry around the entire perimeter of the keyboard until it fully releases.
-
-
-
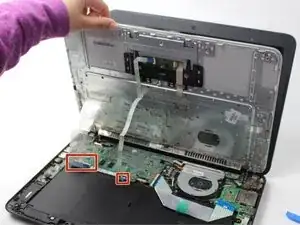
Lift the keyboard perpendicular to the laptop.
-
Flip up each of the the two black ZIF locking flaps that secure the keyboard and trackpad ribbon cables to their motherboard sockets.
-
Disconnect the keyboard and trackpad ribbon cables.
-
Remove the keyboard.
-
-
-
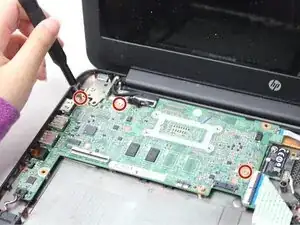
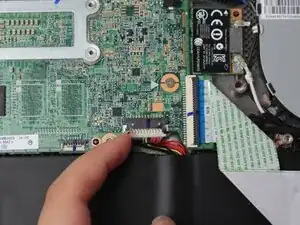
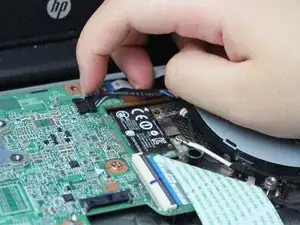
Use your fingernail or the flat end of a spudger to gently disconnect the battery connector from its motherboard connector.
-
-
-
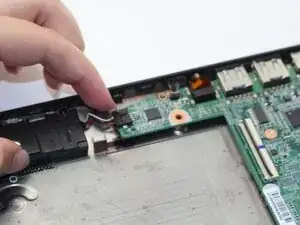
Use your fingernails or the flat end of a spudger to disconnect the speaker and fan connectors from their motherboard sockets.
-
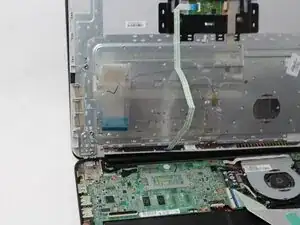
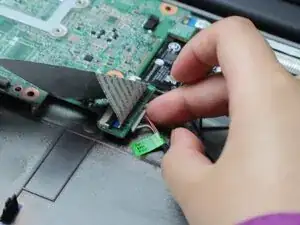
Flip up the black ZIF locking flaps of any ribbon cables connected to the motherboard.
-
Disconnect the ribbon cables.
-
Use your fingernails to disconnect the white connector on the underside of the motherboard.
-
-
-
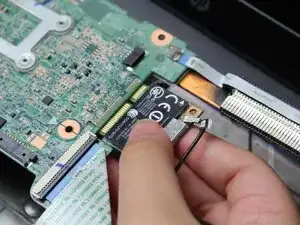
Disconnect the two wireless card antenna cables.
-
Pull the wireless card directly out of its motherboard port.
-
-
-
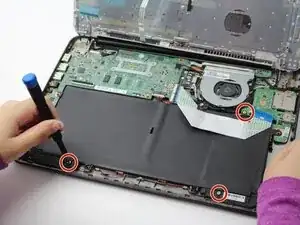
Pull the motherboard a few millimeters to the right to unseat the ports from the chassis.
-
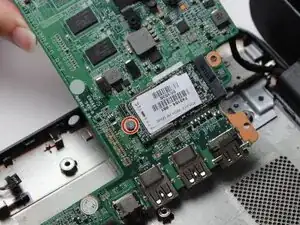
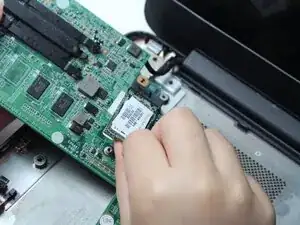
Turn the motherboard over.
-
Remove the single Phillips screw that secures the SSD.
-


To reassemble your device, follow the above steps in reverse order.
Take your e-waste to an R2 or e-Stewards certified recycler.
Repair didn’t go as planned? Try some basic troubleshooting or ask our Answers community for help.