Introduction

Whether it is from long-term use or from excessive force, a keyboard is a component of a computer very prone to damage. Thankfully, the process of replacing the keyboard for the Inspiron 15-5551 is a relatively simple process.

As with any electrical device, there are some precautions that should be taken beforehand. Disconnect the laptop from any power sources or connected devices. You should ground yourself before touching any internal components by touching an unpainted metal surface. If you are planning on doing further work on the internals beyond the scope of this guide, then you should ground yourself periodically.

  1. WOYMiYrVEZSn6pVS
    WOYMiYrVEZSn6pVS
    Y2bGknAw3MBoYgRW
    6c1rEwavAaAXFFT6
    • Turn your laptop upside down.

    • Slide the battery latch to unlock the battery and remove it.

  2. ZPFEeEkBsLbErUEu
    • Open the laptop display and press the power button for 5 seconds to ground it.

    • Grounding the computer helps prevent electrostatic discharge, which is harmful to the computer. It is also recommended that you ground yourself by touching an unpainted metal surface to prevent damaging the internal components.

  3. yAKRGpJQRP4b3BAX
    yAKRGpJQRP4b3BAX
    DZqfOD1CmExytLLw
    ZQXGm41vq4PrbrIG
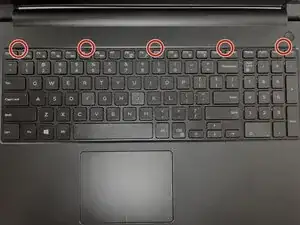
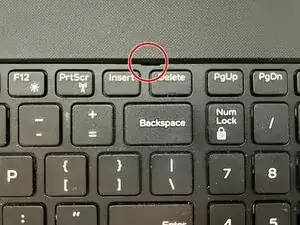
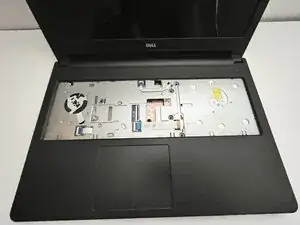
    • Insert the flathead end of the spudger into the holes at the top the keyboard to pry the keyboard free from the securing clips.

    • Slide the keyboard towards yourself to release it from the top case.

    • Lift the keyboard from the case.

  4. hjBt2uVGKvNaZId4
    hjBt2uVGKvNaZId4
    oEX6YfHXEqL6Zc2T
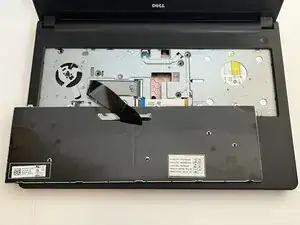
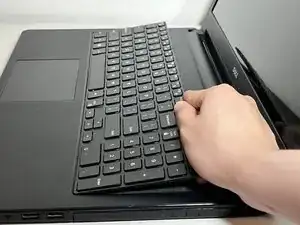
    • Slide the keyboard upward to release it from the palm rest.

    • Lay the keyboard with the keys facing down on the palm rest to access the inside of the laptop.

  5. TkfPhryPdIZNFLGD
    TkfPhryPdIZNFLGD
    HN6JeTwefUFAhVmv
    JapBsqvKicbobOmB
    • Lift the black latch to disconnect the keyboard cable and freely remove the old keyboard.

    • Do not pull the cable without lifting the lock. This will damage the cable and possibly the lock.

  6. UjFMBY21KlFGFRc3
    UjFMBY21KlFGFRc3
    L2RbMFOSyfnCoMmk
    gGgQKewcJLlQANLA
    • Connect the replacement keyboard by sliding the cable under the latch and locking it again.

    • Make sure the label on the cable is facing up the right way and that the cable is properly aligned within the latch.

  7. OKsOR2H3K2DFw6PV
    OKsOR2H3K2DFw6PV
    VIUdHjoo2IeHuk1J
    • Slide the bottom of the keyboard into the palm-rest

    • Firmly press the keyboard into position to properly snap it into place.

Conclusion

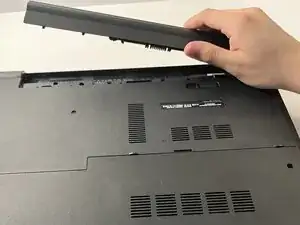
Once the keyboard has been replaced, the battery can be reinserted into the laptop and is ready to use.

SamM.

Member since: 04/03/25

145 Reputation

0 comments