Introduction

If your Arlo Pro 2 is having performance issues or has endured physical damage, follow this guide to replace the Arlo Pro 2 base station motherboard

Overtime the device motherboard may experience performance or compatibility issues like crashes.

Before using the guide, disconnect the Arlo Pro 2 base station from the external power source and make sure it is powered off.

  1. FeittCXRJmeJSUDD
    FeittCXRJmeJSUDD
    sDlMY3iPtWYhPWSJ
    kQZrEODmaBRtRHU3
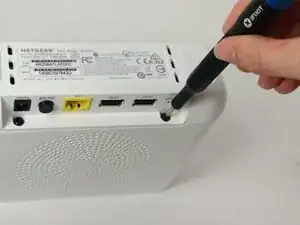
    • Use a TR10 Torx screwdriver to remove the two 10 mm screws on the side of the base station, above the USB ports.

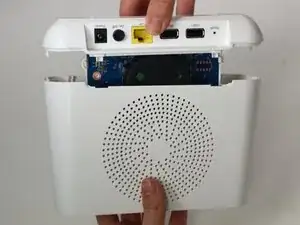
    • Pull apart the top case from the bottom.

    • This may require some force as there are internal catches.

  2. EholG1nujnRjEtBH
    EholG1nujnRjEtBH
    BEGHlFGbwajbpQTg
    BM2ZQiRcgkEG6qrQ
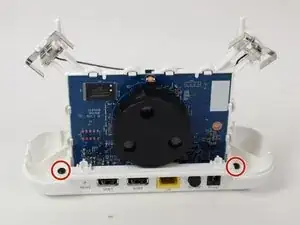
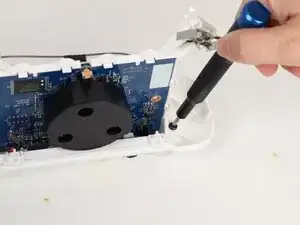
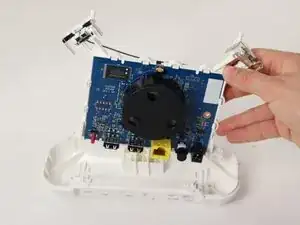
    • Use a TR10 Torx screwdriver to remove the two 10 mm screws to disconnect the motherboard from the base casing.

    • The motherboard is connected to the USB ports; when removing it be careful to gently remove the USB ports from their cavities to avoid any damage.

Conclusion

To reassemble your device, follow the above steps in reverse order.
Take your e-waste to an R2 or e-Stewards certified recycler.
Repair didn’t go as planned? Try some basic troubleshooting or ask our Answers community for help.
Ben I.

Member since: 26/03/25

493 Reputation

0 comments