Introduction

Use this guide if you have no sound or distorted sound when using the Anker Soundcore Motion Boom Plus. This step-by-step guide will safely remove and replace the subwoofer and restore the device to its best performance. Before continuing to the guide, ensure that the device is powered off and use the tools listed to avoid damaging sensitive parts of the device.

  1. XWGiE32O41PfdGxm
    XWGiE32O41PfdGxm
    oE26Mfx1SHJ5Qaif
    hFroDkoGGHHFYKUU
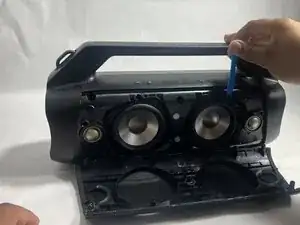
    • Insert an opening tool into the seam between the speaker grille and the chassis.

    • Pry the tool around the top, bottom, and sides until the grille fully releases.

    • Apply gentle pressure to avoid damaging the grille.

    • Remove the grille.

  2. mYQBEn23nwThq3PE
    mYQBEn23nwThq3PE
    VTDmFMZxkgUKJ1Pv
    • Remove the two passive radiators on either side of the device.

    • Avoid pulling too hard or with too much force to prevent breaking the passive radiators.

  3. RPTdMNIRIwTtutc3
    RPTdMNIRIwTtutc3
    tX1cBsCKJVIgJg3P
    • Remove the sixteen 14 mm Phillips screws, eight on each end of the speaker.

  4. d4f6y52lIyCQIeqM
    d4f6y52lIyCQIeqM
    vgjHVsLtpUC2BBD5
    x6Op5WpkHseI4mxH
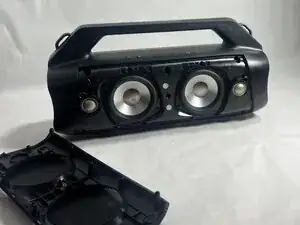
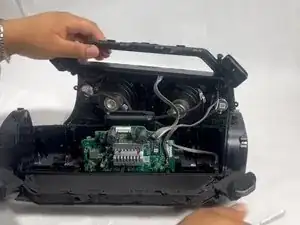
    • Gently remove the handle from the device by clicking off the handles from the sides and then pulling it off.

  5. KhEZUtigO4mxMmJG
    KhEZUtigO4mxMmJG
    fJJUxtuVocFRMgUZ
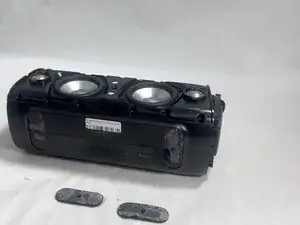
    • Flip the speaker onto its side and use a spudger to remove the two rubber feet on the bottom of the device.

  6. CDp4HSupNkYQneey
    CDp4HSupNkYQneey
    ZmboJVJOIPYfpbnD
    • Remove the eleven 13 mm Philips screws that secure the driver housing.

  7. hg2HVC3SX3FonWPV
    hg2HVC3SX3FonWPV
    TkDVpEIBH2m4Gfix
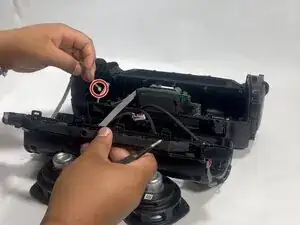
    • Remove the two 14 mm Phillips screws located on each side of the handle, near the clip points.

  8. U2fks2XxoYvRkRhA
    U2fks2XxoYvRkRhA
    5hTBSrESYWHiKXA4
    • Remove the four 14 mm Philips screws on the top of the device.

  9. KPH65eOXVVdNE2tS
    • Insert a spudger into the seam on top of the device.

    • Gently pry the casing open.

  10. ne2XVrmIxKtTsLxo
    ne2XVrmIxKtTsLxo
    ZCFAnSwUShPQSMFe
    hVDgitxCqvixFIBH
    • Disconnect each of the three cables by gently pulling the connectors out of their sockets.

    • Do not pull with force. The ribbon cables are fragile and easily break.

  11. knGvjSlsvbYEZ5VD
    knGvjSlsvbYEZ5VD
    WwoXUrctqKyeajvf
    ZWf4duYC1UMCkQhE
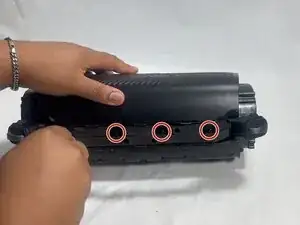
    • Remove the four 11 mm Phillips screws securing the right subwoofer.

    • Gently pull the subwoofer out of the device.

  12. qS4RJYUB6qlkaAUi
    • Detach the cables connected to the subwoofer.

    • Do not pull with force, as the cables are fragile and easily break.

    • Remove the right subwoofer.

    • Repeat the previous two steps for the left subwoofer.

Conclusion

To reassemble your device, follow the above steps in reverse order.
Take your e-waste to an R2 or e-Stewards certified recycler.
Repair didn’t go as planned? Try some basic troubleshooting or ask our Answers community for help.

Hayley

Member since: 26/03/25

988 Reputation

0 comments