Introduction

If your Acer Chromebook Spin 714 CP714-2W-56B2's trackpad has become unresponsive, erratic, or physically damaged, replacing it can restore proper input functionality. Common issues that may require trackpad replacement include loss of cursor control, unregistered clicks, or visible wear and tear.

  1. ANV5MmEIfwxWKuFX
    ANV5MmEIfwxWKuFX
    gmtKBAF16KCiIibL
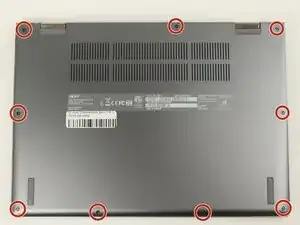
    • Flip the laptop to show the bottom side.

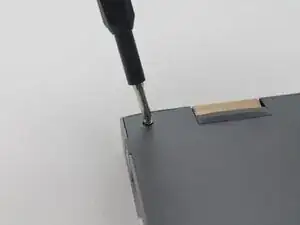
    • Remove the nine 6.5 mm screws using a JIS #1 screwdriver.

  2. Wkn1YlgNTRxc2BCJ
    Wkn1YlgNTRxc2BCJ
    UOcVUvnFJZaM2KUb
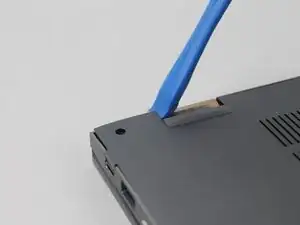
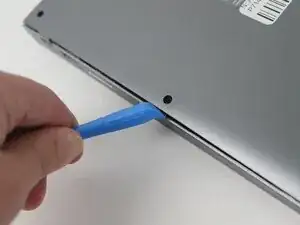
    • Use a plastic opening tool to separate the outer casing and panel; gently work the tool around the entire outer edge

    • The easiest place to start is at one of the hinges. The corners can be somewhat difficult.

    • Be gentle. The internal clips can snap.

  3. FKyUYKmuVpcePLkL
    • Peel off the tape covering the wires.

  4. SAEuY2TADcPy5e1b
    SAEuY2TADcPy5e1b
    chJNmJBN5DHYrsrm
    VfDJW4M6uoH3w1ka
    • Lift the battery from its studs, and place it closer to you.

    • The battery is not clamped or screwed onto the frame. Once you disconnect the battery, you are able to safely remove it by picking it up.

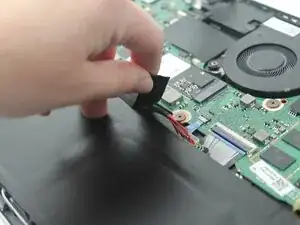
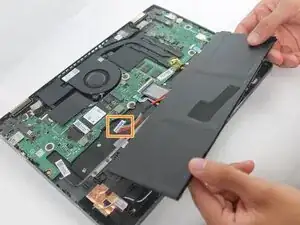
    • Unplug the rainbow wires connecting the battery to the motherboard.

    • Be sure to only grab the white portion of the plug, do not overstretch the rainbow wires.

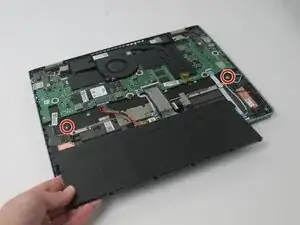
    • Remove the battery from the laptop.

  5. jGnTtGLLoKTCRLY4
    jGnTtGLLoKTCRLY4
    UP1QbYiNCJGimJS6
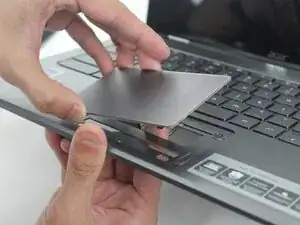
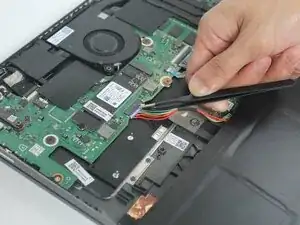
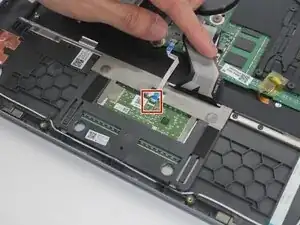
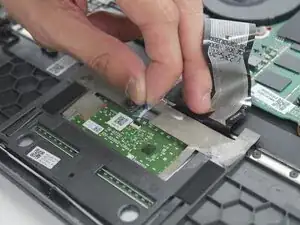
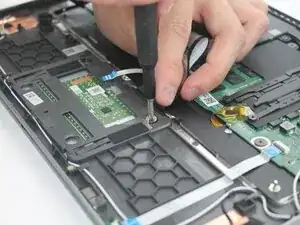
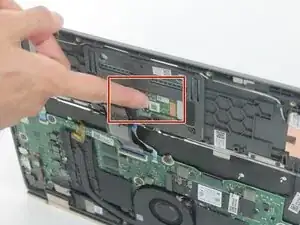
    • Pull the blue ribbon by gently lifting up the flap to disconnect the trackpad from the motherboard.

  6. Y6d2YGPKE1nHLH6H
    Y6d2YGPKE1nHLH6H
    QQuSsiXARWeVVHCr
    • Peel off the sticker that covers the screws locking the trackpad in place.

  7. VAPWuxO6CjWBimvK
    VAPWuxO6CjWBimvK
    rPKeKHXsyYCyhFwq
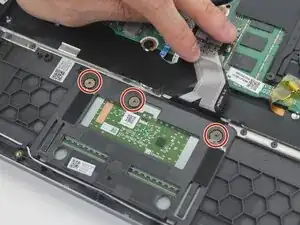
    • Using the Phillips #00 screwdriver, remove the three 2 mm screws securing the trackpad to the frame.

  8. cISKNWFnDnWEFOU4
    cISKNWFnDnWEFOU4
    ZQrjdQnNYKAoFSq4
    dTt1ii4VJpTXGdWV
    • From the internal side of the frame, gently apply upward pressure to the bottom side of the trackpad.

    • The trackpad will pop free from the palm rest opening as you push it outward.

    • Carefully lift the trackpad away from the laptop, noting its orientation for reinstallation.

Conclusion

To reassemble your device, follow these instructions in reverse order.

Ariana Lafitte

Member since: 19/02/25

469 Reputation

0 comments