Introduction

Use this guide to replace the radio in your 2015 Toyota Tacoma with an aftermarket option.

The Radio in your truck is important in everyday use of the vehicle. Not only do you use it to listen to music on your commute, but also for making hands-free calls. If it no longer powers on or if it does not send an audio signal to the speakers, it will need to be replaced.

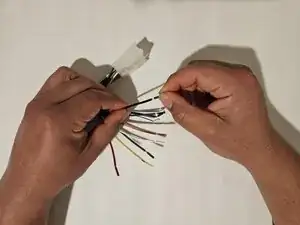
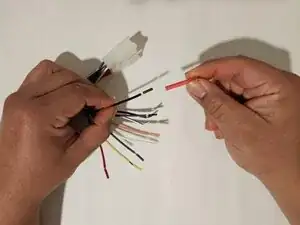
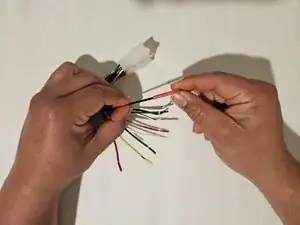
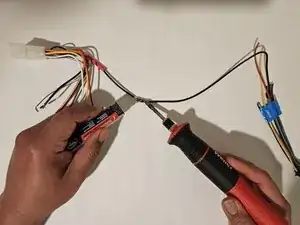
In step 9 of this guide you will need to solder wire connections together from your Toyota adaptor and new radio harness. Use this guide, How to safely join two wires, to create a secure connection and avoid burning yourself.

  1. TsiAwLenKKXhbwFm
    TsiAwLenKKXhbwFm
    33DtlIEpfOAOSOEa
    • Use a panel trim tool to pry the air conditioner control panel away from the dash.

    • Be gentle when prying, the pressure clips get fragile over time.

  2. xCrJWXAgt1pWX2JN
    xCrJWXAgt1pWX2JN
    wWYMpJMS6wsgCByI
    sD63JOmBtyEnDLQY
    • Use your hands to pull the A/C panel to disconnect the two top retaining clips.

    • Take care not to strain the attached wire harnesses.

  3. YeAyCCUfks1wENDB
    • Press the tabs on each connector, and pull them away to disconnect the two connectors.

  4. SBr5SXevILw1RfYb
    SBr5SXevILw1RfYb
    gMMRaMyGkWeVhhWv
    • Remove the four 10mm bolts using the socket wrench.

    • A socket extension can be used to help reach the two bottom bolts.

  5. FGmYb4UovuFDCtEq
    FGmYb4UovuFDCtEq
    vSykcoCbLcBe3KDa
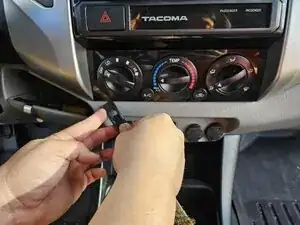
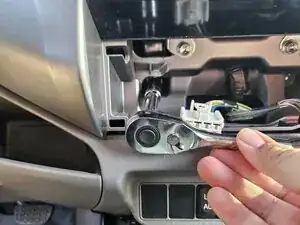
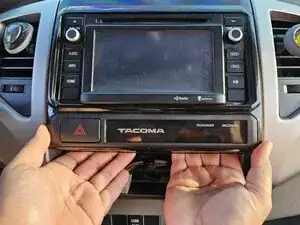
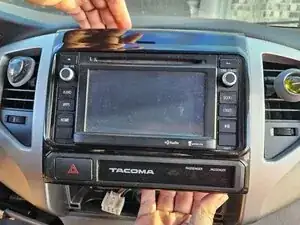
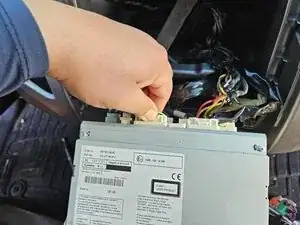
    • Use your hands to get behind the radio and pull away from the dash to release the four pressure clips.

    • There's one clip in each corner.

  6. VQEOgsXoVH33Xd5M
    VQEOgsXoVH33Xd5M
    rIuhdAKAeMLCXRNi
    mphHKAO2UJVBkB4N
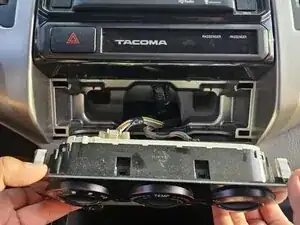
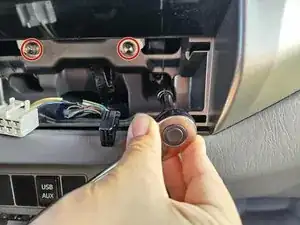
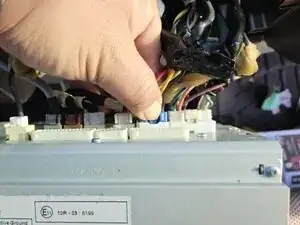
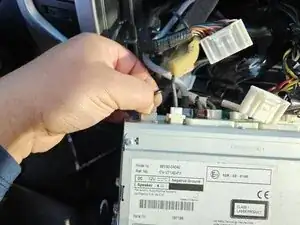
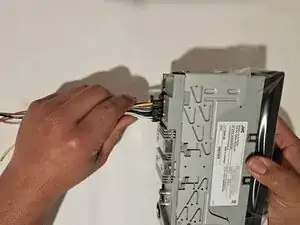
    • Press down on the tab of each connector, and pull it out of its socket. Remove all connectors from the back of the radio.

    • If you are using an OEM replacement, follow the steps in reverse order to reinstall the new radio. If you are using an aftermarket replacement, continue to Step 7 to solder your harness adapter.

  7. wREdVXwCY6dO2MUc
    • Remove the pre-cut wire covers on both the Toyota adapter harness and the new radio harness.

  8. 2lTq2x6HJcYW2jRl
    2lTq2x6HJcYW2jRl
    41UEeTTJKNSeRCgk
    • Slide heat shrink tubing over each wire that will be connected together.

  9. YgQEulCqn4QLtN2W
    • Solder the wires from the adapter and radio harness together.

    • Use the wiring guide that comes with the new radio and with the adaptor to make sure the colors on the wires match with the functions of the radio.

    • Soldering should be done in a well ventilated area. The tip of the soldering iron gets hot, be careful not to burn yourself or anything you set it on.

  10. SaBacMBWPQ4FiwUF
    • Plug the harness into the back of the new radio.

    • Take the radio back into the truck to reassemble.

Conclusion

To reassemble your device, follow the above steps in reverse order.
Take your e-waste to an R2 or e-Stewards certified recycler.
Repair didn’t go as planned? Try some basic troubleshooting or ask our Answers community for help.

jose pecina

Member since: 23/02/25

181 Reputation

0 comments