Introduction

If your side-view mirror is cracked, loose, or no longer adjusting properly, replacing it can restore both safety and visibility while driving. This guide provides step-by-step instructions for replacing the side-view mirror on a 2001–2005 Honda Civic. It also walks you through how to safely remove the interior door panel to access the mirror mounting points. No advanced mechanical experience is required.

Before you begin the repair, make sure that your car is off. For some Honda Civic models, removing the door panel is not required to replace the mirror. If this applies to your vehicle, you may skip steps 2–8, 16–17, and 19–23.

  1. gOnsBHFLiGnvUtsS
    gOnsBHFLiGnvUtsS
    vGAgNIGB4nXFxeDC
    • Make sure window is down and car is off before you begin.

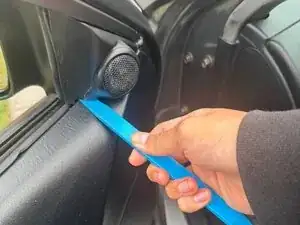
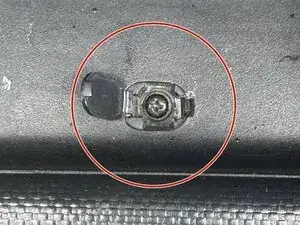
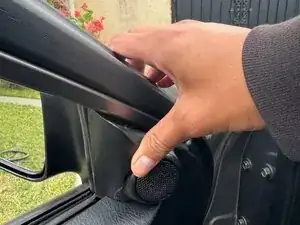
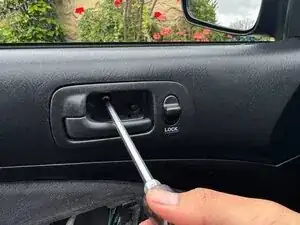
    • Insert a plastic pry tool into the space between the mirror cover and mirror mount.

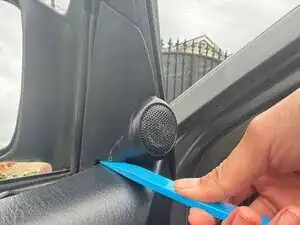
    • Pry around the edges to loosen it and remove the mirror cover.

    • The mirror cover must be removed to remove the door panel.

  2. gMeSfTC1EOjc5aJw
    gMeSfTC1EOjc5aJw
    eG5DWjZwBewgTHLo
    xpLu6jKuMaDHgt3M
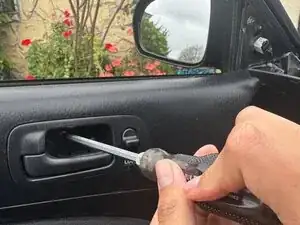
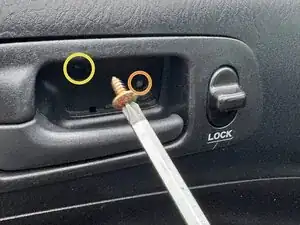
    • Use a Phillips #2 screwdriver to remove both screws from the door handle.

    • 4x12 mm oem tap screw

    • 5x20 mm oem tap screw

  3. vOKFqDn2jDC16RTe
    vOKFqDn2jDC16RTe
    T5gD6iDxuAmCPgtk
    Bi6XcDUT13bXxrQ1
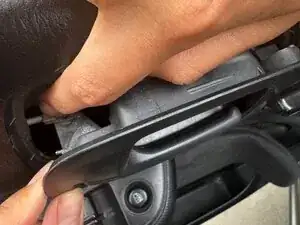
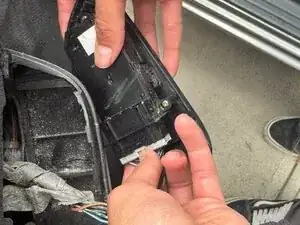
    • Pull the door handle to reveal the clip attached to the actuator rod.

    • Don't pull it off as it is connected to the power cable.

    • Apply slight pressure with your finger, or use needle-nose pliers to remove the clip from the actuator rod.

    • Rotating the clip to the right, away from the rod should disconnect the latch rod from the clip.

    • Do not apply excessive force as these clips have a reputation of becoming weak over time and can break.

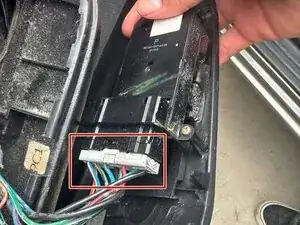
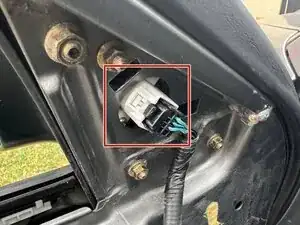
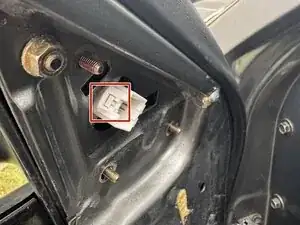
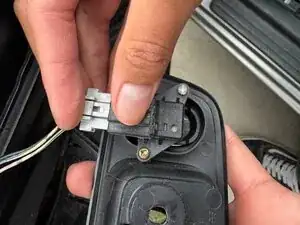
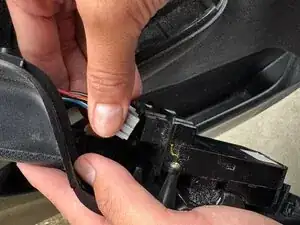
    • Hold down the tabs and disconnect the power cable connector from the door handle.

    • Remove the door handle and set it aside.

  4. QrPHYGZZyZGiZCHS
    QrPHYGZZyZGiZCHS
    V3YbNJhDO1LfusPy
    HWFuuLmyMO6AlOP2
    • Use a plastic opening tool to remove the screw cover in the armrest. Use a Phillips #2 screwdriver to remove the 4x16 self tapping screw.

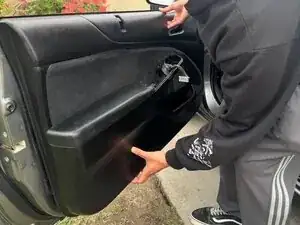
    • Insert the pry tool into the armrest and apply slight pressure to remove the armrest.

  5. MXX3NXvUFyFbL1Yt
    MXX3NXvUFyFbL1Yt
    RiqADkCYnOSoP32g
    • Squeeze the tabs and disconnect the power cable connector from the armrest.

    • Don't force the cable and don't pull the cable out by the wires or it may get damaged.

  6. hJiHhMMCQJWLmaFg
    hJiHhMMCQJWLmaFg
    eU4ksaxTnAa1mDDp
    kFFiYoiNidgBUeUX
    • Use the Phillips #2 screwdriver to remove the 5x20 mm oem tap screws where the armrest was.

  7. GyOMBh6O1ZFBOfnx
    GyOMBh6O1ZFBOfnx
    RFijROFIbmDZWhsL
    yeLmdOYU1ZXrHiVW
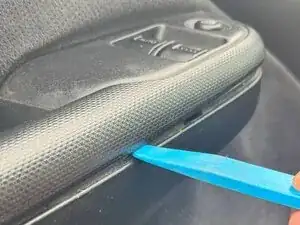
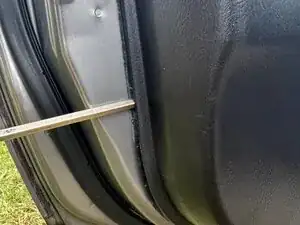
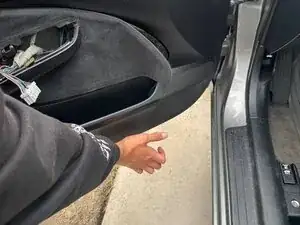
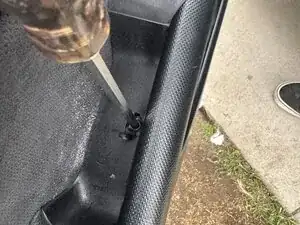
    • Insert the pry tool or a flat-blade screwdriver into the door panel and apply slight pressure to pop the door panel loose.

    • Lift and remove the door panel.

  8. TKsSLtVvjU1TkpFx
    TKsSLtVvjU1TkpFx
    DtTCJ3XH41bhDREl
    5gyiLsjlpGMPyNU3
    • Squeeze the connector tabs and disconnect the power cable from the mirror.

  9. BAjcBMA1HQN2rPEM
    BAjcBMA1HQN2rPEM
    RMdf6lMjAAMQxSZY
    16tcJkXFamXUENFn
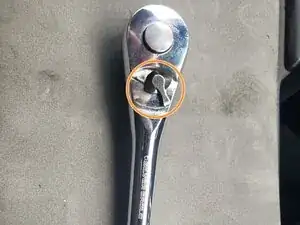
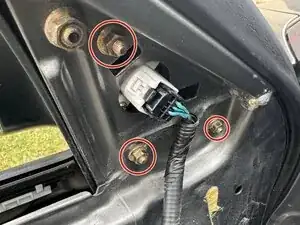
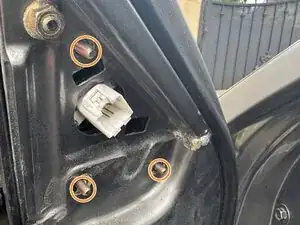
    • Move the lever on the ratchet to the right to set it to loosen.

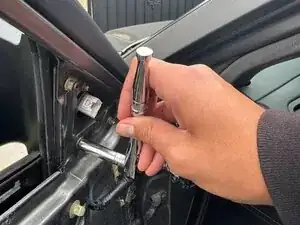
    • Use the 1/4 inch ratchet with an 8mm socket to remove the nuts by repeatedly rotating counterclockwise.

    • Although it’s common to associate left with loosening and right with tightening, keep in mind that when the ratchet is upside down, the lever may appear to point left—but the standard rules still apply.

    • Other ratchets may differ and be reversed (left to loosen, right to tighten).

  10. rCwOsDEjuDfOMV5r
    rCwOsDEjuDfOMV5r
    o1jJJDqrJ3TknNq6
    • Press the connector tab and with your other hand pull the mirror out to remove it.

    • If working with another person, have them pull the mirror on the other side of the door.

  11. Ze4kdwWIY2JiJJGL
    Ze4kdwWIY2JiJJGL
    pnpqKaMZKTKITbig
    MPjKuZSWTESoTdIy
    • Align the new mirror's mounting bolts with the holes.

    • Tighten the nuts with your hand first and then use the 1/4-inch ratchet to secure them.

  12. lH63DkJRWDjKViw6
    lH63DkJRWDjKViw6
    yUDQUs3X1PcyhPUa
    MrfoqJETI3iZvkgZ
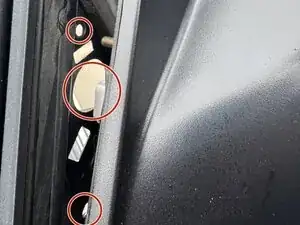
    • Put the door panel back on and make sure the door clips of the door panel align with the car.

    • Apply firm pressure and tap where the door clips are to ensure the door stays on.

    • Make sure the connectors are sticking out so you can reconnect your door handle and door panel.

  13. d6JjimER4K2x1ha1
    d6JjimER4K2x1ha1
    lOVfwWScGkdQQKeL
    • Use the Phillips #2 screwdriver to replace the 5X20 mm OEM tap screws in the armrest cavity to ensure the door panel stays put.

  14. rA42CwRfPhWbwXmW
    • Reattach the mirror cover and apply firm pressure to ensure that is stays on.

  15. GWySw1YBjCKVkwTN
    • Reconnect the door handle.

  16. FCH2CWYyhu3EQfVo
    FCH2CWYyhu3EQfVo
    no6jW5agDcAdUsqj
    RSTOdqf5PcFPPLrb
    • Reattach the door clip by rotating it to the left onto the actuator rod.

    • Once the clip is reattached, you can insert the door handle back into place.

  17. KIYLEXiFfJnVHUyV
    KIYLEXiFfJnVHUyV
    ybyjiJOKrvVs4PAE
    VrTqcKpjiXaJBfGM
    • Use the screwdriver to replace the door handle screws.

    • 5x20 mm oem tap screw

    • 4x12 mm oem tap screw

  18. sDC2luiap1sZeV65
    sDC2luiap1sZeV65
    hNpALJTpyAsoCVSC
    QEfj6hXaweYCZuRD
    • Attach the armrest and make sure the cable connector goes under the door panel.

  19. XA5GGcEKSLJSFA2h
    XA5GGcEKSLJSFA2h
    yZsPEbLWfRQcBSXF
    • Use the screwdriver to secure the 4x16 mm self tapping screw to the armrest.

    • You have completed this guide!

Conclusion

To reassemble your device, follow these instructions in reverse order.

Richard Gonzalez

Member since: 04/03/25

313 Reputation

0 comments