Introduction
Changing spark plugs is a small but essential part of vehicle maintenance that can make a big difference in how your engine performs. Spark plugs are responsible for igniting the air-fuel mixture in your engine's cylinders, which is what keeps your car running smoothly. Over time, they can become worn, dirty, or corroded, leading to reduced fuel efficiency, rough idling, hard starts, or even engine misfires.
Replacing them at the recommended intervals helps maintain optimal engine performance, improves gas mileage, reduces emissions, and ensures a more reliable driving experience. Simply put, keeping your spark plugs fresh is key to keeping your engine healthy.
If it's time to replace the spark plugs of your 2000-2007 Toyota Corolla, follow this guide.
Before you begin this repair, make sure your car is turned off and the engine has cooled if you've driven it recently. Also, disconnect the battery as a safety precaution to reduce the risk of a short or unintended spark, which could cause a fire.
Tools
-
-
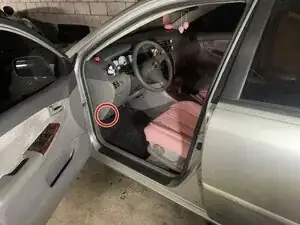
In order to get started, we must locate the hood release. Open the drivers door. Now look to the bottom left of the steering column, there will be a small hood release latch.
-
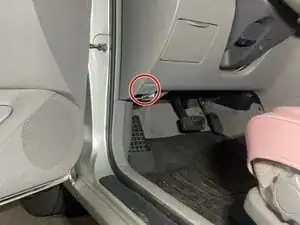
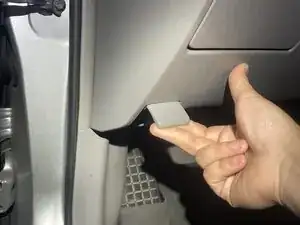
Place two fingers under the lip of the release, and pull upwards, this will release the hood and an audible click will be heard.
-
-
-
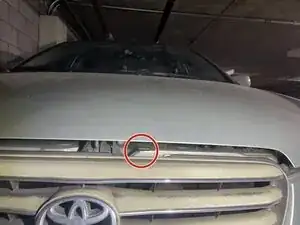
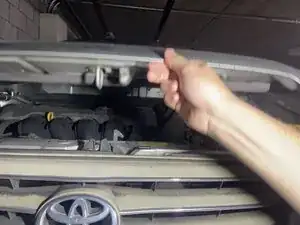
Before we can simply raise the hood, we must move the safety latch out of the way. While pressing the safety latch upwards, pull the hood upwards now, it should be free.
-
Note if the hood is not released, apply more pressure to the safety latch, it may not be fully depressed blocking the hood from opening.
-
-
-
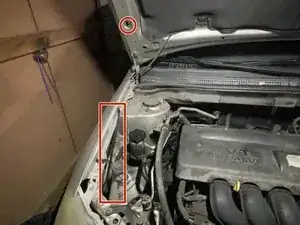
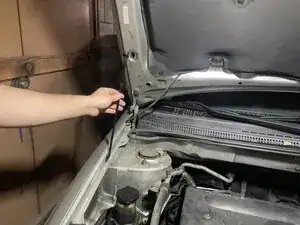
We will now focus on the hood prop, and hood prop hole.
-
Raise the hood prop and insert the head of the hood prop into the hole of the hood, there will be an arrow (red circle) pointing to the correct hole to place the shaft into. This prop will hold up the hood safely while we work in the engine bay.
-
-
-
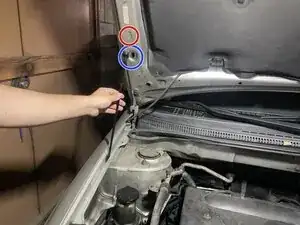
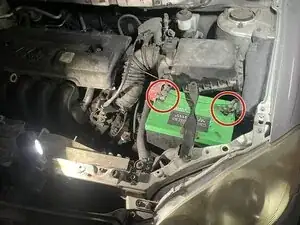
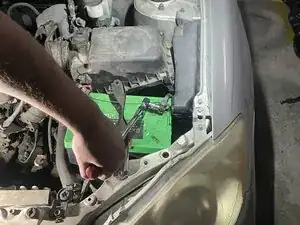
Before working on any electrical components, its a good practice to disconnect the 12 volt battery to ensure the risk of electrical shock is minimized. We can do this with a 3/8 ratchet paired with a 10mm socket.
-
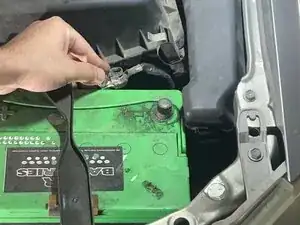
The red circles in the second photo are the two battery terminals. There is a positive terminal (left in photo) and negative terminal ( right in photo). Disconnecting the negative battery terminal clamp is standard practice to ensure safety when working with electrical components.
-
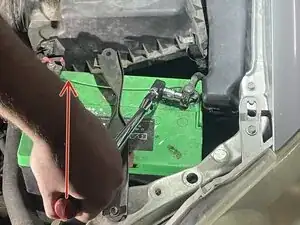
To remove the battery terminal clamp, place the socket on the bolt and rotate the ratchet counter clockwise, or lefty loosey until the clamp is loose enough to remove by hand with no resistance.
-
Now place the negative terminal clamp in a place where it will not wiggle itself back to the post it was previously on. In this case I was able to tuck it away and ensured it did not rebound back to the terminal.
-
Note to locate battery terminal polarity, look at battery, there will either be a + or - sign. The - sign is the one we want to disconnect.
-
-
-
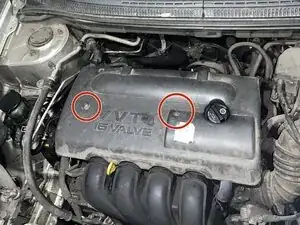
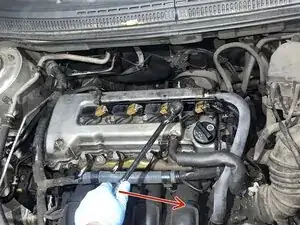
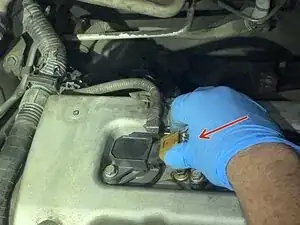
This is the plastic cover for the valve cover. We must remove it by using a 10mm socket to remove the two 10mm nuts holding the cover in place.
-
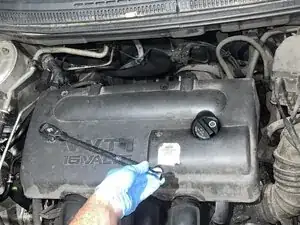
Place your ratchet on each bolt and turn the ratchet counterclockwise (direction of red arrow in photo 2) to loosen each bolt.
-
Once both nuts are removed pull up on the cover and put it in a safe place along with the nuts.
-
-
-
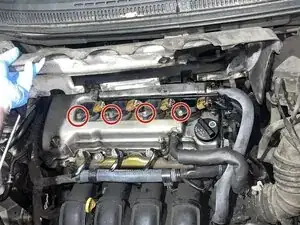
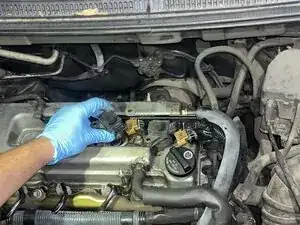
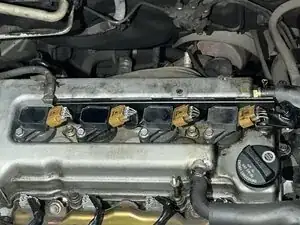
Now the ignition coils must be removed. They also each have a 10mm bolt holding them in place.
-
Place your 10mm socket and ratchet on any of the ignition coils and turn the ratchet counter lock wise to loosen the bolt. Remove all bolts and place in safe place. There are only 4 bolts to remove.
-
-
-
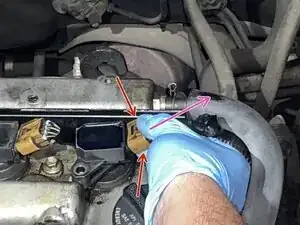
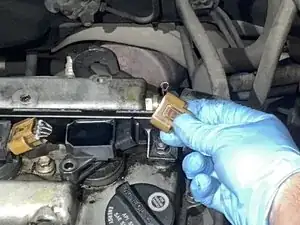
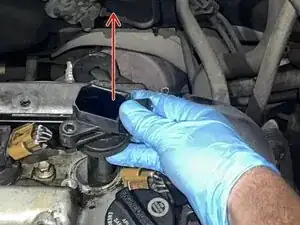
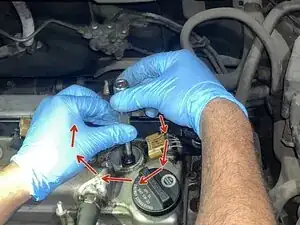
Now we must disconnect the connectors from each coil. Apply a pinching force ( red arrows represents pinching force on each side) and pull outwards away (pink arrow is direction of pull) from the coil to release the pigtail.
-
Now the ignition coil is free to be removed. Apply a twisting motion while pulling upwards on the coil to free any corrosion holding the coil in place. Place 4 coils somewhere safe
-
-
-
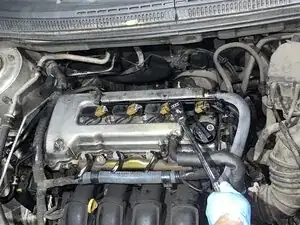
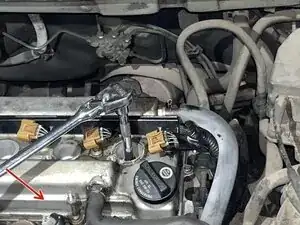
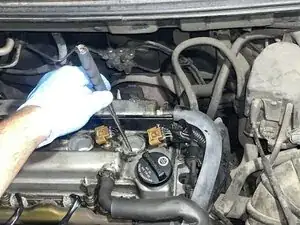
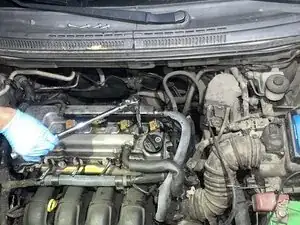
Attach the 5/8 spark plug socket to the 6” extension and ratchet and lower tool into cylinder. Apply a counter clock wise rotation to loosen spark plug.
-
Note, some spark plug sockets have rubber inserts that retain the sparkplugs to remove them, if yours does not, a magnet may be used. Remove all 4 spark plugs.
-
Caution Be sure not to drop any debris into cylinders, if this happens damage can occur to engine, if this does happen, use a vacuum or compressed air with a blow gun attachment to remove foreign matter.
-
-
-
Place your new spark plug into the spark plug socket. There is a rubber holder inside the socket that will secure the new plug from falling out and getting damaged. Turn the extension by hand first until tight.
-
Now we may attach our ratchet and rotate only 1/4-1/3 of a turn to properly torque. Repeat for each cylinder.
-
-
-
Once all plugs are tight, we can reinstall each ignition coil in any order and press down to seat the coils correctly. There should not be a gap between coils and valve cover.
-
Reinstall the 4 10mm bolts and tighten by hand first then 1/4 turn with the ratchet.
-
-
-
Attach the pigtails to each ignition coil. There should be a subtle click alerting you the electrical connector is secure.
-
The wiring harness allows no extra space to confuse what order the connectors are in, so it should be clear what connector goes to what cylinder.
-
-
-
Reinstall the plastic cover and align holes with studs and oil fill port. Place two 10mm nuts and tighten by hand then 1/4 turn with ratchet.
-
-
-
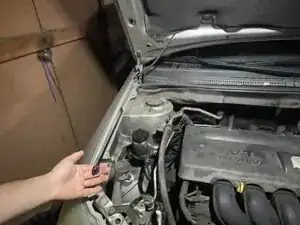
Before we can close the hood, locate the negative battery terminal. We are safe to place the terminal clamp over the battery post and tighten down by rotating the ratchet clockwise over the 10mm bolt.
-
Attempt to move the now tight terminal, if it does not move we can proceed to the next step. If the clamp moves , tighten the bolt more until it cannot move.
-
Note a loose battery terminal can cause a vehicle to not start, so its best to ensure terminals are tight.
-
-
-
Lift up the hood to allow clearance to put hood prop back into place. Ensure prop is secured in plastic holder.
-
Ensuring all tools or parts and removed from the engine bay, lower the hood and press down to lock hood in place. There should be no gap between hood and grille. Repeat the pressing down motion until the hood is locked in place and unable to be lifted up.
-


Now we may start the vehicle.