Introduction

Use this guide to replace a burned-out or malfunctioning inner front indicator bulb on your 1997-2006 BMW 3 Series (model number E46).

The inner front indicators are the portions of the headlights that flash orange when you signal a turn. Over time, the halogen bulbs inside will naturally burn out and require replacement. A bulb's lifespan can range anywhere from 500 to 4,000 hours. Your vehicle’s dashboard will tell you the bulb's need to be replaced by clicking and flashing faster than usual when you turn on your indicators.

Note: the required bulb model may differ between different years or body styles. The specific vehicle model used in this guide is a 2001 325i Sedan, which requires a 7506 type bulb. You can check which bulb fits your vehicle at an auto parts retailer’s website such as AutoZone or O’Reilly. Otherwise, if you take a visit to any auto parts store in person, most workers will be glad to help you find the right part.

  1. bGldajBROebVVRXV
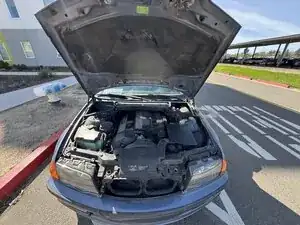
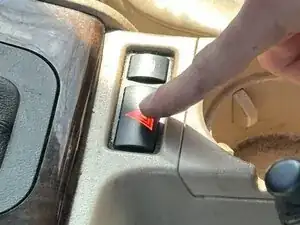
    • Unlock the hood of the car by pulling the black latch on the bottom left side of the driver footwell.

  2. gKEPOqPCig3ChiHx
    gKEPOqPCig3ChiHx
    NXcbSIKJHiJSF3QF
    2FuxgUobbC4ZffN1
    • Open the hood by lifting the lever that comes out of the grill, and pulling up on the hood.

    • Watch out for wind that could slam the hood shut!

  3. sVgBmrHcgCsXCtBM
    sVgBmrHcgCsXCtBM
    fqDkENfraDn2NYRB
    Py3HksJseKZYodWc
    • On each front corner there is a pill-shaped access hole in the metal trim.

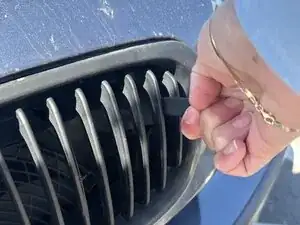
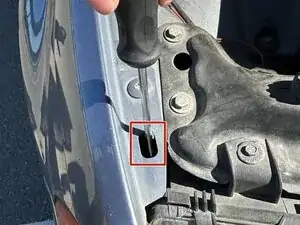
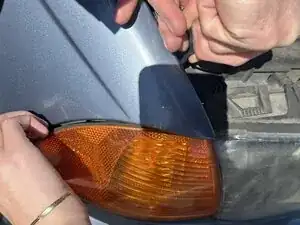
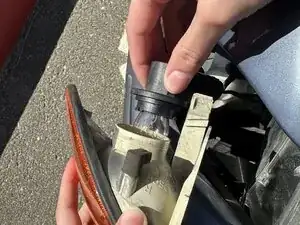
    • Take a flathead screwdriver and insert it through the access port.

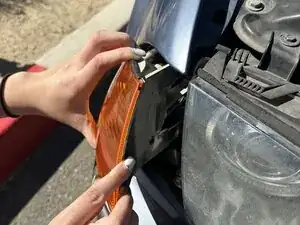
    • Gently push straight down to locate a white plastic tab connected to the indicator assembly.

  4. WHOKBOJaFBVAMRgb
    WHOKBOJaFBVAMRgb
    EC21LtT1iqHDVXoZ
    • Once you find the tab, push down and towards you to release the indicator assembly.

    • This will take some effort. If the assembly is not budging, reposition the screwdriver and try again.

    • Be careful not to pull the assembly out completely as you might tear the electrical wiring of the bulb.

  5. MAXq1RioueFQSE1Y
    MAXq1RioueFQSE1Y
    IVfLMRYwebSwmDVs
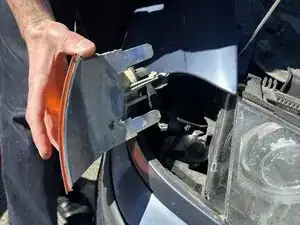
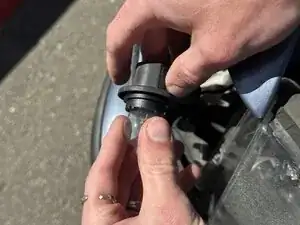
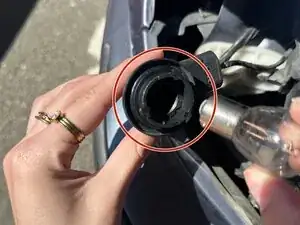
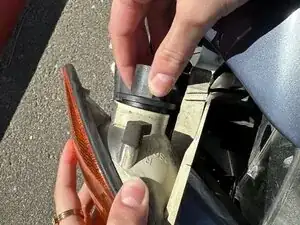
    • Locate the bulb housing and rotate it counterclockwise in order to release it from the indicator assembly.

  6. Cx2kH4kw5FOYIKhH
    Cx2kH4kw5FOYIKhH
    lLGy31LNAVPCcTKe
    xS6XveGnuk1i5C5O
    • Gently unscrew the old bulb counter-clockwise and pull it out.

  7. FdALEZjqfHYbNk2Y
    FdALEZjqfHYbNk2Y
    oc24NUcOIKB2SbiN
    • Push in the new bulb and screw it clockwise until you feel it lock.

  8. UyFVDfwlErC4j2ru
    • It's convenient to check if the newly installed bulbs work while you have the lights disassembled.

    • Activate the hazards from inside the cabin to check if the indicators light up.

  9. 2VIjgYtDpjD5y3Il
    2VIjgYtDpjD5y3Il
    TwUJYmPpVa2vlOUU
    HALqFabYlZNI2K1U
    • Push the bulb housing back into the indicator assembly and rotate clockwise to secure it.

  10. kZhdGBJksP3iEqrG
    kZhdGBJksP3iEqrG
    nZAGNwb1w6eGZeO4
    QDG3rEsM4VfYcykS
    • Push the assembly back into the frame of the car until you hear/feel it click.

Conclusion

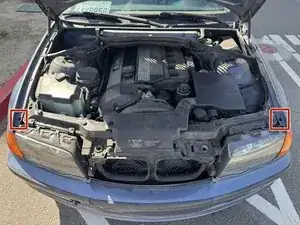
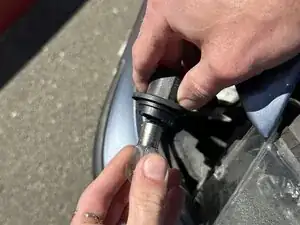
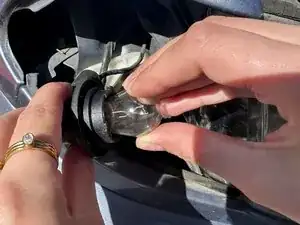
If necessary, repeat the process for both the left and right indicators. Usually when one indicator goes out, the other is not far behind. Since the bulbs come in a two pack anyway, take the opportunity to refresh both your indicators!

Mika Eloyan

Member since: 19/02/25

181 Reputation

0 comments