1 - Kettle - The different functions
The aim of this type of guide is to make it easier to repair kettles using examples in the form of photos, diagrams, explanations, and links to tutorials, helping future fixers to become more self-sufficient.
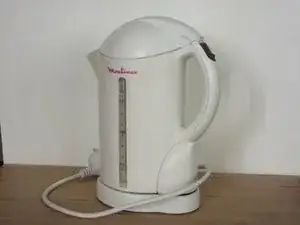
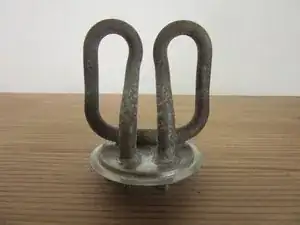
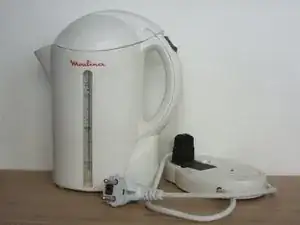
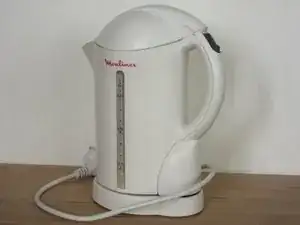
In this document, we explain what the device is made of, show the different sub-assemblies, their roles, how they function individually and as a whole.
We don't show the disassembly or reassembly of devices; our goal is to study a category of devices. In a given category, no device is identical from a brand to another, or even within a single brand. As such, detailing which tool to use or how to proceed is impossible. If you struggle, we encourage you to look up a disassembly tutorial online, specific to your model. There are many tutorials out there.
Our goal is to show that it's possible to learn through practice. The advantage is that it allows anyone to make progress 'smartly', by understanding how things work. Once we understand the principles, we can do it over and over, as needed and on other devices!
The point is also not to remake what's already been done. We select pre-existing quality content, and we complete it if necessary, to aggregate everything around a methodological axis of autonomous and safe repairs.
Repairing is very similar to investigating. You must look for proof, ask questions, find clues, analyze incriminating evidence, check alibis... then identify and arrest the suspect!
Investigating requires a method.
We invite you to discover this method.
To start repairing any device, whether very simple or very complex, we suggest asking three questions. This is the phase of gathering information, which takes place before disassembling anything.
This first phase is as important as the repair itself. If your analysis is correct, repairing will far easier.
The three questions to systematically ask are, in order:
What are the device's functions?
In the case of simple objects, this question may seem unnecessary. But for more complex objects, it's essential to understand the origin of the malfunction. This way, we avoid dead ends as much as possible.
How to use the device?
It's the logical sequel to the first question. Once we've familiarized ourselves with all the device's functions, it's important to understand its proper use. You can refer to the manual if you have access to it. Another option is to ask the owner of the device... if they even know, which is not always the case (!).
What is the issue?
We can finally ask the last question, which is about the device's malfunction(s).
We must determine if the device is fully or partially malfunctioning (hence the first question), what are the symptoms, if a certain event caused the malfunction, anything that helps to identify the origin of the issue.
During this step, we must test the device, observe what happens (*1) and confirm with the user the nature of the problem(s). We must check what works and what doesn't, to avoid any misunderstanding regarding the next steps.
Once we've gathered this initial information, we can probably formulate an initial diagnosis. This enables proceeding to the next step, the repair itself.
In this phase, you will:
At the end of this phase, it's a good idea to test the device to check that it works as desired.
In the workshop, it must be done with the user. Confirm with them whether the operation succeeded.
(*1) Repairing requires using (almost all) our senses.
- sight, to see what is happening
- hearing, to hear possible noises from the device
- smell, to identify the smell of burning, for example
- touch, to feel vibrations, temperature, etc.
To succeed in repairing, we advise working in a calm environment, with enough room and good lighting.
(*2) IMPORTANT! Disassembling devices, especially more recent ones, is often a long and delicate operation. So it's important to have enough time and the right tools. Be aware that the job might damage some parts of the device, or in the worst case, even make it unusable. We recommend searching online for advice about how to disassemble a device with the exact brand and model involved.
Repairing electric or electronic devices almost always requires opening these devices. This, in turn, requires taking certain precautions to avoid the risk of electrocution and other dangers (burns, explosion, fire ...).
As such, mastering the basics of electricity, as well as knowing and applying the relevant safety rules is vital when opening such a device.
If you aren't certain, only perform checks with the power off.
If you take a measure while the device is powered, prepare the measure while it's off by connecting the multimeters with grip clips. This enables you to proceed with verification without having to handle potentially dangerous intruments.