Introduction
The LG Chromebase 22cv241 has just one upgradeable internal component: SO-DIMM PC3L-12800 RAM. The SSD is a SanDisk i110 SSD BGA chip soldered to the board.
Like all Chrome machines the Chromebase can be converted to a standard PC by flashing the BIOS and installing a supported operating system. Although it can dual-boot ChromeOS and Linux without any internal modification, a complete EFI flash is required to fully convert it to Linux or Windows. It uses a write protect screw which must be removed for a full flash, and removing this screw requires a nearly-complete teardown.
-
-
Begin by removing the stand. Pull off the cover where the stand meets the screen, then remove the three screws shown here.
-
-
-
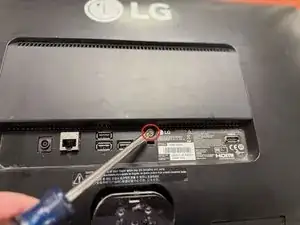
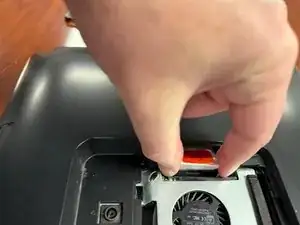
Remove the screw above the debug switch hole. Then pry up the hatch by releasing the four latches circled in this picture. After this, the hatch can be raised and pulled downward.
-
-
-
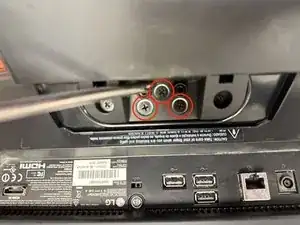
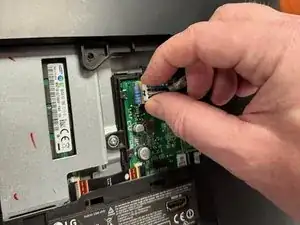
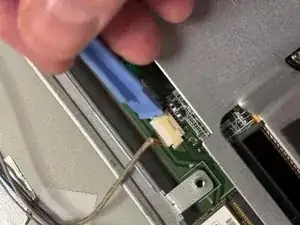
Remove the three circled screws. Then release the USB interface cable by squeezing the latches on either side of the connector and lifting it free. Next, release the speaker cable by pulling it out of the socket.
-
-
-
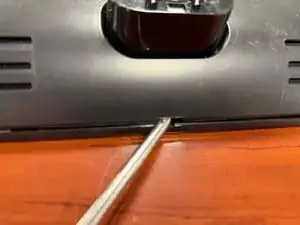
Begin to release the cover by prying it apart in the center hole. Then work your way around the cover with a spudger, releasing the clips along the way. Release the clips on the bottom and sides, then work your way to the center. Be careful around the top center to avoid damaging the webcam.
-
-
-
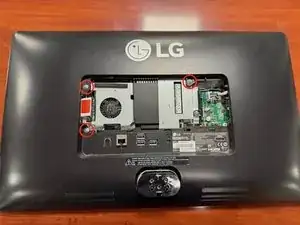
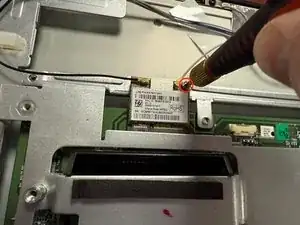
Detach the webcam cable using a spudger. You will probably break the clip, but it will still reconnect. Next, remove the Wi-Fi card by removing the screw and lifting it out. This is required to remove the motherboard in the next step.
-
You do not need to detach the Wi-Fi antennas or other cables. Just remove the tape and slide them out of the way.
-
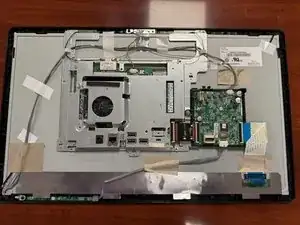
Leave the video board attached to the motherboard frame. You should be able to raise the entire frame without detaching the control cable from the video board.
-
-
-
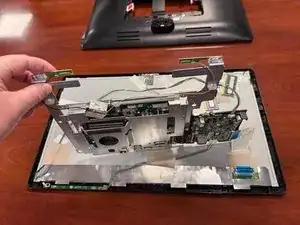
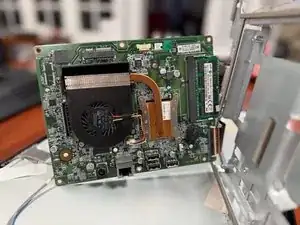
The motherboard is protected by the steel frame, with the back facing the screen. You can lift the entire frame without detaching many cables, only the webcam and Wi-Fi card.
-
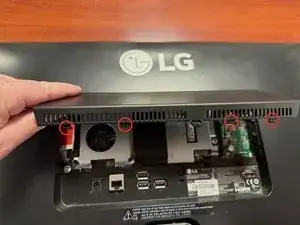
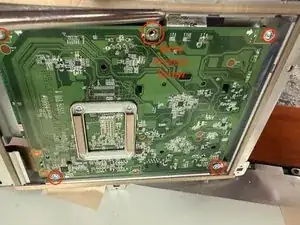
Remove the five circled screws to release the motherboard. Then slide it straight out of the frame, releasing the Ethernet and USB ports.
-
The center screw is the BIOS write protect screw. Note that the pad has two raised quarters: The screw shorts these together to enable write protection. Do not replace this screw if you want to be able to flash the board with an un-restricted EFI image.
-
-
-
You can hinge the motherboard out of the frame without releasing the video card cable. This will give you access to the RAM slot.
-
The Chromebase uses standard a PC3L-12800 SO-DIMM. This is a low-power (1.35 V) chip commonly used in Atom and Celeron machines and laptops of the era, including the Intel NUC. Most Chromebase machines have 2 GB or RAM, though some reportedly have a 4 GB SO-DIMM. I replaced mine with an 8 GB SO-DIMM and it works perfectly.
-
There are no other user-upgradeable components, though the Wi-Fi card is easy to replace.
-
-
-
Reassembly is the reverse process. Remember to leave the center screw out in case you want to flash the BIOS. Be careful to tape the cables back in place and reinstall the rest of the screws.
-
The case simply pops back together with some pressure. The hatch is also easy to pop back into place.
-
-
-
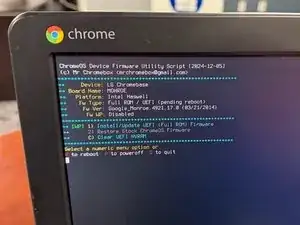
If you want to flash the BIOS and replace the (end of life) ChromeOS, follow the instructions at MrChromebox.tech:
-
1) Enter Recovery Mode by holding the Recovery Button while pressing the power button
-
2) Put the device into Developer Mode by pressing Control-D to turn OS Verification off, then reboot and wait for the machine to boot into Developer Mode
-
3) Get a Root shell by pressing Control-Alt-F2 (right arrow) and logging in as chronos/chronos
-
4) Download the firmware utility by typing "curl -LO mrchromebox.tech/firmware-util.sh > firmware-util.sh"
-
5) Run the firmware utility by typing "sudo bash firmware-util.sh"
-
6) "Install/Update UEFI (Full ROM) Firmware" by selecting option "2" (assuming you removed the write protect screw)
-
7) Reboot and install an operating system like Debian 12 (note that the install requires using the full capacity of the tiny SSD - do not select the option of a separate /home partition)
-