Introduction
The AXE I/O by IK Multimedia is a professional-grade digital audio interface geared towards guitarists and producers. This guide is a simple teardown of the product so you don’t have to rip yours apart.
Tools
-
-
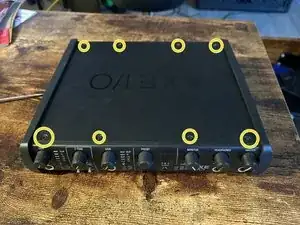
Remove the top and bottom plate screws
-
There are 8 T9 screws on the top plate and 6 T9 screws on the bottom plate
-
-
-
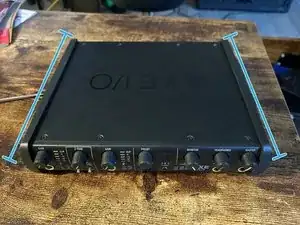
Gently pull on the bumpers. There is some double sided tape under the bumper to hold it in place.
-
Remove the two T10 screws from each side, revealed by the bumpers you’ve just removed.
-
-
-
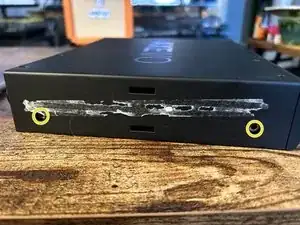
Nothing holds this in place now. Gently pull on the back plate after you’ve removed the top plate.
-
-
-
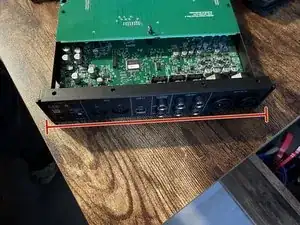
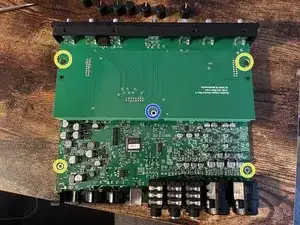
Remove the 4 T10 screws holding the Lower board in place, then remove the long T10 screw and 5.5mm nut (marked blue)holding the upper board. Be VERY CAREFUL as this long screw IS THE CHASSIS GROUND! It is very easy to accidentally scape the two resistors that are adjacent to the screw.
-
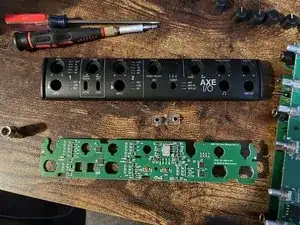
Remove all of the control knobs from the front panel by gently pulling on them. You can also pull on the entire front panel gently to pull the knobs off too.
-
With the front panel removed, you can access the final T10 screw. Remove this and the front board can be removed from the panel.
-
-
-
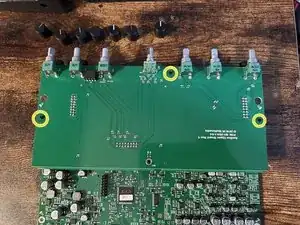
Remove the three risers from the upper board. I pinch these with a pair of pliers and give gentle upward pressure on the board to remove them. With these three risers removed the board will pull straight up from the lower board.
-
-
-
Thats it. Just a few screws and your beautiful AXE I/O is now a pile of PCBs and metal housings. To reassemble just follow this guide in reverse order.
-
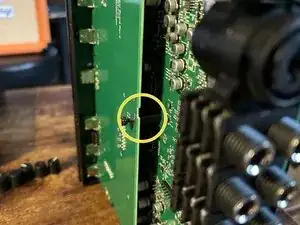
Please take special care to install the spacer between the upper and lower board. This is critical as it keeps the upper board from flexing under the stress of the screw.
-