Introduction
This guide shows how I disassembled the lens in an attempt to clean it.
Tools
-
-
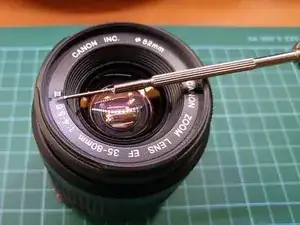
Unscrew the 3 screws that hold the front lens assembly to the rest of the lens.
-
It seems this partially disassembled lens can be used as a macro lens - I didn't try.
-
-
-
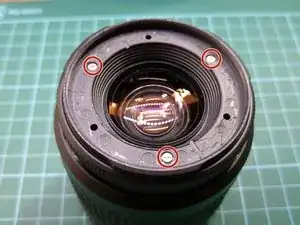
Remove the rubber ring. This exposes the 3 screws and their metal collars.
-
Take care not to drop the metal collars - they are like washers.
-
-
-
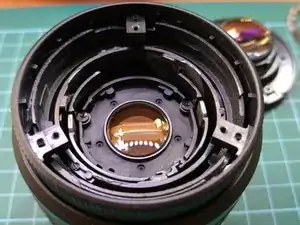
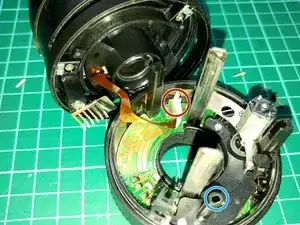
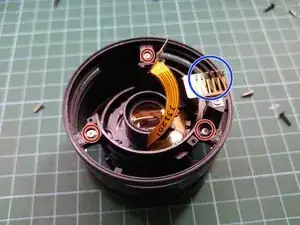
Pull out the connector of the flex cable vertically while supporting the circuit board (I used a plastic spudger to push down the circuit while pulling the white connector). To insert it back, simply push it back into the slot. Note the orientation of the connector (Take lots of pictures)
-
Note the black plastic pillar - the white focusing gear (obstructed in this shot) from the focusing ring needs to go back inside this during re-assembly. It's a little tricky.
-
-
-
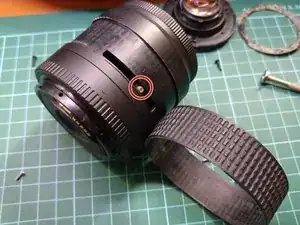
Unscrew the 3 screws to release the barrel.
-
Be careful not to damage the metal brush. It can be removed and re-installed easily.
-
-
-
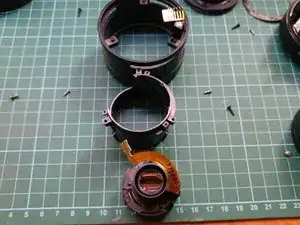
Once the barrel is freed, the rest of the assembly comes apart once the pieces are rotated - they are 'nested' within helical tracks inside each 'shell'
-
Before you disassemble it, note carefully how each 'layer' is nested within the next one. Otherwise it will take a lot of trial-and-error to put it back.
-
The focussing ring assembly also 'drops out'. To re-assembleit, align the 3 tabs in the barrel with the slots in the inner helicoid (inner part of the focussing ring), then turn it 45º.
-
During re-assembly, ensure that: 1. the ribbon cable doesn't get snagged. 2. the white focusing gear needs to sit into the black pillar (highlighted in step 4)
-
Useful document: Parts Catalog for Canon EF 35-80mm III Lens
-