Introduction
This guide has been updated by iFixit staff! Read the new, official iPod Touch 2nd Generation battery replacement guide.
-
-
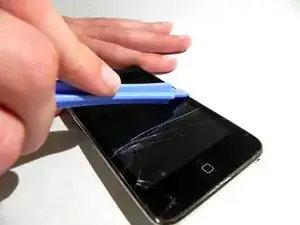
Wedge the PX 3688 plastic opening tool between the glass front panel and the plastic frame. Start near the top where the volume control buttons are located and stay on one side of iPod.
-
Turn the tool in a hinge-like rotation away from the iPod and pry the glass panel out of its case.
-
Be careful to work at a slow and gentle pace. Avoid breaking anything inside the iPod, especially the screen.
-
-
-
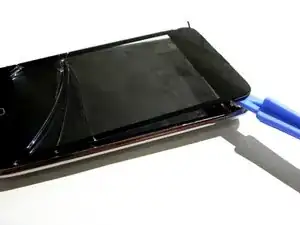
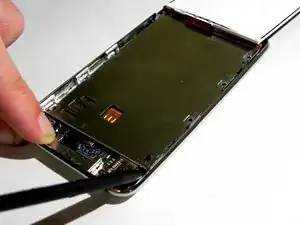
Work your way around the iPod, prying the front panel up, until it is completely separated from the clips.
-
Lift the front panel out of the bottom case.
-
-
-
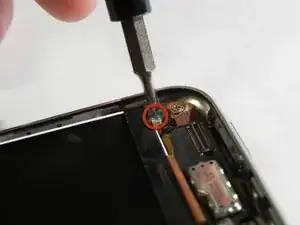
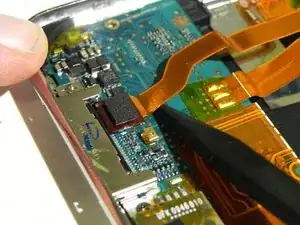
Using the PX 3688, pry the touch screen cable connector off the top logic board.
-
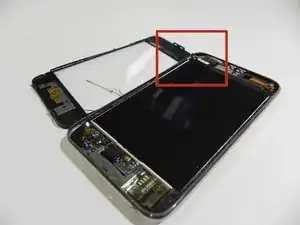
Check the front panel for any damage. Be careful not to scratch the front panel on the underside of the black portions.
-
Clean the face of the display and the inner face of the front panel.
-
-
-
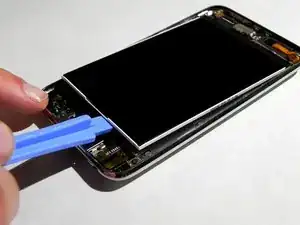
Insert a PX 3688 plastic opening tool with the edge angled up, toward the underside of the display, between the white plastic backlight and the metal beneath it.
-
Pry the lower edge of the display up until it's at about a 45 degree angle with the rest of the iPod.
-
Hold the display in this position with one hand for the next step to avoid damaging the display ribbon cable.
-
-
-
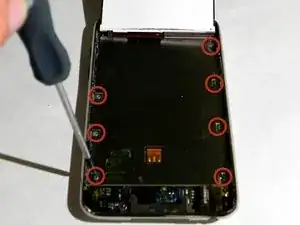
Remove the seven Phillips screws securing the metal display tray to the rear panel with a Phillips #00 screwdriver.
-
-
-
Place the display back in the metal display tray.
-
Use a PX 3688 plastic opening tool to peel the copper tape off the top edge of the display.
-
-
-
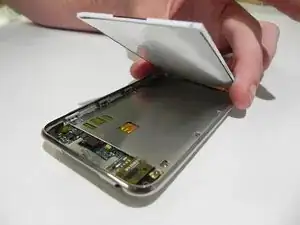
Lift the bottom of the display and rotate it towards the top edge of the iPod.
-
Use the spudger tool to lift the metal display tray and rotate it toward the top edge of the iPod on top of the display.
-
-
-
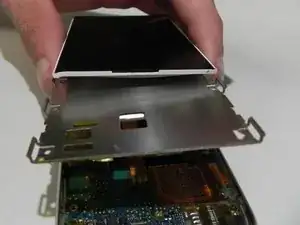
Lift the metal tray slightly (the battery is attached to the underside) and remove the display from the iPod.
-
-
-
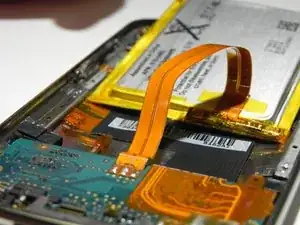
Rotate the metal display tray to the top of the iPod, being careful of the ribbon connecting the battery to the logic board.
-
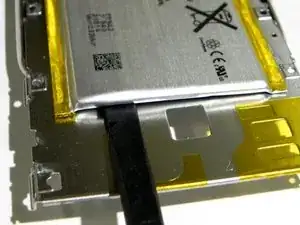
Using the flat end of the spudger, pry the battery from the adhesive that secures it to the metal display tray.
-
Remove the metal display tray.
-
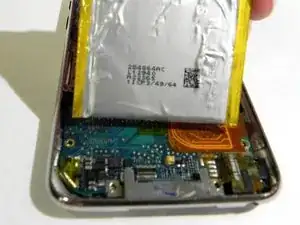
Place the battery back in the rear panel.
-
-
-
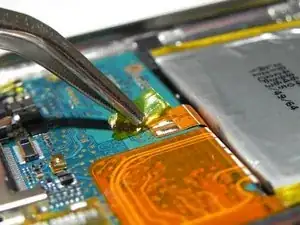
The battery on the iPod Touch is attached via solder pads.
-
Heat the solder of the solder pads individually and use your metal spudger to pry them from the logic board.
-
When soldering, work from one side of the ribbon cable. Heat the side while using the spudger to gently lift the ribbon cable from the board. Repeat this process for the other two pads.
-


To reassemble your device, follow these instructions in reverse order.