Introduction
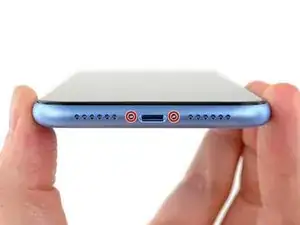
Use this guide to remove or replace the two screws securing the iPhone XR display panel. These are the only screws on the exterior of the iPhone. They use a five-point design that is unique to Apple, requiring a specialty P2 pentalobe driver for removal.
-
-
Power off your iPhone before beginning disassembly.
-
Remove the two 6.7 mm-long pentalobe screws at the bottom edge of the iPhone.
-
Conclusion
To reassemble your device, follow these instructions in reverse order.

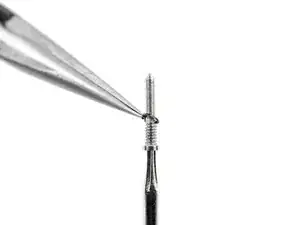
One of my gaskets was as shown in your second photo, the other had been worked into the threads (as if smeared) probably from the factory and was completely unusable.
In place of replacements (unsure of where to purchase) I just used a clear silicone caulking on both screws upon reassembly to offer at least some water seal. I wish these gaskets were included with the gasket waterproofing sealant kit!
Erica -
Is there any place to buy these screw gaskets? I haven’t seen it mentioned anywhere but one of mine was pretty much chewed up. Silicone should work but I’d prefer the oem solution.
Chilinh Nguyen -
I found a place on Amazon that sells them. It's cheapest to get a full set of screws than to get just these. $5-$6 USD.
J Olin -
Can it be dead?
Lulu navarro -
If I transfer the data from the old to the new battery with an icopy, don't I get an error message?
David Julian Krause -
how am i supposed to know if the battery is below 25% if the screen won't turn on?
Beth Jackson -
Spoiler alert! I just followed all the steps and if you bought the anti-clamp you might save a lot of time and some unreversible steps.
I recommend that you read all the steps before beginning and follow the steps up to the point where the guide removes the screen (step 23). After that read again the precautions of step 41 and try the next thing:
- Using something like the iOpener hot bag, heat up the back side of the phone where the battery is glued to for some minutes
- Alternatively use a 3d printer heat bed at 60 degrees Celsius
- Once the back of the phone is hot to the touch, enough to make it uncomfortable to the touch, find a portion of the battery with a smooth surface and attach the anti-clamp to it and the back of the phone
- Follow the steps 4 and 5 to detach the battery from the frame
If this procedure works you will not have to remove some elements such as:
- lower speaker black tape (step 28)
- lower speaker water proof gasket (step 33)
I hope that someone find this helpful. Happy fixing!!
Julio Beltran -