
Introduction
-
-
Power off your iPhone before beginning disassembly.
-
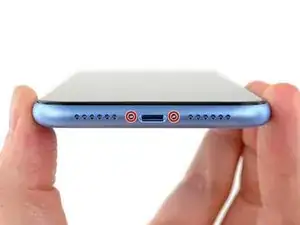
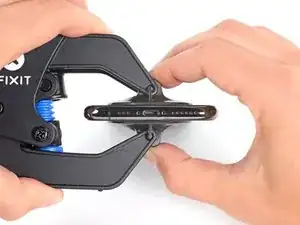
Remove the two 6.7 mm-long pentalobe screws at the bottom edge of the iPhone.
-
-
-
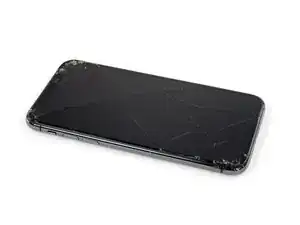
If your iPhone has a cracked screen, keep further breakage contained and prevent bodily harm during your repair by taping over the glass.
-
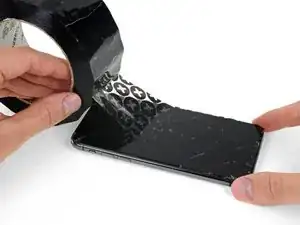
Lay overlapping strips of packing tape over the iPhone's display until the whole face is covered.
-
If the broken glass makes it difficult to get a suction cup to stick in the next few steps, try folding a strong piece of tape (such as duct tape) into a handle and lifting the display with that instead.
-
-
-
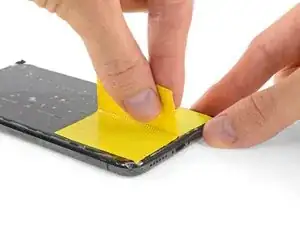
Lay overlapping strips of clear packing tape over the iPhone's screen until the whole face is covered.
-
If you can't get the suction cup to stick in the next few steps, fold a strong piece of tape (such as duct tape) into a handle and lift the screen with that instead.
-
-
-
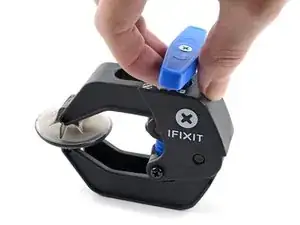
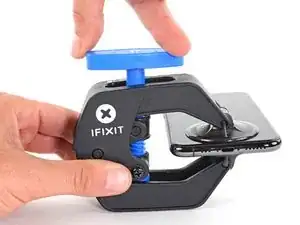
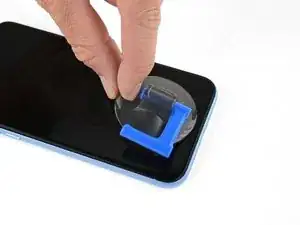
Pull the blue handle backwards to unlock the Anti-Clamp's arms.
-
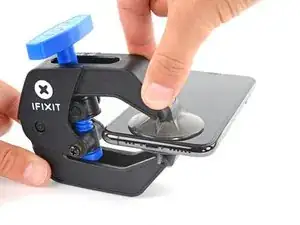
Slide the arms over either the left or right edge of your iPhone.
-
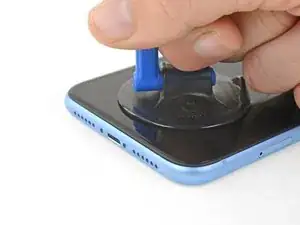
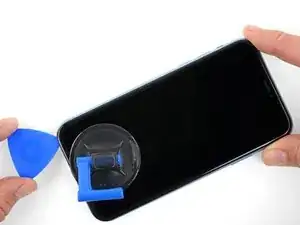
Position the suction cups near the bottom edge of the iPhone—one on the front, and one on the back.
-
Squeeze the cups together to apply suction to the desired area.
-
-
-
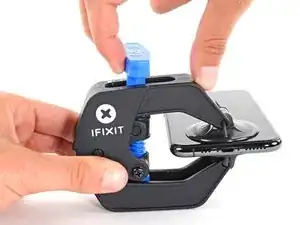
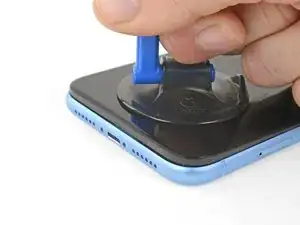
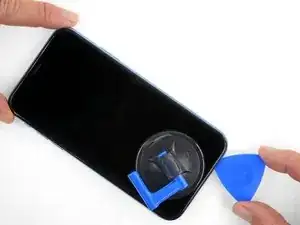
Pull the blue handle forward to lock the arms.
-
Turn the handle clockwise 360 degrees or until the cups start to stretch.
-
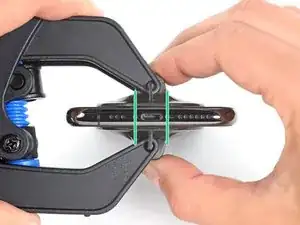
Make sure the suction cups remain aligned with each other. If they begin to slip out of alignment, loosen the suction cups slightly and realign the arms.
-
-
-
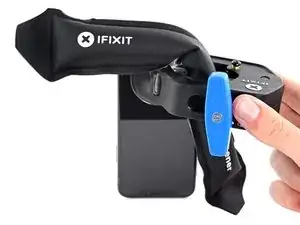
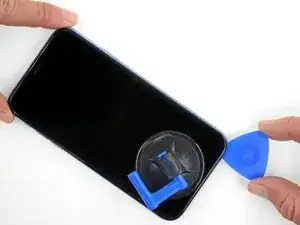
Heat an iOpener and thread it through the arms of the Anti-Clamp.
-
Fold the iOpener so it lays on the bottom edge of the iPhone.
-
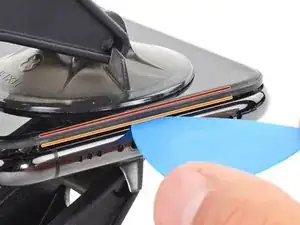
Wait one minute to give the adhesive a chance to release and present an opening gap.
-
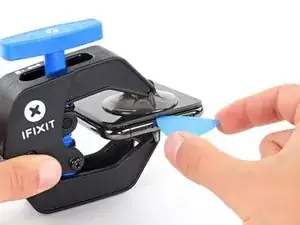
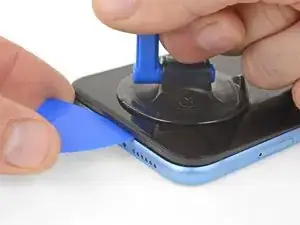
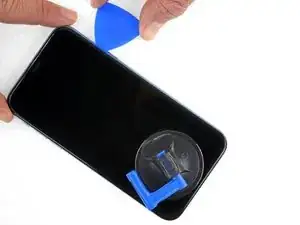
Insert an opening pick under the screen and the plastic bezel, not the screen itself.
-
Skip the next three steps.
-
-
-
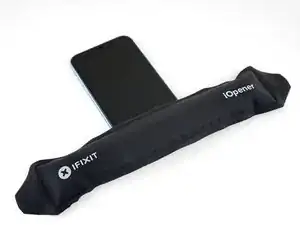
Use a hairdryer or heat gun, or prepare an iOpener and apply it to the lower edge of the iPhone for about a minute in order to soften up the adhesive underneath.
-
-
-
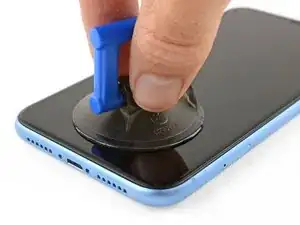
If you're using a single suction handle, apply it to the bottom edge of the phone, while avoiding the curved portion of the glass.
-
-
-
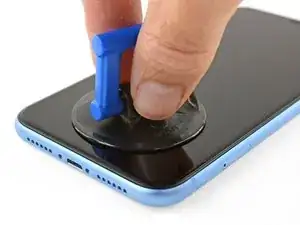
Pull up on the suction cup with firm, constant pressure to create a slight gap between the front panel and rear case.
-
Insert an opening pick under the screen and the plastic bezel, not the screen itself.
-
-
-
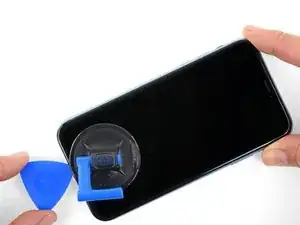
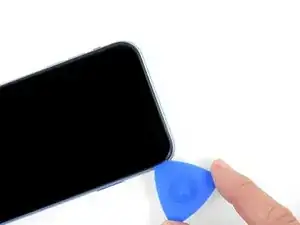
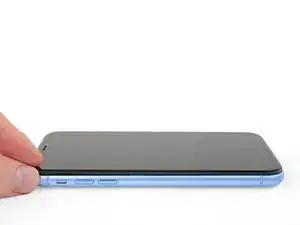
Slide the opening pick around the lower left corner and up the left edge of the iPhone, slicing through the adhesive holding the display in place.
-
-
-
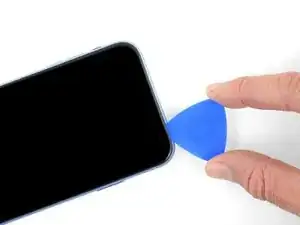
Re-insert your pick at the bottom edge of the iPhone, and slide it up the right side to continue separating the adhesive.
-
-
-
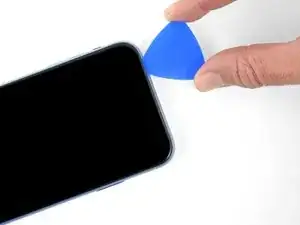
Slide the opening pick around the top corner of the display, while gently pulling or wiggling the display down in the direction of the Lightning port.
-
Slide the pick to the opposite corner and cut any remaining adhesive securing the display.
-
-
-
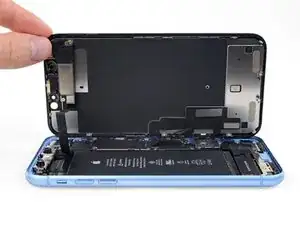
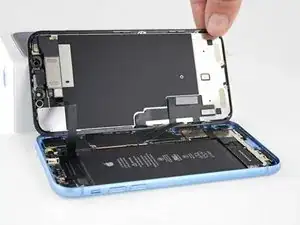
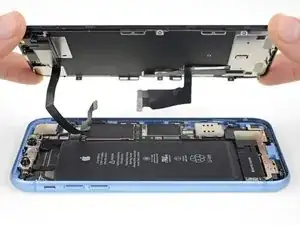
Open the iPhone by swinging the display up from the left side, like the back cover of a book.
-
Lean the display against something to keep it propped up while you're working on the phone.
-
-
-
Remove three 1.2 mm Y000 screws securing the battery connector cover bracket.
-
Remove the bracket.
-
-
-
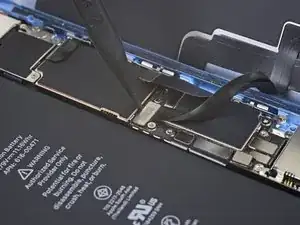
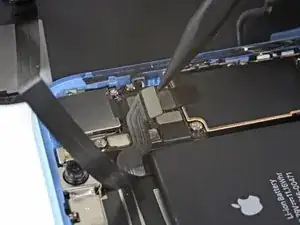
Use the point of a spudger to pry the battery connector straight up out of its socket.
-
Bend the connector slightly away from the logic board to prevent it from accidentally making contact with the socket and providing power to the phone during your repair.
-
-
-
Remove the two 1.2 mm Y000 screws securing the display connector bracket.
-
Remove the bracket.
-
-
-
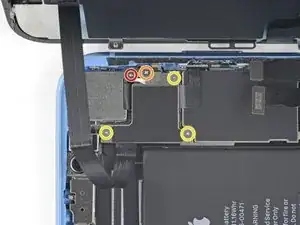
Remove the five screws securing the logic board connector bracket to the rear case:
-
One 1.3 mm Phillips #000 screw
-
One 1.5 mm Phillips #000 screw
-
Three 1.2 mm Y000 screws
-
Remove the bracket.
-
-
-
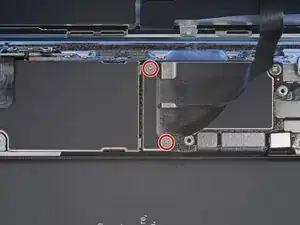
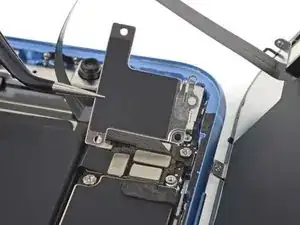
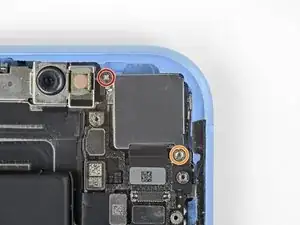
Remove the two screws securing the rear camera cover:
-
One 1.6 mm Phillips screw
-
One 2.4 mm standoff screw
-
-
-
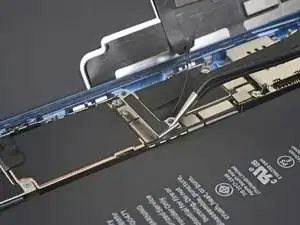
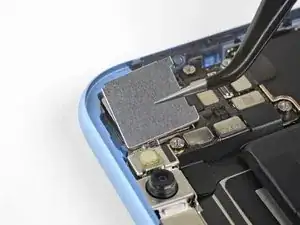
Use an opening tool or fingernail to disconnect the camera cable connector by prying it straight up from its socket.
-
-
-
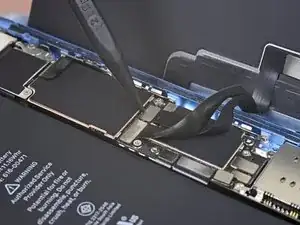
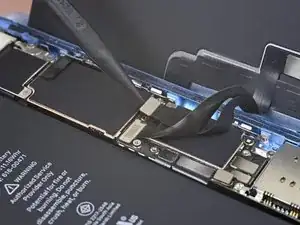
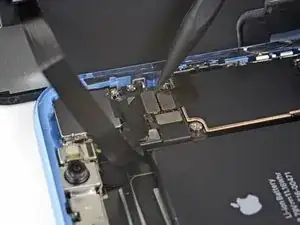
Insert the tip of a spudger at the top left corner of the camera, between the camera assembly and the iPhone's frame.
-
Gently pry up to lever the camera out of the iPhone.
-
-
-
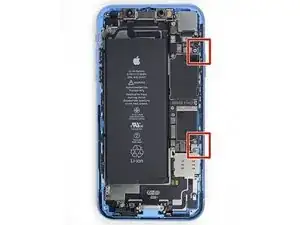
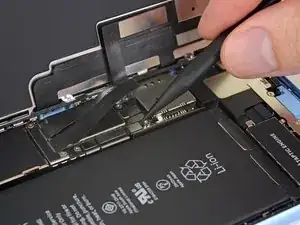
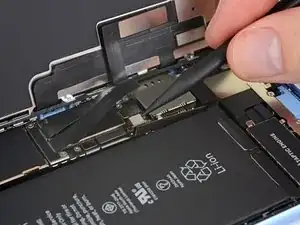
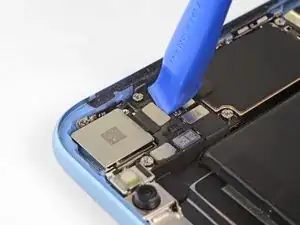
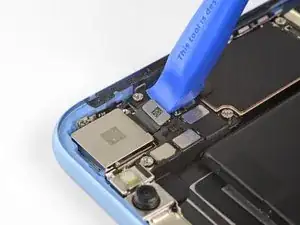
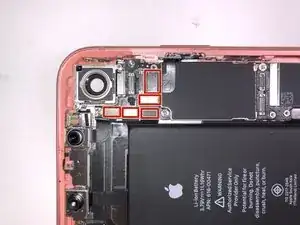
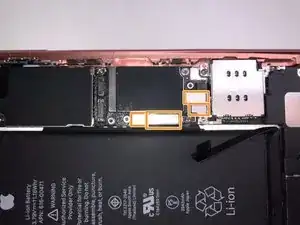
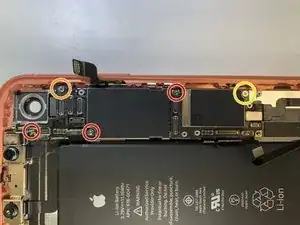
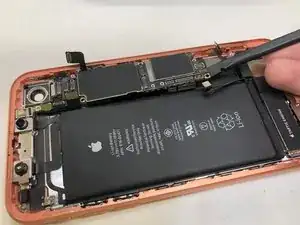
Disconnect the remaining Front Panel Connectors
-
There are 5 FPC's near the iSight camera.
-
There are 4 FPC's near the SIM reader.
-
-
-
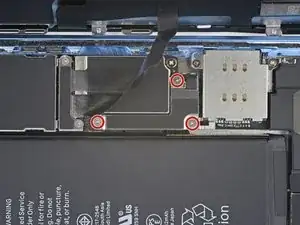
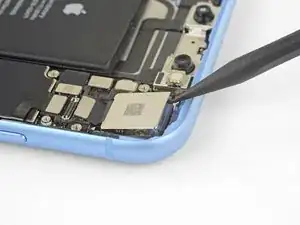
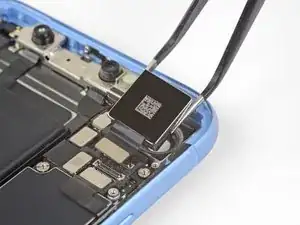
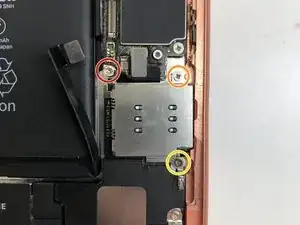
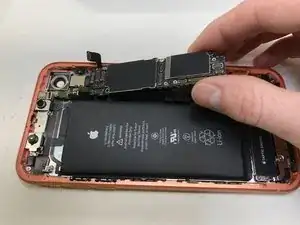
Remove the following screws:
-
2.9mm standoff screw
-
1.5mm Phillips #000
-
1.6mm Phillips #000
-
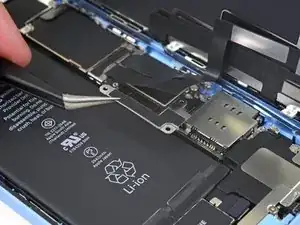
Remove the grounding bracket
-
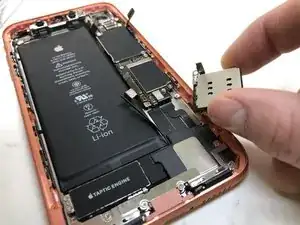
Pull the SIM reader
-


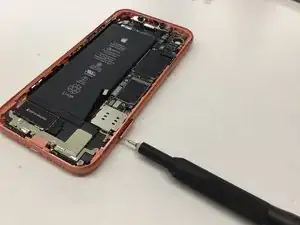
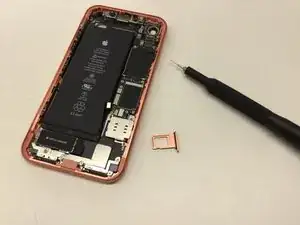

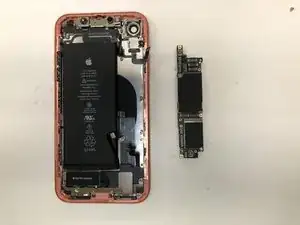
To reassemble your device, follow these instructions in reverse order.

20 comments
if I replace the logic board will it remove a iCloud lock??????
TL;DR: Yes, it should but…
All of the phone’s memory is stored on the NAND flash memory with is soldered to the logic board. Replacing the iCloud-locked logic board with a logic board from a phone that does not have an iCloud lock will technically remove the lock.
A terrible analogy would be like if you had had a tumor (iCloud lock) in your brain (MLB) so your surgeon (you, the technician) performed a brain transplant. Replacing the brain would indeed get rid of the tumor. However, your body (The phone’s housing) would just become the person of whose brain was transplanted into your body.
The only true way to remove an iCloud lock is to obtain the Apple ID & Apple ID password of the original owner.
You just have to try to find a good logic board and trust that the seller is legit. (Easier said than done)
This guide was more intended for those that are attempting micro-soldering repairs. However, you can use the guide for whatever you need. :-)
If i chanfe the logic board do i also have to swap the facial scan like the fingerprints on the prior iphone or all i gotta do is swap the boards
Great question! From what I’ve experienced, the Face ID hardware is similar to touch ID hardware in that it is tied to the phone’s logic board. However, FaceID does seem a little more forgiving. The phone I’m currently using is an iPhone X that was severely damaged. I bought it off a customer and installed a new screen but Face ID did not work. A couple months later, I was using an app that made use of face ID hardware for facial recognition and mapping. I thought it wouldn’t work since FaceID wasn’t working on my phone. To my surprise, it worked just fine. I then tried setting up FaceID and it was able to activate and capture my face.
If you’re looking to refurbish a phone, assume FaceId won’t work without the original hardware. However, your milage may vary.
Does the camera work even the face I'd doesn't work ?
From what I’ve seen, yes it does. However, your milage may vary. Make sure you check to see if your cameras are good before you replacing/repairing the logic board. I’ve already had an iPhone XS where the cameras and flashlight stopped working. Replacing the iSight camera seemed to do the trick.
Front camera will function as normal, but no Face ID
Richard -
One of my gaskets was as shown in your second photo, the other had been worked into the threads (as if smeared) probably from the factory and was completely unusable.
In place of replacements (unsure of where to purchase) I just used a clear silicone caulking on both screws upon reassembly to offer at least some water seal. I wish these gaskets were included with the gasket waterproofing sealant kit!
Erica -
Is there any place to buy these screw gaskets? I haven’t seen it mentioned anywhere but one of mine was pretty much chewed up. Silicone should work but I’d prefer the oem solution.
Chilinh Nguyen -
I found a place on Amazon that sells them. It's cheapest to get a full set of screws than to get just these. $5-$6 USD.
J Olin -
Can it be dead?
Lulu navarro -
If I transfer the data from the old to the new battery with an icopy, don't I get an error message?
David Julian Krause -
how am i supposed to know if the battery is below 25% if the screen won't turn on?
Beth Jackson -
Spoiler alert! I just followed all the steps and if you bought the anti-clamp you might save a lot of time and some unreversible steps.
I recommend that you read all the steps before beginning and follow the steps up to the point where the guide removes the screen (step 23). After that read again the precautions of step 41 and try the next thing:
- Using something like the iOpener hot bag, heat up the back side of the phone where the battery is glued to for some minutes
- Alternatively use a 3d printer heat bed at 60 degrees Celsius
- Once the back of the phone is hot to the touch, enough to make it uncomfortable to the touch, find a portion of the battery with a smooth surface and attach the anti-clamp to it and the back of the phone
- Follow the steps 4 and 5 to detach the battery from the frame
If this procedure works you will not have to remove some elements such as:
- lower speaker black tape (step 28)
- lower speaker water proof gasket (step 33)
I hope that someone find this helpful. Happy fixing!!
Julio Beltran -