
Introduction
For an easier repair, use our fix kit and follow this shorter guide to replace your iPhone’s entire screen.
For more advanced fixers, this guide will help you replace only the iPhone 8 LCD and digitizer assembly (a.k.a. the bare “front panel”). This requires you to transfer several components from your original screen to the new one before installing it—including the front-facing camera, earpiece speaker, LCD shield plate, and home button assembly.
For all screen/display repairs, it's important to carefully transfer the original home/Touch ID sensor onto the new display in order for it to function. The solid-state home button is paired to its original logic board by Apple, so replacing it will render it unusable.
Note: If your iPhone’s auto brightness feature does not work properly after your screen repair, make sure your iPhone is updated to iOS 12. True Tone functionality is disabled after a screen replacement, even when using an original Apple screen.
-
-
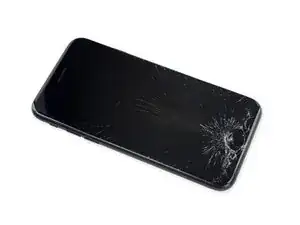
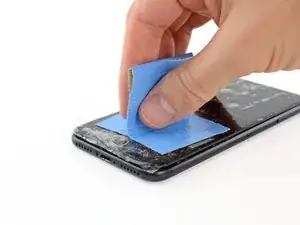
If your display glass is cracked, keep further breakage contained and prevent bodily harm during your repair by taping over the glass.
-
Lay overlapping strips of clear packing tape over the iPhone's display until the whole face is covered.
-
If the broken glass makes it difficult to get a suction cup to stick in the next few steps, try folding a strong piece of tape (such as duct tape) into a handle and lifting the display with that instead.
-
-
-
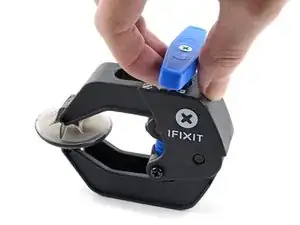
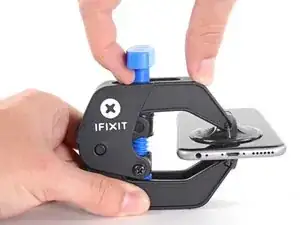
Pull the blue handle backwards to unlock the Anti-Clamp's arms.
-
Slide the arms over either the left or right edge of your iPhone.
-
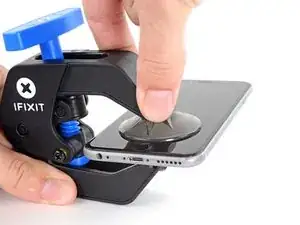
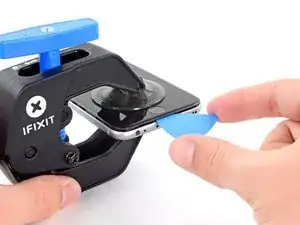
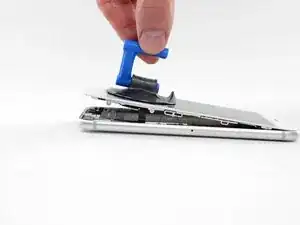
Position the suction cups near the bottom edge of the iPhone just above the home button—one on the front, and one on the back.
-
Squeeze the cups together to apply suction to the desired area.
-
-
-
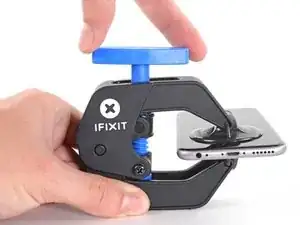
Pull the blue handle forwards to lock the arms.
-
Turn the handle clockwise 360 degrees or until the cups start to stretch.
-
Make sure the suction cups remain aligned with each other. If they begin to slip out of alignment, loosen the suction cups slightly and realign the arms.
-
-
-
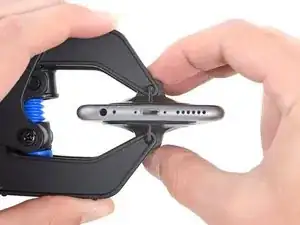
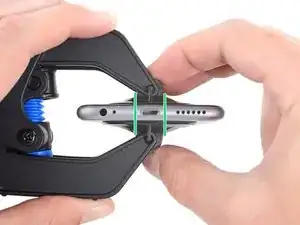
Heat an iOpener and thread it through the arms of the Anti-Clamp.
-
Fold the iOpener so it lays on the bottom edge of the iPhone.
-
Wait one minute to give the adhesive a chance to release and present an opening gap.
-
Insert an opening pick into the gap.
-
Skip the next three steps.
-
-
-
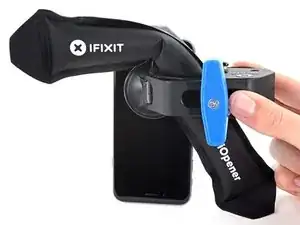
Heating the lower edge of the iPhone will help soften the adhesive securing the display, making it easier to open.
-
Use a hairdryer or prepare an iOpener and apply it to the lower edge of the phone for about 90 seconds in order to soften up the adhesive underneath.
-
-
-
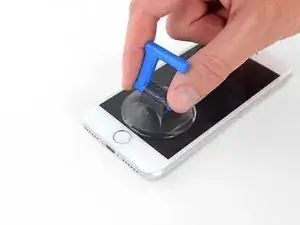
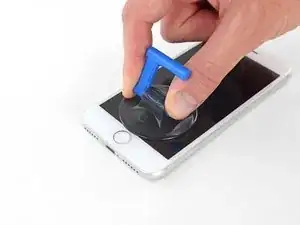
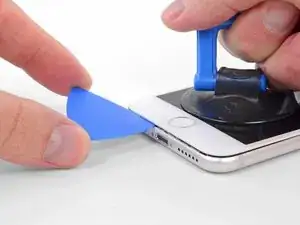
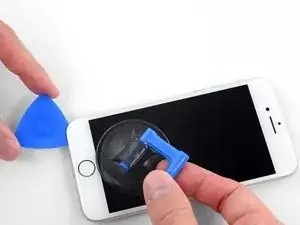
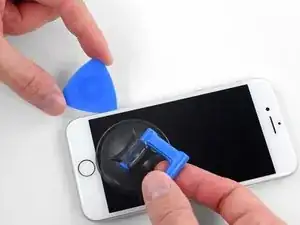
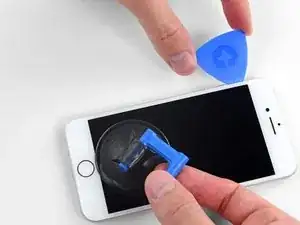
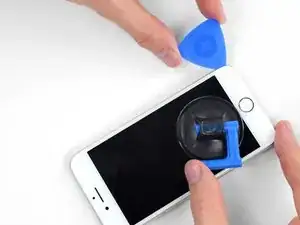
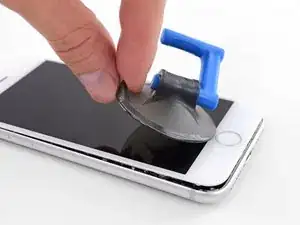
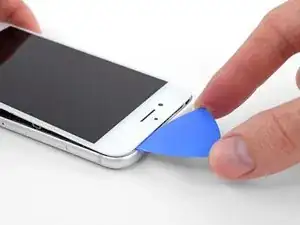
Pull up on the suction cup with firm, constant pressure to create a slight gap between the screen and the frame.
-
Insert an opening pick into the gap.
-
-
-
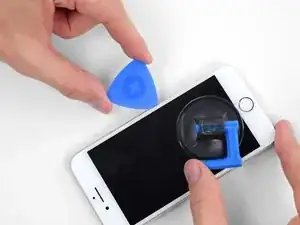
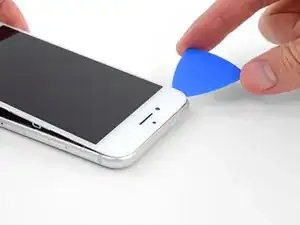
Slide the opening pick up the left edge of the phone starting at the lower edge and moving towards the volume control buttons and silent switch, breaking up the adhesive holding the display in place.
-
Stop near the top left corner of the display.
-
-
-
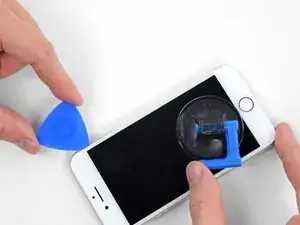
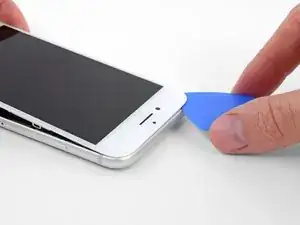
Re-insert your tool at the lower right corner of the iPhone, and slide it around the corner and up the right side of the phone to separate the adhesive.
-
-
-
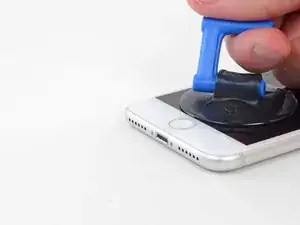
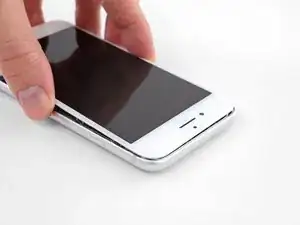
Gently pull up on the suction cup to lift up the bottom edge of the display.
-
Pull on the small nub on the suction cup to remove it from the front panel.
-
-
-
Slide an opening pick underneath the display around the top left corner and along the top edge of the phone to loosen the last of the adhesive.
-
-
-
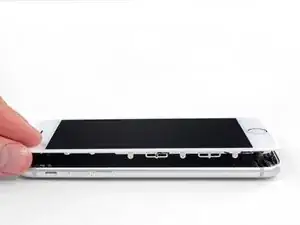
Slide the display assembly slightly down (away from the top edge of the phone) to disengage the clips holding it to the rear case.
-
-
-
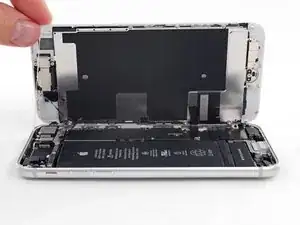
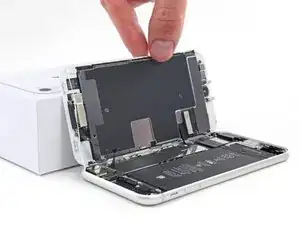
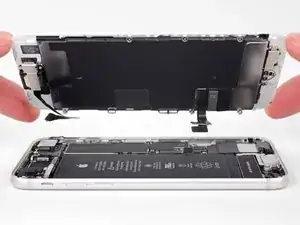
Open the iPhone by swinging the display up from the left side, like the back cover of a book.
-
Lean the display against something to keep it propped up while you're working on the phone.
-
-
-
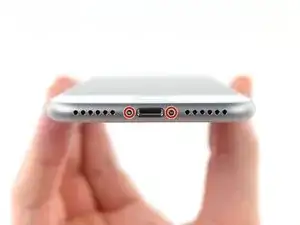
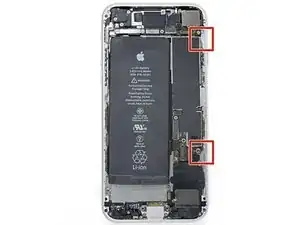
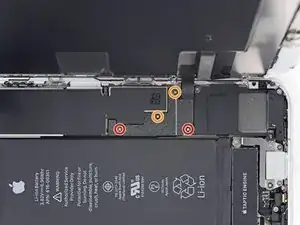
Remove four Phillips screws securing the lower display cable bracket to the logic board, of the following lengths:
-
Two 1.3 mm screws
-
Two 2.8 mm screws
-
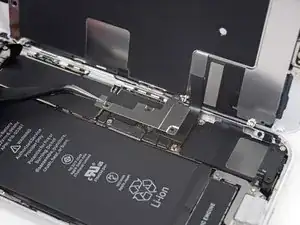
Remove the bracket.
-
-
-
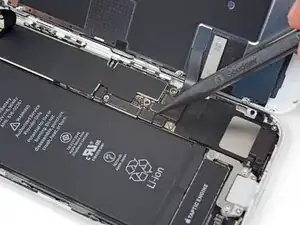
Use the point of a spudger to pry the battery connector out of its socket in the logic board.
-
Bend the battery connector cable slightly away from the logic board to prevent it from accidentally making contact with the socket and providing power to the phone during your repair.
-
-
-
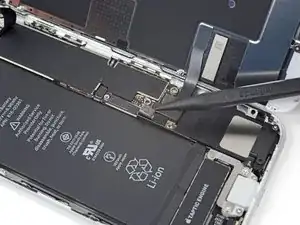
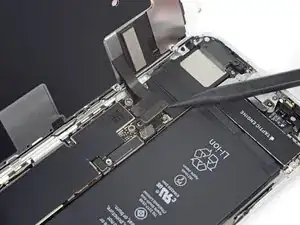
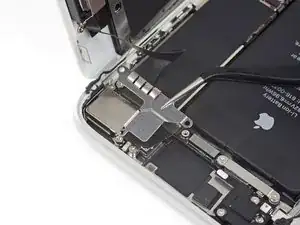
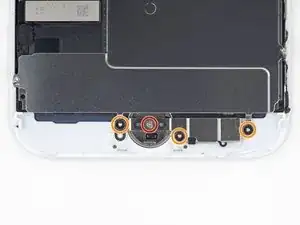
Remove the three 1.3 mm Phillips screws securing the bracket over the front panel sensor assembly connector.
-
Remove the bracket.
-
-
-
Remove the four Y000 screws securing the bracket over the home/Touch ID sensor:
-
One 1.2 mm screw
-
Three 1.3 mm screws
-
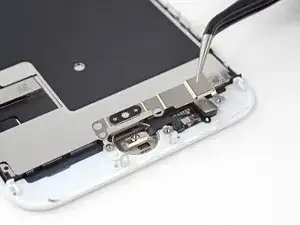
Remove the bracket.
-
-
-
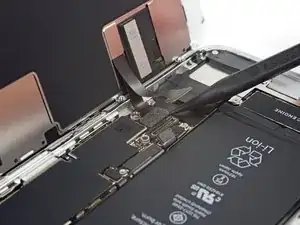
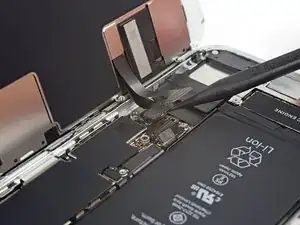
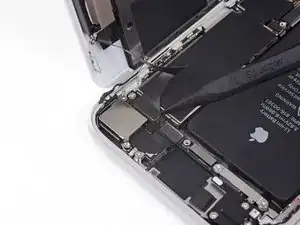
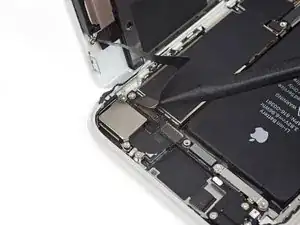
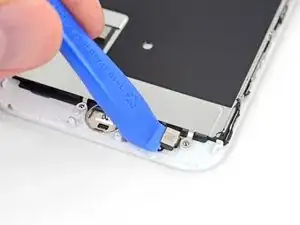
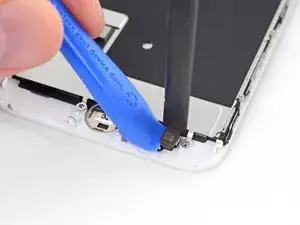
Use an opening tool to pry under the left edge of the home button cable connector to disconnect it from its socket.
-
-
-
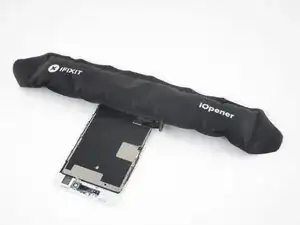
Flip the display assembly over. Use a hairdryer or prepare an iOpener and apply it to the lower edge of the display for about 90 seconds in order to soften up the adhesive underneath.
-
-
-
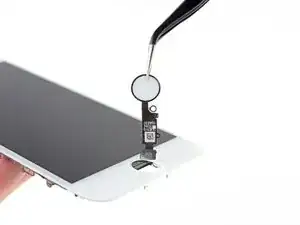
Use an opening pick to gently separate the adhesive holding the home/Touch ID sensor cable to the back side of the display panel.
-
-
-
Remove the home/Touch ID sensor assembly by lifting it through the front side of the display.
-
-
-
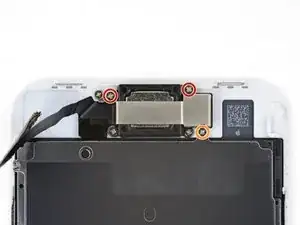
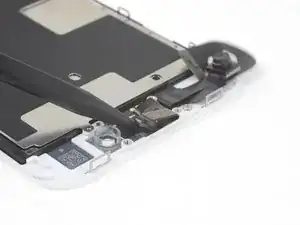
Remove the three Phillips screws securing the top earpiece bracket to the front panel:
-
Two 2.6 mm screws
-
One 1.8 mm screw
-
-
-
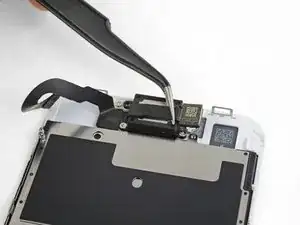
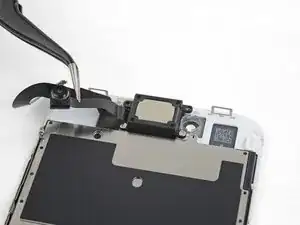
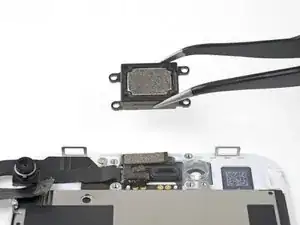
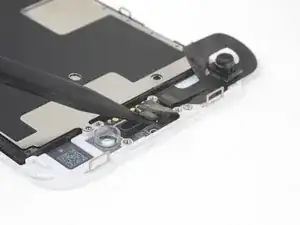
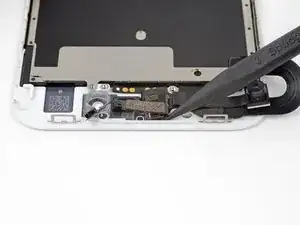
Remove the two Phillips screws securing the earpiece speaker to the front panel:
-
One 1.8 mm screw
-
One 2.3 mm screw
-
-
-
Heat an iOpener and apply it to the upper edge of the display to soften the adhesive holding the front camera and sensor assembly in place.
-
-
-
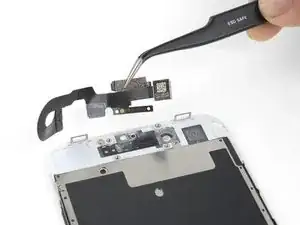
Use the point of a spudger to gently pry the proximity sensor out of its recess on the front panel.
-
-
-
Slide the tip of a spudger underneath the ambient light sensor flex cable, and lift the sensor out of its housing.
-
-
-
Slide an opening pick underneath front camera cable assembly, separating the adhesive holding the camera and sensor cable.
-
-
-
Heat an iOpener and lay it over the edge of the shield closest to the home button to soften the adhesive holding it in place.
-
-
-
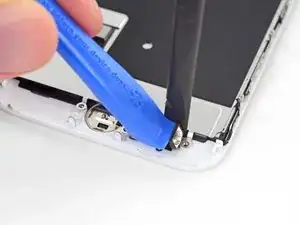
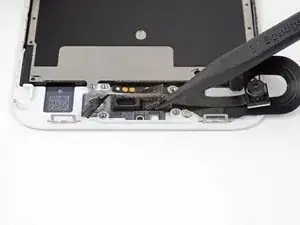
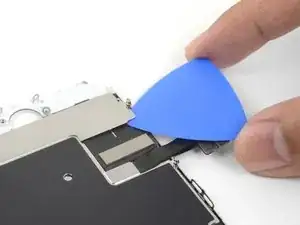
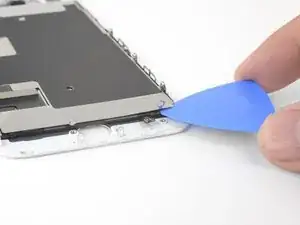
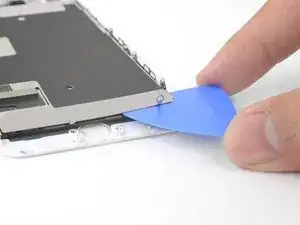
Use an opening pick to break up the adhesive near the home button that holds the flat display cable to the LCD shield plate.
-
-
-
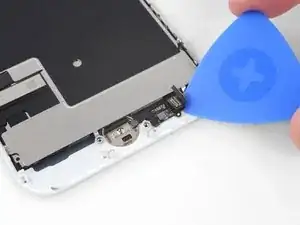
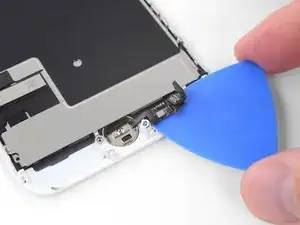
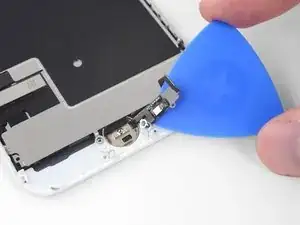
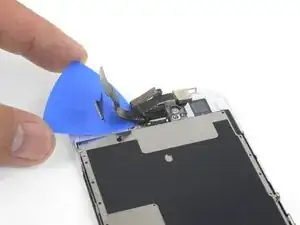
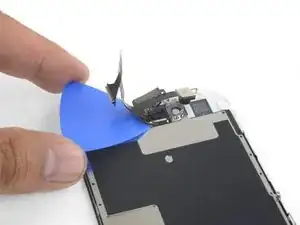
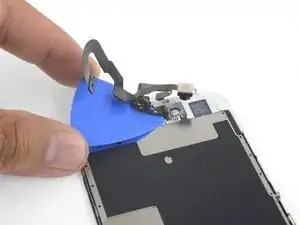
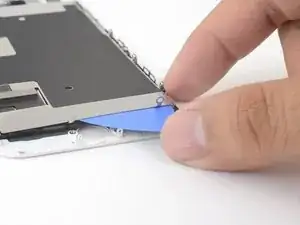
Insert an opening pick from the bottom right corner and continue to separate the display cable from the LCD shield plate.
-


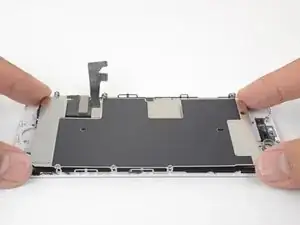

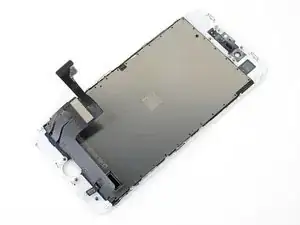
Compare your new replacement part to the original part. You may need to transfer remaining components or remove adhesive backings from the new part before installing.
To reassemble your device, follow these instructions in reverse order.
Take your e-waste to an R2 or e-Stewards certified recycler.
Repair didn’t go as planned? Check out our iPhone 8 Answers community for troubleshooting help.

17 comments
So I’m pretty sure I know the answer to this - but can I test out the screen replacement without hooking up the camera, home button, etc? Can I just attach the three cables to the phone to make sure the screen works, or would it brick the phone?
Hi Sarah,
You can test the display without bricking your phone. It may boot-loop when the front sensor/camera assembly isn’t connected though. Be careful while you work with an opened phone with the battery connected…it is easy to accidentally short things out!
After replacing the iPhone 8 LCD Screen and Digitizer, it seems that the battery is draining faster. I just wanted to see if this is a normal problem or was there something I missed during the install process?
My daughters phone was repaired and the same thing is happening to her
Do you have to remove the plastic holder for the camera?
Hi Diego,
If your replacement part did not come with the plastic holder, you will have to transfer the old one onto the new frame.
just how long are those screws- i turn and turn and turn and the lift off is soooo slight, seemingly insignificant…
An. Jahnke -
I would recommend, from the very beginning, dumping all tools out of the kit (if you got it) and using that white paper tool box as a tray to organize the screws and braces in. It’s nice to work over because it catches screws well and makes it easy to see them if you drop any.
Johnny Emrica -
That’s a great idea thank you
Mohamed Dekkiche -
Screw to the left of the charging port will not come out. Screw on the right came out no problem. Any ideas?
Bill Maher -
I already replaced my iPhone 8 battery with one from iFixit and honestly I wasn't impressed. It worked well for a few months, but then I started noticing the peak performance capability dropping significantly thereafter. I followed the initial charging instructions to a tee and only let it drop below 20% once a month. Normal everyday use for me... no intense apps like games, etc. I considered having Apple do it this time around, but for these older models they don't keep the batteries in-stock and you have to give them your phone for up to a week. So in the end, I opted to try another battery from iFixit instead. Hopefully this one will last longer.
tripmusic -
How with the gigantic kit do I not have a 3 1/2 pentalobe driver the very first screwdriver I reach for and that I need is not in any of these kits. What’s up with that?
Michael Stephens -
Same problem. The kit comes with a screw driver, but not for this pentalobe screw. This is a problem.
Yuji Ishitsuka -
I had to search what screwdriver bit I had to use from the ifixit toolkit; it's the P2 bit. (Maybe it's more obvious if you bought the battery kit, because it only has one type of pentalobe screwdriver.)
Nathaniel Zielstra -