Introduction

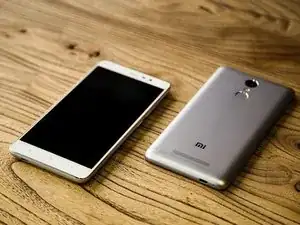
This is a guide for the disassembly of the Xiaomi Redmi Note 3.

While not necessary, to complete this disassembly, folks are encouraged to have basic knowledge on the workings of phone electronics.

  1. VvAdijO4E6Hroysx
    VvAdijO4E6Hroysx
    GcPRUXEpnKJKoIO6
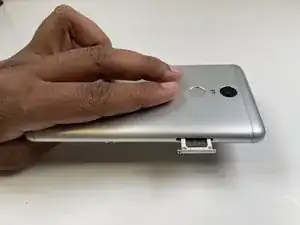
    • Locate the sim card tray at the right side of the phone

    • Insert the metal needle sim tool into the tray hole to eject the tray and pull it out

  2. mgcxQbV4MXmxjBRp
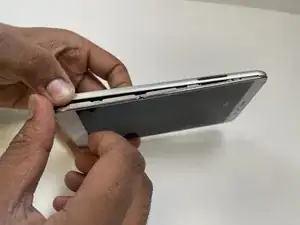
    • Insert your thumb in between the back panel and the front of phone and slowly follow along the edges to separate the two pieces

  3. Ym6SIsIeeZDpETNG
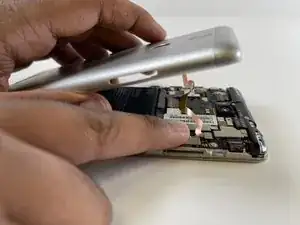
    • Remove the plastic connector that links the battery with the motherboard by gently prying the ends of the connector from each side of the phone

  4. JtokFJOytT6xYIEf
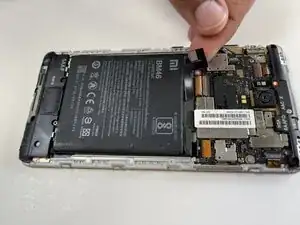
    • Pull the black tab at the top left of the battery to disconnect the battery from the system

  5. GtHnNYFbJvAAV1oO
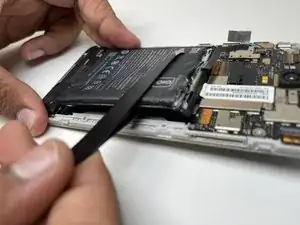
    • Wedge the tweezers under the battery to lift it up

    • Remove as much as adhesive as needed to lift the battery from phone using tweezers or fingers

    • Adhesive that binds the battery to the phone can be strong and this may require a little bit of effort to remove the battery

  6. LHKfFOZQuYelRPWY
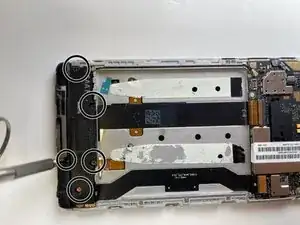
    • Use the screwdriver to unscrew the speaker at the bottom back of the phone. There are five screws around the edges of the speaker

  7. WSLIO2MkO4kuorhs
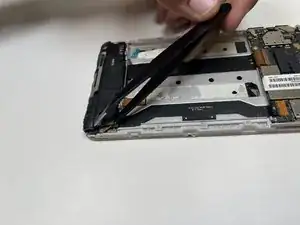
    • Remove the loud speaker cover using the tweezers to expose the daughterboard

  8. JjCAlDIFAqfTGfMG
    JjCAlDIFAqfTGfMG
    5EgunIWCDaO3CgRw
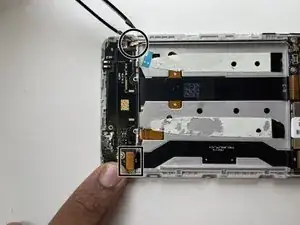
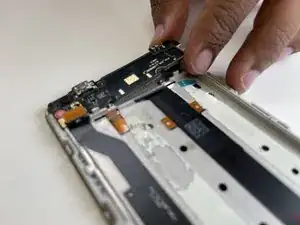
    • Remove the two gold tabs on the two top corners of the daughterboard

    • Pry the daughterboard open with the tweezers or pull it out using your fingers

    • There is a heat shield underneath the daughter board and it can get hot from charging the phone so make sure you don’t touch it

  9. wZMFNkorUgmSIy5M
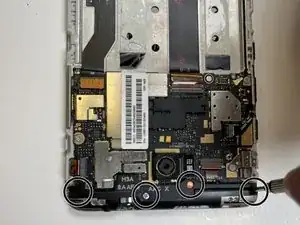
    • Unscrew the four screws at the top of the motherboard and pop up the top cover

    • One screw might by disguised by a sticker so locate that and remove the sticker as well

    • Pulling the top cover without removing all the screws might damage the motherboard

  10. e4ANTB6cZvRMDLBM
    • Remove the rubber cover that’s containing the camera

  11. UTdndNIElCFpqbfo
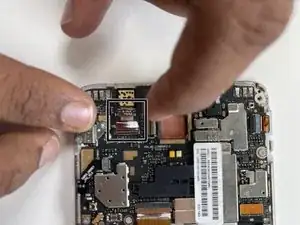
    • Pull the tab that’s holding the front camera to remove the camera protector

    • To keep the camera from damage hold the camera from the corner and not from the middle of it

  12. s4V2yqBTQC4RKHl3
    • Pull out the front camera using tweezers or your fingers

  13. lwfDbpccNFTjK6ZQ
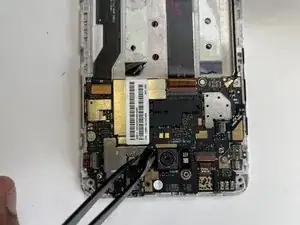
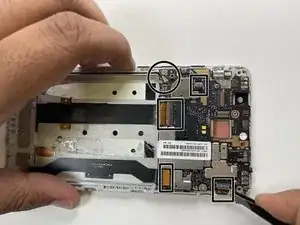
    • Remove the five connectors of the motherboard using tweezers or your fingers

  14. gnKeqPAEIZNHNbYi
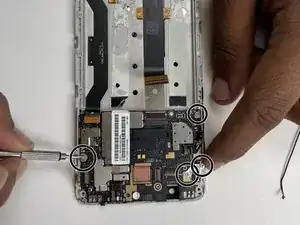
    • Remove the remaining four screws as your work down to the bottom to loosen the motherboard

  15. NqvtAafgJMsu3VLN
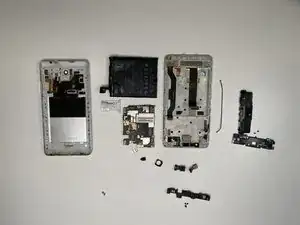
    • Congrats -- You disassembled the Xiaomi Redmi Note 3!

Conclusion

To reassemble your device, follow these instructions in reverse order.
Meaghan Owens

Member since: 23/06/23

241 Reputation

0 comments