Introduction

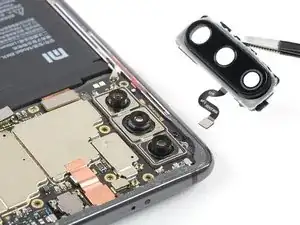
Use this guide to remove or replace a broken rear camera glass in your Xiaomi Mi 9.

You’ll need replacement adhesive to reattach components when reassembling the device.

  1. 2RPRexuBjPIWdChg
    • Before you begin, switch off your phone.

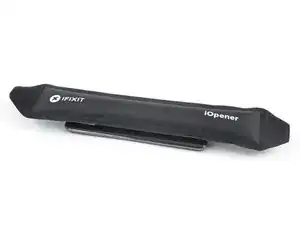
    • Apply a heated iOpener to the rear glass to loosen the adhesive beneath the edges. Apply the iOpener for at least two minutes.

  2. pHrmswE1VaXX6y5L
    pHrmswE1VaXX6y5L
    JCsSSrKRDLRSFMOx
    JsggSKUOPjVxkAdJ
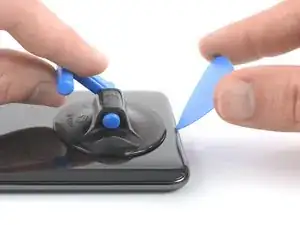
    • Secure a suction handle to the lower edge of the rear glass, as close to the edge as possible.

    • If the phone's rear glass is cracked, the suction handle may not stick. Try lifting it with strong tape, or superglue the suction handle in place and allow it to cure so you can proceed.

    • Lift the rear glass with the suction handle to create a gap between the glass and the frame.

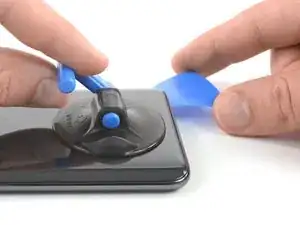
    • Insert an opening pick into the gap.

    • If you have trouble, apply more heat to further soften the adhesive. Follow the iOpener instructions to avoid overheating.

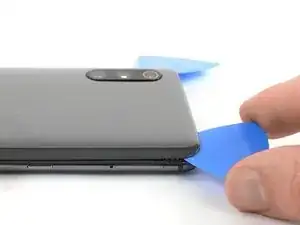
    • Slide the opening pick to the bottom right corner of the phone.

  3. yTF5uO4KbDSCtQxr
    yTF5uO4KbDSCtQxr
    rYeWYEhMZtGA43EY
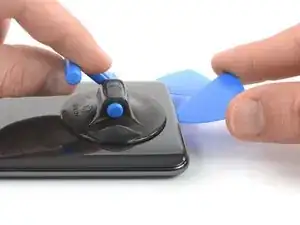
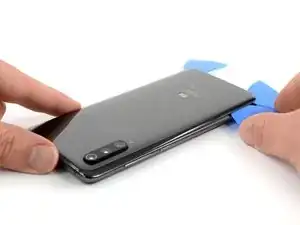
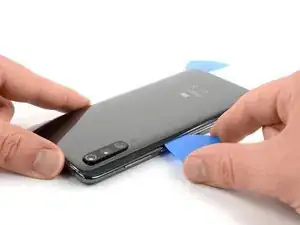
    • Insert a second opening pick and slide it to the bottom left corner to cut the adhesive.

    • Leave the opening picks in place to prevent the adhesive from resealing.

  4. De6lobZdtIArYytf
    De6lobZdtIArYytf
    RNNXc4fC43CyJOrL
    aUnMdDfOZ3OU2MRa
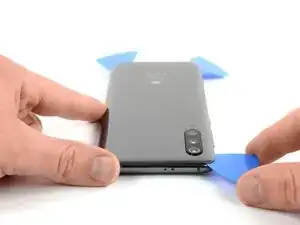
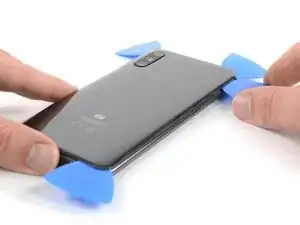
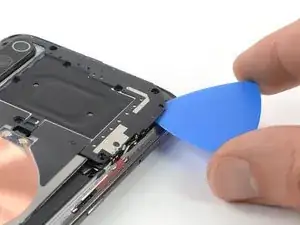
    • Insert a third opening pick at the bottom left corner.

    • Start to slide the opening pick from the bottom left corner along the side of the Xiaomi Mi 9 to cut the adhesive.

    • Be aware of the rear cameras and only insert the tip of the opening pick. As the adhesive cools down it gets harder to cut. If necessary use your iOpener to reheat it.

    • Leave the opening pick in the top left corner to prevent the adhesive from resealing.

  5. EdK4WnqgJwetyrxm
    EdK4WnqgJwetyrxm
    brmSZantnTEZBHqb
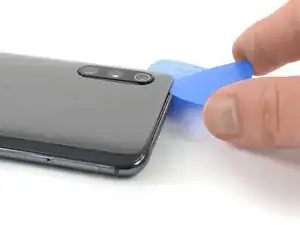
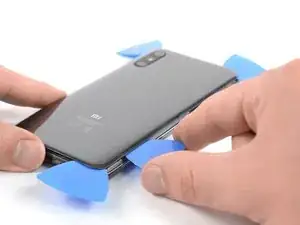
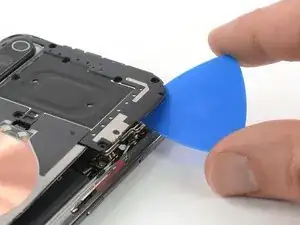
    • Insert a fourth opening pick under the top left corner of the rear glass.

    • Slide the opening pick along the top to cut the adhesive.

    • Leave the opening pick in the top right corner to prevent the adhesive from resealing.

    Be very careful at this point not to raise the cover too much, at the slightest bending the glass shatters. It just happened to me :(

    enrica_spiga -

  6. e3BnipEoxkinOCOT
    e3BnipEoxkinOCOT
    sTOsqiG5sWBiHQyk
    • Insert a fifth opening pick at the top right corner of the phone.

    • Slide the opening pick along the right edge to cut the remaining adhesive.

  7. gWvnIF6PPQUREMWB
    gWvnIF6PPQUREMWB
    Pxub5yuADPsnIoMO
    • Carefully lift the rear glass and remove it.

    • Before installing new adhesive and reassembly, remove any remaining adhesive from the phone, and clean the glued areas with isopropyl alcohol and a lint-free cloth.

    Il y a un peu d'adhésif autour de l'appareil photo, c'est pour cela que ça peu forcer un tout petit peu.

    Charles -

  8. mNPiTHVUA5iAGt1V
    • Remove the ten Phillips #00 screws (3 mm length) that secure the motherboard cover.

    • There might be tamper proof sticker on some of the screws.

    Note, the Explorer/Transparent edition does not use phillips #00 screws.

    Jason Baginski -

    It uses 0.8mm star screws(P2 Pentalobe in the iFixIt store)

    Jason Baginski -

    Thanks for mentioning Jason!

    Dominik Schnabelrauch -

  9. crEsbkOrfbeVBFyY
    crEsbkOrfbeVBFyY
    UlR6WDIgZQhmOrhH
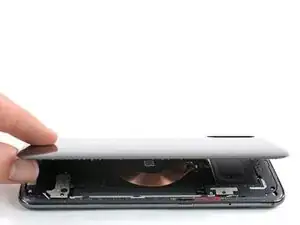
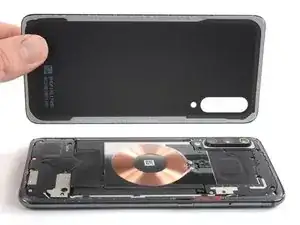
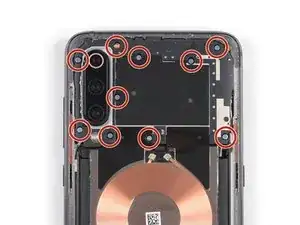
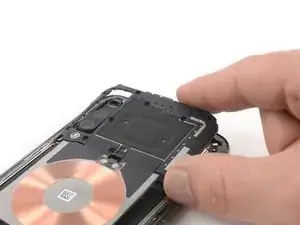
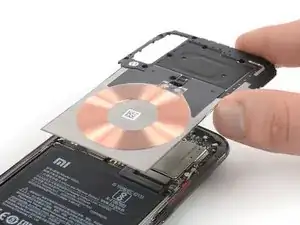
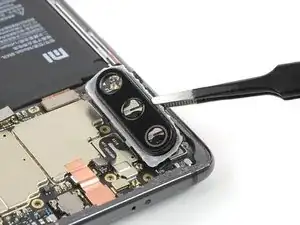
    • Insert an opening pick at the top right corner of the motherboard cover.

    • Twist the opening pick sideways to pry up and slightly lift the motherboard cover.

  10. JXrDimYCjPcCXYaC
    JXrDimYCjPcCXYaC
    MexVAhDGGLQHoMvY
    • Carefully remove the motherboard cover including the charging coil / NFC antenna.

  11. JD1bfZVuYKInvJmn
    JD1bfZVuYKInvJmn
    UyBwLXPGJOUj4IAI
    • Use a spudger to pry up and disconnect the battery flex cable.

  12. dYLquAs3RXg4hnxh
    dYLquAs3RXg4hnxh
    bIOHBTlI6ZFnMEhJ
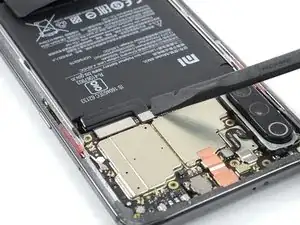
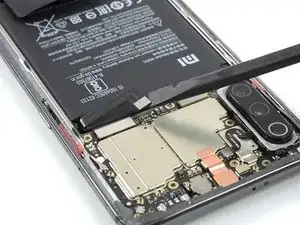
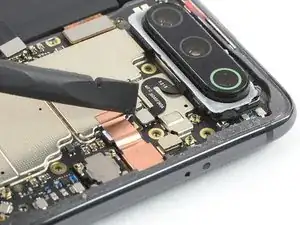
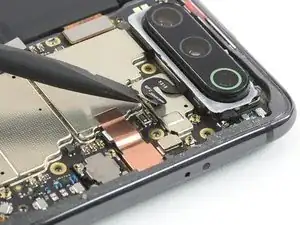
    • Use the flat end of a spudger to pry up and disconnect the sensor cable of the rear camera glass.

  13. qNAxRXb11VCWiadN
    qNAxRXb11VCWiadN
    DeBRxBhDMJIQCALW
    • Remove the rear camera glass.

    Can we replace only the camera glass or do we need to replace sensors too?

    Thanks

    Toni Dias -

    Looks like a combined unit. Separating the glass from the sensor (or vice versa) sounds like a delicate job.

    Tobias Isakeit -

Conclusion

To reassemble your device, follow these instructions in reverse order.

Repair didn’t go as planned? Check out our Answers Community for troubleshooting help.

Dominik Schnabelrauch

Member since: 23/11/16

224647 Reputation

One comment

Hi, I need the part number of the cover with the sensors. The sensors are not working in my device.

Robert Lawrowski -