Introduction

Use this guide to remove or replace the back panel on an Xbox Series X.

Before you begin, completely power down and unplug all cables from your console. Remember to follow general electrostatic discharge (ESD) safety procedures while repairing your console.

  1. 3bZJo5AEqOISmVxU
    3bZJo5AEqOISmVxU
    kGOaBCslJWZrcPUf
    • Before you begin, completely power down and unplug all cables from your console.

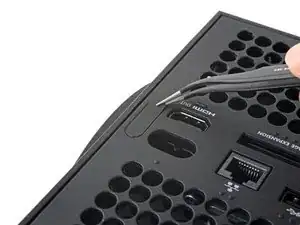
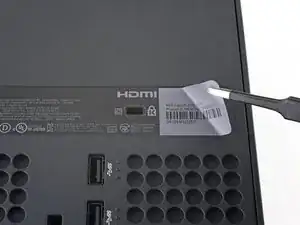
    • Use a pair of tweezers to remove the sticker hiding the first screw on the back panel, near the base.

  2. QVtqrbDsBgrw6WZq
    QVtqrbDsBgrw6WZq
    IVS6BushCHXDMTuP
    wWNRqGPUqtlhrNV2
    • For cleaner removal, use an iOpener or hair dryer to heat the sticker.

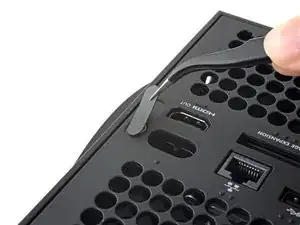
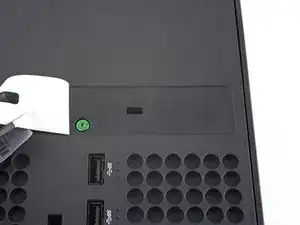
    • Use a pair of blunt tweezers to peel back the large sticker on the back panel to reveal the second screw.

    • You only need to peel this sticker to where you can access the hidden screw. You don't need to pull it completely off.

    • Technically, these are tamper-evident stickers, but don't worry—Microsoft can't legally void your warranty, as long as you don't damage anything. Have fun!

    Recommend using a hair dryer to soften the label adhesive.

    Crash -

    Microsoft can void your warranty. They can use whatever excuse if it is sent in because you opened it and you cannot prove you didn’t damage it.

    DirtyD -

  3. aqjZt2Xb3m3aolZQ
    • Use a T8 Torx driver to remove the two 7.4 mm‑long screws securing the back panel.

    • Throughout this repair, keep track of each screw and make sure it goes back exactly where it came from to avoid damaging your console.

  4. m4ius4PHhbf1vBgc
    m4ius4PHhbf1vBgc
    dAiRHFUnRejZqcLE
    IbXFLL4MqqboGYqR
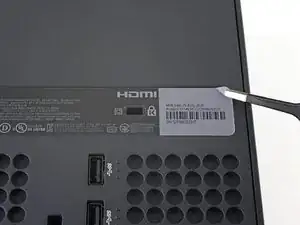
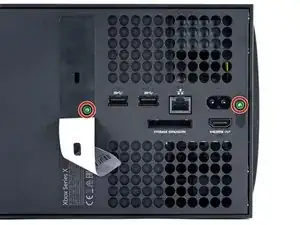
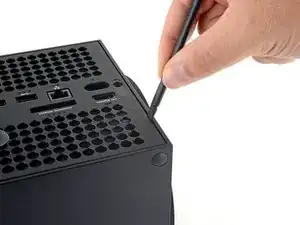
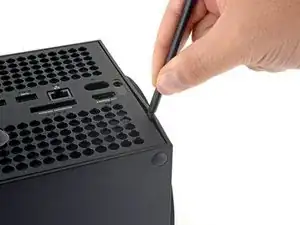
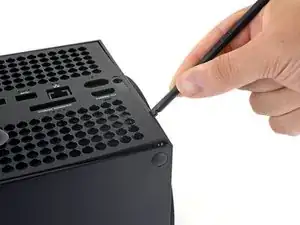
    • Insert the flat end of a spudger into the gap between the back panel and the shell, near the left side of the base.

    • Pry up the back panel to release it from the locking clips.

  5. v3nCqkOqZPiQPTiV
    v3nCqkOqZPiQPTiV
    enZdeM2q3kplUM35
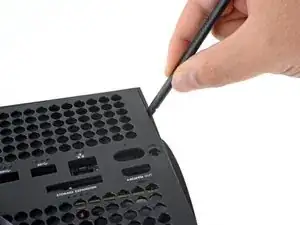
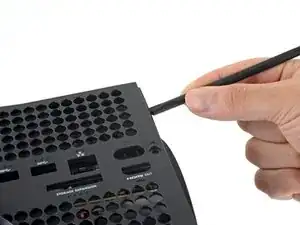
    • Insert the flat end of a spudger into the gap between the back panel and the shell, near the right side of the base.

    • Pry up the back panel to release it from the locking clips.

  6. T3KZEDU3kapNSLob
    T3KZEDU3kapNSLob
    dTuJey3MhNX4153H
    3Uhf3MV2ssejZD2H
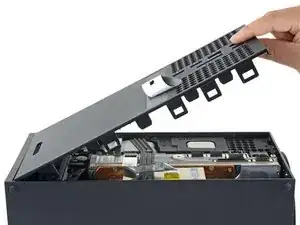
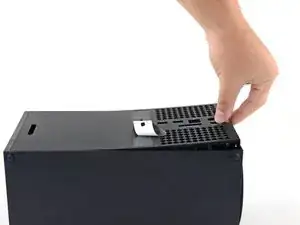
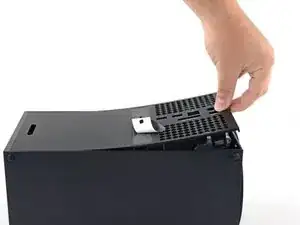
    • Grip the back panel at the opening you just created and pull it up and away from the shell to unclip the long edges.

    • During reassembly, press along the edges of the back panel to snap it into place.

  7. uldRdnlZxZAALgGC
    uldRdnlZxZAALgGC
    LL1Kmc3SnuUNCMOg
    cxQDaTGO2Zcg2IFW
    • The back panel slots into a gap at the top of the shell.

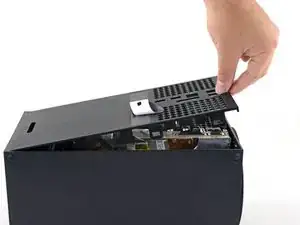
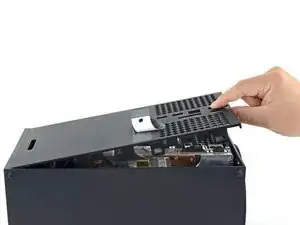
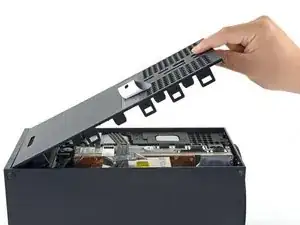
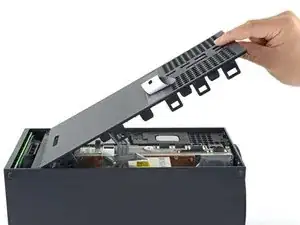
    • Tilt the back panel up and pull it away from the top edge of the shell to release it from the gap.

    • Remove the back panel.

Conclusion

To reassemble your device, follow these instructions in reverse order.

Repair didn’t go as planned? Try some basic troubleshooting, or ask our Xbox Series X Answers community for help.

Carsten Frauenheim

Member since: 10/03/20

130781 Reputation

0 comments