Introduction

This guide will teach you how to remove the front cover plate from your Xbox One wireless controller. Initially, no screws will be visible. Follow the steps to locate each factory screw.

  1. CZmZL2YuctGTuPJd
    CZmZL2YuctGTuPJd
    KHyRlDiLSFSdhQPm
    • Slide the battery cover toward the top of the controller to remove it.

    • Lift up the batteries or the battery pack from the battery compartment.

  2. 1RnNtaoQqQZkbY2E
    1RnNtaoQqQZkbY2E
    wVNiZ3TUwVBoC2FL
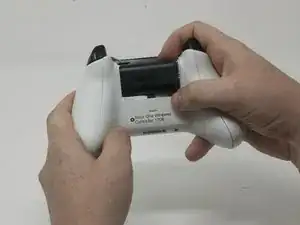
    • Insert a plastic opening tool into the top seam, and gently work the opening tool to the bottom of the controller.

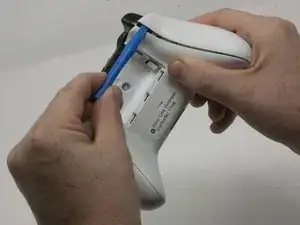
    • Continue using the opening tool to gently pry the side plate off of the controller.

    • Repeat this process for the second side plate.

    Only use a pry tool! The vibration motor wires are exposed and directly accessible from the side when opening. I attempted to open it with a small knife, expecting to be able to gently pry the clips open, accidentally sliced through my right motor’s wires.

    Sawyer Coe -

    If you have some Guitar picks laying around they work GREAT!

    Mike Beane -

    For some reason, the two closest hinges at the top of the two handle covers are extremely strong. I had to play around to get them off unlike several guides and video tutorials that, I don't know how, take them off without the slightest effort.

    Controller wireless Xbox One Model 1708

    Stefano Spinelli -

  3. S6rlXDDRcqlumZ32
    • Gently peel the battery label or punch a hole in the center of the sticker in the battery compartment to reveal the hidden screw.

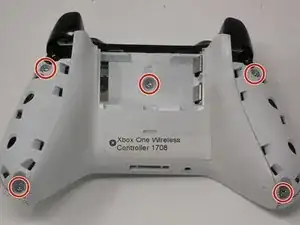
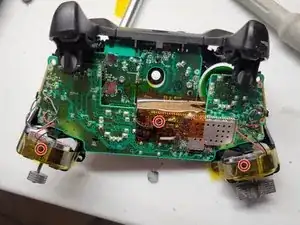
    • Remove the five 9mm torx-9 security screws from the back of the controller.

    Torx-8 security bits work as well.

    jahiamir -

    Torx 8 or 9 wasn’t working. I used 2.0 minus screwdriver

    richjlee -

    The 2.0 minus worked for me as well.

    metric -

    When sliding in the plastic cover during reassembly be sure it lines up with the battery compartment contacts. It can be really easy to not see it and bend the contacts. If you still encounter force during this step, depressing the triggers out of the way worked for me.

    Drew -

    Since mine is out of warranty I just broke out the security nib with a 2.0 standard bit. Then used a T8 torx.

    Tim LaCrosse -

  4. iqgdKTgD5ghZ2AiA
    iqgdKTgD5ghZ2AiA
    k5hd4bkef3GQZcnV
    • Orient the controller so the front plate is facing up.

    • Lift the front cover off of the controller.

  5. jALZRgrIkQxcoU2w
    • Turn the controller face down and gently lift the rear plate.

    • Be careful with the rumble motors, as they tend to fall out, risking damage to the motherboard.

    Reassembly: When placing the back cover on: notice that the battery terminals need to slide inside the cover first. Then compress the triggers slightly, Then the cover will be aligned correctly. Then add the front cover and add screws so it doesn’t come undone.

    hunteil -

    It isn't necessary to take off the back cover

    Otto Hahn -

  6. kfdJ5aNuDEUk4QSv
    kfdJ5aNuDEUk4QSv
    EaxhK2qZKFPa2bSP
    uLhJmZMFjIR1fmmF
    • Tape the Rumbler/shock motors in place.

    • This will prevent the motors from falling out.

    if you replace thumbsticks only, this step is NOT required and it is safer not to remove bottom cover, removing faceplate is sufficient to replace thumbsticks

    Piotr Wysocki -

Conclusion

To reassemble your device, follow these instructions in reverse order.

Weston Gilmore

Member since: 25/09/17

1903 Reputation

4 comments

i used a t8 and it worked

Rudy Bp -

T9 is VERY snug. T8 would probably be better but I don’t have one to try.

Craig Ferguson -

T9 barely fits, I couldn’t even get 2 of the screws to turn. I think T8 works better

Baron Kube -

One frustrating thing. All the guides I find on iFixit never give tips on reassembly. I'm having a difficult time getting the back plate back on. No help here, unfortunately.

Jim Pennington -