Introduction
I took my power brick apart in order to clean it. The power settings for my Xbox had been left on "Instant On" from the day of launch until earlier this year. With your system in Instant On the fan runs continuously drawing .16Amps/19Watts. Putting your console in its Energy Saving mode only draws .03Amps/4Watts. The amount of filth inside your power brick will depend on several factors such as the energy mode you keep your system set to. If the fan isn't running, obviously it isn't drawing in more dust/debris than it would if it was on. The last step has pictures that show just how filthy your electronics can get over time and the importance of cleaning them in order to keep them functional.
-
-
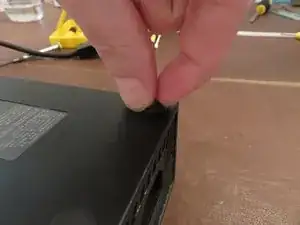
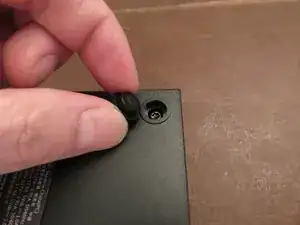
Unlike the X360 Power Brick, these rubber boots require no tools to pry them up. Simply get your fingernails underneath and gently pull them up.
-
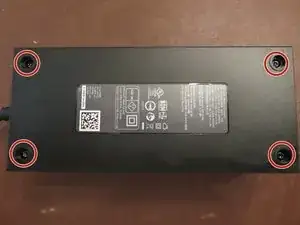
Remove the 4 screws with your T10 security bit driver.
-
-
-
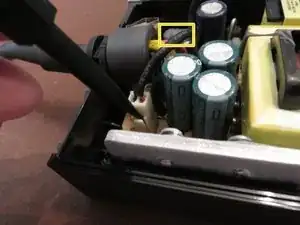
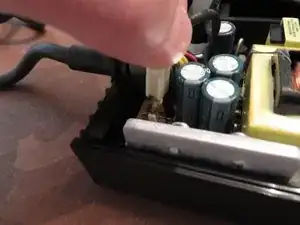
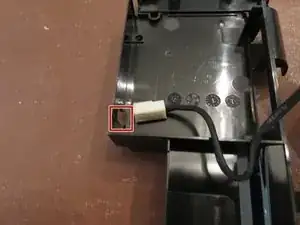
Using the point end of your plastic spudger, or your fingers, gently pull back the tab holding the fan power cord in place.
-
Gently pull the cable up and away from the circuit board.
-
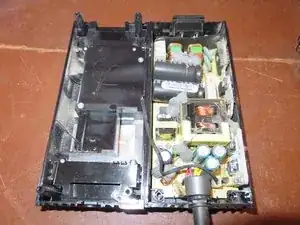
If you look inside the yellow box, top left corner, you will notice a grey color on top of a capacitor. I'm not positive what this substance is but it has a consistency of sticky tack, if you remember playing with that as a kid. When I first opened the power supply the fan power cable was pressed into it rendering it stuck. Gently pull the cable up
-
-
-
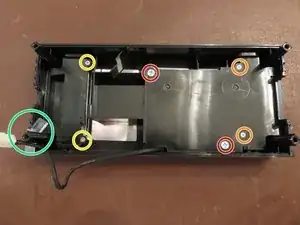
Use a Phillips head screwdriver to remove the two larger screws.
-
The two smaller screws (orange) were a little tricky. They are screwed down very tight. I started with a #0 phillips head and slightly stripped the screw head. Not enough to destroy it. I recommend using a #1 phillips head on these. I also used a small rubber grip in order to get a better grip on my screwdriver. Made it much easier.
-
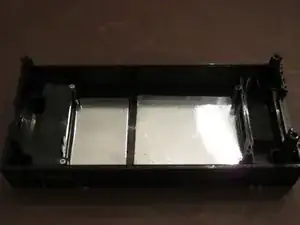
Once screws are removed lift the plastic frame from the left side and remove it from the top of the power brick and flip it over.
-
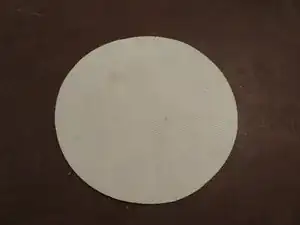
Unlike the X360 power brick, the light diffuser does not need to be removed from the power supply. If you want to remove it anyway simply grab it with your fingers and lift it out.
-
These screws serve no purpose. There was nothing under there. Unless you have a different variation than mine there is no need to remove these screws.
-
-
-
Lift the fan from the side furthest away from the cable.
-
Pull the cable through the hole in the frame and place the fan off to the side.
-
-
-
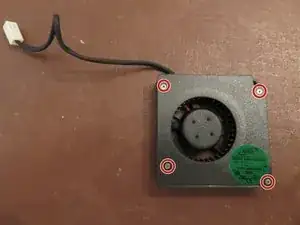
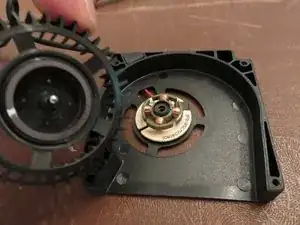
Remove the 4 screws using a #0 Philips head and remove the top of the fan housing.
-
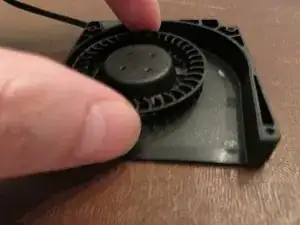
Gently grab the fan and lift it up.
-
-
-
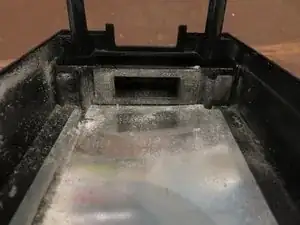
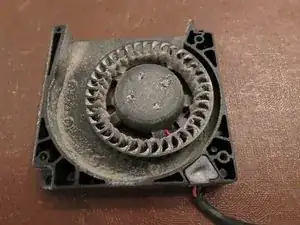
Just under 3 years from the day it was purchased (Nov 22 2013) and now (Aug 12 2016) this is the amount of filth my power brick accumulated. I am only recently getting into electronics repairs which is why this didn't happen sooner.
-
After 1 year your Xbox/PS warranty becomes null and void unless you purchase an extended warranty. Clean your consoles before dirt and dust destroy them!
-
45 comments
Would this help with the orange light I am getting from the Xbox one power Brick?
Me too having the same question please help!!
kingasd -
Hi! I’ve had many people come to me and ask the same question, if your Xbox One makes a sound when you try to activate it, but there is no light on the Xbox and the power brick is holding a solid orange light, it is most likely the end of your power bricks life. Unfortunately, Microsoft and any other gaming store/supplier stock these anymore, so your last resort would be eBay. 2nd option is if your Xbox doesn’t turn on or make a sound, and your power brick turns white, it’s the console. Long story short, in your situation I would say you might need to invest in a new power brick.
It is your power brick have too get a new one or change the compasitors there's 3 of them I just had too do it
What specifically is the problem angelorestrepo and kingasd? The orange light is an indicator that your system is in energy saving mode. What happens when you power up the unit?
http://support.xbox.com/en-US/xbox-one/c...
Mind you at this point I have no idea what's really going on with either of your systems but it's possible this may be a really simple fix. Check this link and try these simple solutions if you haven't already.
Falls das nicht gelingt mit den Finger-Nägel: Einfach Holzschraube oben vorsichtig eindrehen, Gummifuss löst sich ab bzw. kann an der Schraube herausgezogen werden. Das “Loch” der Schraube sieht man nachher so gut wie nicht mehr.
Flagsoft -
TIP : If you have problems remove the rubbers: Just use a wood screw and gently screw it in the center until the rubber lifts up !
Flagsoft -
My t10 isn't working nothing is its just scrapping away at the screws
Angel Freeny -
Is it a T10 or T10 security bit? Security bit has a hole in the middle
Navy Vet 2015 -
Thank you so much for posting the tool needed for the screws on the bottom !!
kklovesmusic -
I'm here to serve :) glad you got it
Navy Vet 2015 -
I don’t have any screws, it’s just a piece of plastic that I can turn with tweezers
canadian_birdman -
Thanks for the suggestion about using a wood screw —worked like a charm. Just wish I had seen this before I tore one of the feet up trying to get it out.
errolsayre -
Well, All my boots tore apart with a gentle pull. So whgat do you do when you have a rubber circle with a square bit of plastic stuck there now?
Adam Slater -
Hi I’ve been researching this a bit online and many people are saying it’s extremely dangerous, however I need to at least try to fix my power supply as I have no other way to watch tv or play games. If I have a limited knowledge of electrical components would you still suggest undertaking this repair?
Jake -
The wood screw suggestion needs adding to the instructions - awesome suggestion!
Josh Beckett -
Amendment: The wood screw suggestion does not work for all models (I have just broken a couple of rubber boots removing them) - this was because they had a hard plastic center that prevented me screwing in a wood screw to aid removal and forcing me to try and pull them out by hand.
Josh Beckett -
When you peel off the rubber underneath theres like plastic holders above the screws. You have to take the holders off with a pair of needle-nose pliers, then you have the Torx TR10 screws underneath. And yeah it was hard to get the rubber off, I used the spudgers fine tip to remove the rubber.
Americo DeLuca -
CONSEIL: Si vous avez des problèmes, retirez les caoutchoucs: utilisez simplement une vis à bois et vissez-la doucement au centre jusqu'à ce que le caoutchouc se soulève!
moi_alexis01 -
I found that poking my T10 screwdriver through the center of the rubber feet and gently prying gets them off pretty easy. I'm guessing it's like tamper proofing for the warranty.
Mario Vega -
I got a safety pin and it worked
Christian -