Introduction

This guide is used as an internal prereq.

  1. MZPUUJVPxxANUeoT
    • Peel the silver tape securing the optical drive to the metal casing.

    Does anyone know if the Silver Tape is Lead Tape?

    Sean -

    Looking at mine, I doubt it. It looks like standard foil tape

    Rukir Gaming -

  2. ZtSZCTiWnI1mFySC
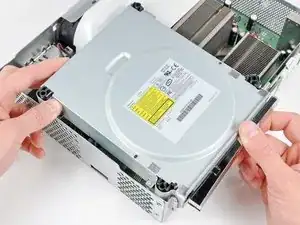
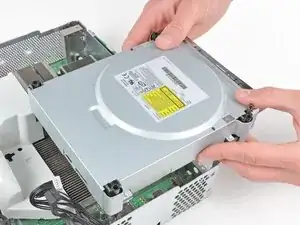
    • Slightly lift the optical drive upwards to gain clearance to disconnect the SATA and power connectors located on the backside of the optical drive.

    • Don't try to completely remove the optical drive just yet. Two cables still connect it to the motherboard.

  3. aP5BgixloKHsaQOB
    aP5BgixloKHsaQOB
    bFYsJNjL6UUJtumE
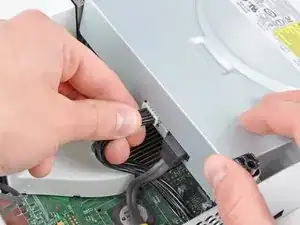
    • Grab the power connector by its cables and pull it straight out of its socket on the optical drive.

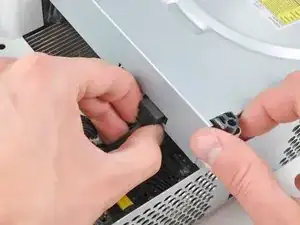
    • Disconnect the SATA data connector from its socket on the optical drive by pulling it straight away.

    I found the power cable to be very tough to get out, at least it is the first time doing this.

    Nick Flacco -

    I found it much easier to remove the SATA cable after lifting the assembly mostly out of the case.

    Jonathan Crall -

  4. NlR5YgLZKUOY6y2G
    • Lift the optical drive assembly out of the metal casing.

    Be careful not to lose or break the two teeny metal clips securing the optical drive assembly snugly to the metal casing on either side of the drive's front face. I used a spudger to press in the topmost tines on these clips because they were catching on the drive and bending up. The clips should stay on the metal housing, not come off with the drive.

    Vaughn Baker -

Conclusion

To reassemble your device, follow these instructions in reverse order.

Walter Galan

699383 Reputation

0 comments