Introduction
This guide will help you to remove the WiFi board from the Nintendo Wii U Gamepad.
Parts
-
-
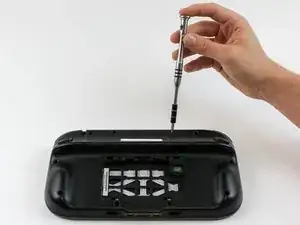
Place Gamepad face down and remove the two 4.7 mm screws with a Phillips size #00 screwdriver.
-
-
-
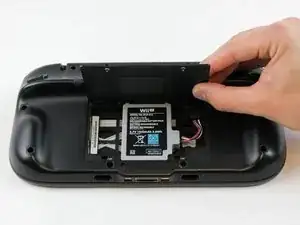
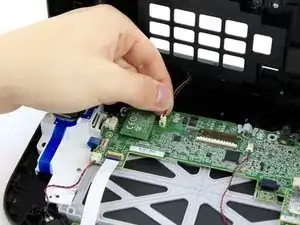
With your finger, press down and pull back on the battery connector plug.
-
Remove the battery from the battery case.
-
-
-
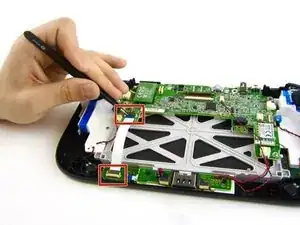
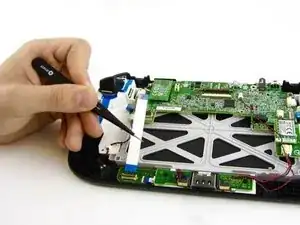
Remove 10 9mm screws with Tri-Wing size Y1 screwdriver around the outer case.
-
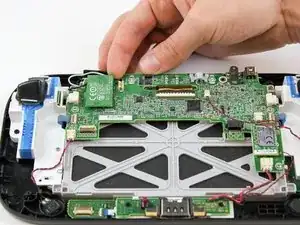
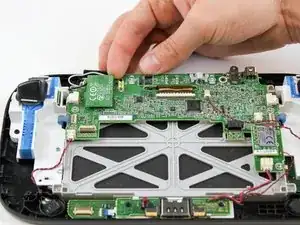
Lift up on the back of case.
-


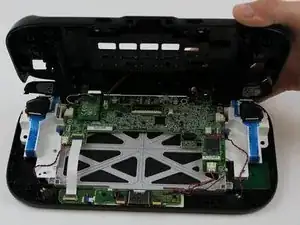


To reassemble your device, follow these instructions in reverse order.
12 comments
I just completed this repair on our Game Pad, and it worked perfectly!
There were two things that I noted that may be of use to anyone else completing this repair. First, the 9mm screws on the back may be located under small stickers used to conceal the screw holes. If you take them up carefully with a knife or other flat blade, you can reuse them if desired. Second, I didn’t see the need to remove the white ribbon cable in step #6. I successfully completed the repair without that step.
I just completed this repair on our Game Pad, and the guide worked perfectly!
There were two things that I noticed that may be of help to someone else completing this repair. First, note that the 9mm screws holding the back on may be located under small black stickers used to hide the screw holes. If you take them up carefully with a knife or other flat blade, you should be able to reuse them if you desire. Second, I didn’t see a need to remove the white ribbon cable in Step #6. I successfully completed the repair without that step.
Cheers!
This fix worked perfectly - our Wii U was virtually unusable because of the severely limited range of the gamepad. My kids are thrilled that they can comfortably play again!
tried to unscrew the 10 Tri-Wing size Y1 screw with my iFixIt toolkit
unfortunately the tool is too “fat” and short, it cannot reach 4 screws on the corners of the gamepad.
having the iFixIt toolkit and needing to purchase an additional slim screwdriver it’s a shame…
Antonello Iannone -